Minecraft Multiplayer: A Practical How-To Guide
Learn how to play Minecraft multiplayer with friends, choose the right hosting option, join worlds, and troubleshoot common issues. A step-by-step, beginner-friendly guide from Craft Guide to help you start fast and play together safely.

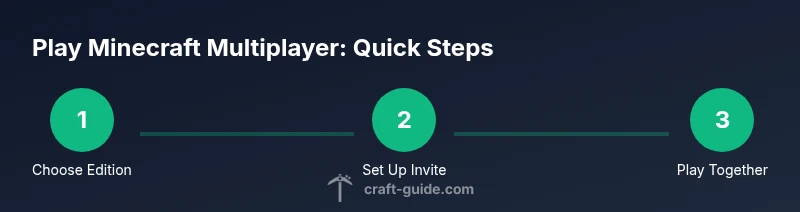
By the end of this guide you will know how to play Minecraft multiplayer, whether you’re hosting a Realms world, running a private server, or joining a friend's LAN game. You’ll learn the core concepts, required accounts, and the steps to connect, coordinate with teammates, and manage settings for a smooth online session. Craft Guide offers practical, beginner-friendly instructions to get you started quickly.
What multiplayer in Minecraft offers
Multiplayer expands what you can do in Minecraft by inviting friends to share resources, coordinate builds, and tackle adventures together. According to Craft Guide, playing with others turns a simple survival day into collaborative projects, social activities, and coordinated challenges. You’ll experience shared bases, communal farms, and friendly competition that can turn ordinary sessions into memorable stories. This section explains the core benefits of multiplayer and sets expectations for what you’ll gain when playing with others. You’ll also learn how to get started quickly and safely, so you’re ready to invite or join a world in minutes.
In multiplayer, you’ll encounter different play styles, from cooperative building and exploration to competitive mini-games. You’ll need a suitable edition, an account, and a way to connect with others. Craft Guide’s approach emphasizes practical steps and smooth coordination—keeping things simple so you can focus on creativity and teamwork. Remember that a good multiplayer experience relies on clear communication, basic etiquette, and reliable connectivity. As you read, think about the kind of world you want to build with friends and the hosting option that best fits your group. This mindset helps you choose a server type and set expectations that align with your goals.
Server types and how they differ
Minecraft multiplayer isn’t one-size-fits-all. There are several ways to play with others, each with its own setup, rules, and potential benefits. According to Craft Guide analysis, Realms provide a hassle-free hosted world managed by Mojang, while LAN play enables quick local multiplayer on the same network. Third-party servers offer a broader ecosystem with custom plugins, bigger communities, and diverse game modes. Java Edition and Bedrock Edition handle cross-play differently, so your choice of edition can influence who you can play with and how you connect. Key trade-offs include ease of setup, customization, player limit, and security. Realms are easy and reliable for smaller groups; LAN is great for local sessions; public servers offer variety but require more setup and caution. When deciding, consider your group size, technical comfort, and whether you want ongoing world persistence or temporary sessions. Craft Guide recommends starting small with Realms or LAN to learn the ropes before expanding to public servers or a self-hosted option.
How to join a world: LAN vs online servers vs Realms
Joining a multiplayer world depends on the hosting method. For LAN, all players must be on the same physical network; one player hosts the world and others connect via Direct Connect using the host’s local IP address. For Realms, the host invites players through the Realms menu; invited players simply accept and join from the Realms section. For online servers, you’ll need the server address (IP and port) or a server list entry. In all cases, ensure you’re running compatible editions (Java vs Bedrock) and that your game versions match. Craft Guide cautions players to verify server rules and privacy settings before joining or inviting others to avoid conflicts and ensure a safe, enjoyable session.
Setting up your own server: options and basic steps
Hosting options vary from official Realms to self-hosted servers and popular third-party platforms. Realms offers a straightforward path with minimal maintenance but comes with subscription constraints. Self-hosted servers give you complete control and flexibility with plugins and world customization, but require more technical setup, including port forwarding and security considerations. For beginners, Craft Guide suggests starting with Realms or a simple LAN test with a trusted friend, then gradually exploring third-party servers or a privately hosted world as confidence grows. Before you begin, decide on the edition, confirm hardware requirements (RAM, CPU), and prepare a plan for backups and security. A basic hosting setup typically involves choosing a hosting option, configuring world settings, sharing the address with invited players, and testing the connection.
Joining with friends: etiquette and best practices
Multiplayer thrives on cooperation and clear communication. Establish a shared goal for the world or game mode, agree on rules for building, and designate roles to avoid conflicts. Craft Guide emphasizes respectful behavior, consent-based creation, and keeping spawn areas protected to prevent griefing. When inviting friends, provide a simple, explicit set of guidelines and keep a channel for feedback. Regularly back up important builds and agree on schedule and maintenance windows to minimize disruption. Additionally, practice good digital hygiene: keep accounts secure, use strong passwords, and avoid sharing sensitive information with strangers in public servers.
Common pitfalls and troubleshooting basics
New multiplayer sessions often stumble over version mismatches, connectivity issues, or misconfigured servers. Ensure that all players use the same game version and edition, and verify the host’s IP/URL and port. If you can’t connect, check your firewall or router settings, confirm you’re using the correct address, and test with a different network if available. Lag can stem from bandwidth limitations or busy servers; closing background apps and opting for wired connections can help. If issues persist, consult the server’s rules or support resources and consider updating Java or Bedrock edition, as required. Craft Guide reminds players that most problems have straightforward fixes once you confirm edition compatibility and network access.
Tools & Materials
- Minecraft edition (Java Edition or Bedrock Edition)(Choose based on the server type you plan to join or host.)
- Minecraft account(Your account must be active and linked to the edition you’re using.)
- Device with internet connection(PC, console, or mobile device that supports the chosen edition.)
- Server address or Realms invitation(For Realms, invite links; for servers, IP and port.)
- Stable network (prefer wired)(Wired connections reduce latency and improve stability.)
- Headset or voice chat setup(Optional but helpful for teamwork on larger servers.)
- Backup plan (local testing world or offline setup)(Useful for practice before going live with friends.)
Steps
Estimated time: 30-75 minutes
- 1
Check edition and account compatibility
Verify that all players are on the same edition (Java or Bedrock) and that each person has a valid Minecraft account. Aligning versions upfront avoids connectivity and compatibility problems later. This step is the foundation for a smooth multiplayer session.
Tip: Ensure everyone signs in with the correct Microsoft/Mojang account linked to their edition; mismatches cause login errors. - 2
Choose your multiplayer option
Decide whether you’ll use Realms, LAN, or a third-party server. Realms is easiest for small groups; LAN is quick for local testing; third-party servers offer more world variety and communities. This choice shapes how you connect and what settings you’ll manage.
Tip: If you’re new, start with Realms or a simple LAN test to learn the basics before moving to public servers. - 3
Find or create the server
If joining, obtain the server address (IP and port) or invitation link. If hosting, set up your chosen option (Realms, self-hosted, or a hosted server) and configure the basic world settings. Make sure all invited players know how to join.
Tip: Double-check server address formatting (IPv4 vs domain name) and request a test connection from a friend before inviting more players. - 4
Configure multiplayer settings
Adjust settings like game mode, permissions, spawn protection, and chat rules. If you’re hosting, consider enabling basic anti-grief protections and backup schedules. For Realms and hosted servers, review the host's rules and plugins.
Tip: Keep a simple rule list visible in the world to set expectations and reduce in-game disputes. - 5
Coordinate and play together
Agree on a communication channel and a shared plan (who builds what, where, and when). Use coordinates or offline planning tools to avoid crowding the same space. Begin with a quick test run to ensure everyone can move, chat, and build.
Tip: Use a static spawn and a clear base layout to minimize confusion for new players joining the world. - 6
Test and troubleshoot
Run a short multiplayer session to confirm connectivity, latency, and gameplay flow. If issues arise, check edition parity, network settings, and server status. Iterate on fixes and keep notes for future sessions.
Tip: Maintain backups of the world before major builds or plugin changes to safeguard progress.
People Also Ask
Which edition should I use for multiplayer with friends?
If your group uses mainly PC, Java Edition is a common choice, but Bedrock supports cross‑platform play across consoles and mobile. Decide based on who you want to play with and what devices they have, then pick the edition that supports those players.
Choose the edition that matches most players in your group, keeping cross‑play in mind if you plan to include consoles or mobile players.
What’s the difference between Realms, LAN, and third‑party servers?
Realms is a hosted solution by Mojang for small groups; LAN requires players to be on the same local network; third‑party servers offer various game modes and larger communities but may require more setup and caution.
Realms is easy for small groups, LAN is local, and third‑party servers give variety but need setup and safety awareness.
How do I join a Realms world?
The host invites you through the Realms panel, and you accept the invitation. Realms worlds persist online and include built‑in maintenance, making it simple to start playing with friends.
Ask your friend for an invitation link in Realms and accept it to join.
Why can’t I connect to my friend’s server?
Check that you share the same edition and version, confirm the server address, and verify your firewall or router settings. If needed, test with a different network to isolate the issue.
Make sure you’re on the correct version and that the address is right; check your network settings if you still can’t connect.
How can I improve multiplayer performance?
Use a stable wired connection when possible, reduce render distance for smoother gameplay, and ensure the host has adequate hardware and stable backups. Regular maintenance of server software helps prevent dropouts.
A wired connection and reasonable settings usually fix most performance hiccups.
Is it safe for kids to play on multiplayer servers?
Play on trusted servers with moderation, keep conversations in game chat appropriate, and use parental controls if needed. Avoid sharing personal information and use server rules to guide behavior.
Play on moderated servers with clear rules and supervision to keep kids safe.
Watch Video
The Essentials
- Choose the right multiplayer option for your group.
- Match editions and server versions across players.
- Coordinate expectations and rules before building together.
- Prioritize security, backups, and version compatibility.