Minecraft with Gadget: Practical Builds and Mod Tips
Learn practical gadget-driven builds in Minecraft with Gadget, using safe mods, step-by-step automation, and beginner-friendly techniques for creative crafters.

According to Craft Guide, this guide helps you add gadget-style contraptions to Minecraft with Gadget by using safe, compatible mods, basic gadget blocks, and a step-by-step approach. You’ll plan a function, assemble essential components, test in a controlled world, and integrate the gadget into builds. This approach emphasizes accessibility for beginners and practical results for veterans.
What counts as a gadget in minecraft with gadget
In the context of minecraft with gadget, a gadget is a compact automation or utility built with Redstone, pistons, observers, and related blocks, often powered by wiring or datapacks. Gadgets perform a single clear task with minimal input—opening doors, sorting items, farming cycles, or signaling build stages. Thinking in terms of inputs, processes, and outputs helps you design reliable gadget systems. Start by sketching the trigger (input), the logic (process), and the result (output) before wiring or coding anything. This mindset keeps projects approachable while enabling impressive automation within creative builds.
Choosing safe, compatible mods and datapacks
Before you add gadget functionality, choose a safe, compatible setup. Select a mod loader or datapack path that matches your Minecraft version and play style. Fabric is lightweight for simple gadgets; Forge covers a broader mod library. Always back up your world and use a dedicated testing realm to avoid corrupt saves. Verify each mod or datapack is up to date, has clear compatibility notes, and a strong community record. Keep visuals separate with a texture or resource pack so you can update looks without altering core gadget logic. Document decisions for easy reproduction later.
Essential gadget blocks and components
Gadget-building relies on a core toolkit: Redstone dust, repeaters, and torches for signal control; observers and comparators for state detection; pistons (standard and sticky) for moving parts; droppers and dispensers for item handling; hoppers for sorting; daylight sensors and redstone lamps for timing and feedback. A few extra items—levers, pressure plates, and trapdoors—are helpful UI elements and access controls. Understanding how these parts interact lets you assemble predictable, reusable gadget modules that slot into larger builds with ease.
Step-by-step: building a simple gadget-powered door
A classic starter gadget is a piston-powered door that opens when you approach or press a hidden switch. Conceptually, place two pistons to form a doorway, wire a pressure plate or proximity detector to trigger a redstone signal, and link to the pistons so they extend and retract smoothly. Add a simple locking mechanism with a comparator to confirm door state and prevent accidental re-entry. The goal is a reliable, repeatable action with minimal delay and clear visual feedback so players understand how the gadget behaves in your world.
Step-by-step: creating a gadget-powered storage system
A compact storage gadget sorts items into dedicated chests by type using droppers, droppers-launchers, and a simple minecart or item sorter loop. Start with a basic input chest and a detector rail that routes items to the correct stack based on item type. Build a clear routing network with labeled chests and simple redstone logic to avoid cross-contamination. As you test, adjust comparator timings and rail direction to ensure items flow efficiently and reliably even as your base expands. This approach makes complex storage feel intuitive and scalable.
Testing, safety, and restoration
Gadget systems should be tested in a controlled environment before deploying in the main world. Create a sandbox area that mirrors your build’s dimensions, then run through typical use cases: inputs, state changes, and outputs. Always keep a fresh backup of your world in case signals cause unexpected behavior or lag. When issues arise, simplify the circuit to identify the failing component, verify compatibility with current game version, and consider reducing clock speeds or avoiding overlapping redstone clocks to prevent runaway loops. Documentation of changes helps you revert safely.
Advanced gadget ideas for creative builds
As you gain confidence, explore multi-step gadgets that combine several subsystems: automatic farms with timed harvest cycles, a gadget-based security system with keycards, or a dynamic lighting network that responds to player presence. Use datapacks for custom events or visuals and consider modular design so you can swap in new gadgets without rebuilding every time. Keep aesthetics in mind—well-integrated gadgets feel like native features rather than addon hacks, preserving immersion in your Minecraft world.
Troubleshooting common gadget issues
Common problems include lag from too many simultaneous redstone devices, mis-timed clocks, or conflicts between mods. If a gadget stops working, check the signal path for breaks, ensure repeaters are properly phased, and confirm the trigger is registering input. Disable conflicting mods and test in isolation to identify root causes. When wiring becomes dense, pause to redraw layouts with modular components and labeled colors to track signal flow more easily. Regular backups minimize downtime when debugging.
Authority sources
For broad guidance on game-based learning and digital fabrication concepts, see credible sources such as: https://www.ed.gov, https://www.nsf.gov, and https://www.nature.com. These references offer general principles about education, science, and design thinking that apply to gadget-driven builds in Minecraft and related creative projects.
Tools & Materials
- Minecraft Java Edition with Fabric or Forge(Choose one mod loader; ensure it matches your game version)
- Gadget mods and datapacks(Install only compatible, well-reviewed options)
- Datapacks or resource packs(For visuals and extra functionality)
- In-game components (redstone, pistons, observers, droppers)(Core to most gadget designs)
- Backups(Create world backups before major gadget changes)
- Testing world(Optional but highly recommended for experimentation)
- External scripting option (optional)(Use with care and safety; not always needed)
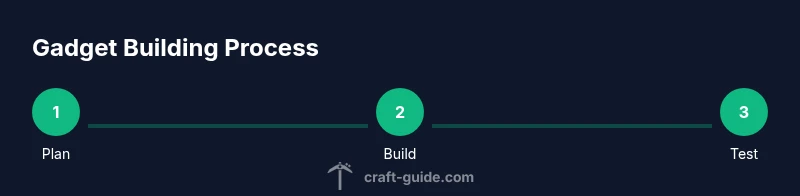
Steps
Estimated time: 2-3 hours
- 1
Prepare your world and install compatible mods
Back up your world and set aside a testing realm. Verify version compatibility for Fabric/Forge and gadget mods. Create a simple inventory of components you’ll use in your first gadget.
Tip: Always test in a duplicate world before touching your main save. - 2
Plan your gadget function
Decide the gadget’s purpose, inputs, and outputs. Write a quick flow chart or sketch a blueprint to map triggers, processing logic, and the resulting action.
Tip: Keep the function focused and modular so you can reuse logic later. - 3
Gather components
Collect redstone components, pistons, observers, droppers, and chests. Prepare a small testing bench to assemble your first gadget without committing to a full build.
Tip: Label components visually to avoid mix-ups during assembly. - 4
Place base blocks
Lay out the core frame and wiring path. Leave space for future wiring expansion and for maintenance access.
Tip: Plan wiring routes with clear entry and exit points to simplify troubleshooting. - 5
Connect logic with redstone circuits
Attach inputs to detectors, connect signal paths to shutters or doors, and test state changes with step-by-step validation.
Tip: Test one signal path at a time to isolate issues quickly. - 6
Test gadget in a safe area
Run through typical usage scenarios, observe timing, and verify feedback signals. Adjust delays and clock speed as needed.
Tip: Use a temporary LED or indicator block to visualize outputs. - 7
Integrate gadget into a build
Incorporate the gadget into a larger project, ensuring aesthetic alignment and functional reliability. Update related wiring if the build grows.
Tip: Document changes so future edits are straightforward.
People Also Ask
What is a gadget in Minecraft?
A gadget is a small automation built with redstone and blocks to perform a task, like door control or item sorting. It focuses on a clear input, processing, and output.
A gadget is a small automation made with redstone that performs a task, like opening a door or sorting items.
Are gadget mods safe to use in vanilla Minecraft?
Gadget mods can enhance play but may conflict with other systems. Always back up and test in a separate world before applying to your main game.
Mods can help, but back up your world and test in a separate world first.
Do I need data packs to use gadgets?
No, gadgets can work with redstone and basic blocks, but datapacks can add extra features or visuals if you want deeper customization.
You don't need datapacks, but they can add more features if you want.
Will gadget builds affect performance?
Complex gadget networks can impact performance. Optimize by using simpler designs and limiting concurrent redstone activity.
Yes, complex gadgets can slow things down; keep designs simple when possible.
What is a good starter gadget to build?
A piston-operated door is a classic beginner gadget that teaches signal timing and block movement without overwhelming complexity.
Start with a piston door to learn basics of timing and gating.
How do I back up my world before gadget installs?
Create a duplicate world save or use a backup tool. Work in a separate copy to avoid risking your main world.
Back up by duplicating the save before changes.
Watch Video
The Essentials
- Plan gadgets with clear inputs, processes, and outputs.
- Test in safe environments before applying to main worlds.
- Modular design simplifies upgrades and reuse.
- Back up frequently to prevent data loss.
- Balance functionality with performance to avoid lag.