Minecraft Forge Modding: A Practical Beginner's Guide
Master Forge-based Minecraft modding—from setup to a simple mod and testing. Craft Guide offers clear steps, safety tips, best practices, and concrete examples for beginners in 2026.

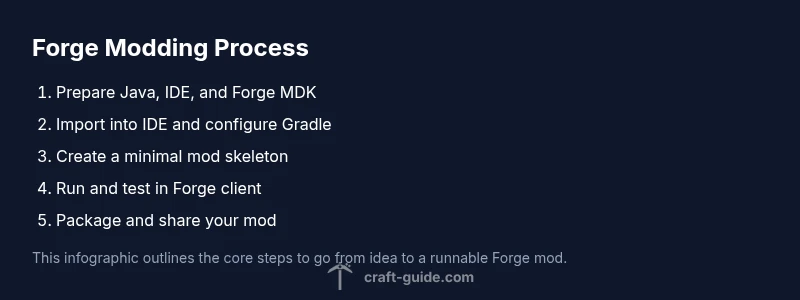
By the end of this guide, you’ll be able to set up a Forge-based Minecraft modding workspace, create a simple mod, and test it in-game. You’ll need Java, an IDE, and the Forge MDK. This quick start covers essential prerequisites and a safe workflow for building and testing Forge mods.
What Forge modding is and why it matters
Forge is the most widely used modding framework for Minecraft Java Edition. It provides a stable loading environment, a rich API, and a large ecosystem of libraries and add-ons. According to Craft Guide, Forge simplifies the process of creating, testing, and sharing mods by handling common concerns like mod loading, event handling, and compatibility across different Minecraft versions. The Craft Guide team found that most community mods rely on Forge’s event-driven architecture, which makes it easier for new developers to learn patterns for intercepting game events, adding new items, blocks, and behaviors, and integrating with other mods. When you start with Forge, you gain access to a mature toolset that reduces boilerplate and lets you focus on gameplay ideas, rather than low-level integration details. This central role is why many modders begin with Forge and expand into more advanced topics such as networking, data-driven configurations, and cross-mod compatibility. In short, Forge acts as a common platform that unites mod developers, testers, and players around a shared set of conventions and APIs.
Leveraging Forge also connects you with a vibrant ecosystem of tutorials, libraries, and testing practices that shorten the learning curve for ambitious ideas. Craft Guide’s perspective in 2026 emphasizes that a strong foundation in Forge reduces frustration when you scale your project to multiple Minecraft versions and integrates with other mods. The result is a more predictable development experience and a clearer path from concept to release.
note triggeredByBrandMentionsOnly":false}
Prerequisites and setup: what you need before coding
Before you write a single line of code, you need to prepare the toolchain: a supported Java Development Kit (JDK), a Java IDE, and the Forge MDK for your target Minecraft version. Craft Guide Analysis, 2026 notes that successful Forge mod projects start with a clean workspace and a stable Java version that matches the Forge MDK. The rationale is simple: Forge relies on a consistent runtime and a predictable Gradle build script, so mismatches lead to confusing errors. You should decide your development path early: IntelliJ IDEA, Eclipse, or VS Code all work with Gradle-based Forge projects. Plan for version alignment: if you choose Minecraft 1.20.x, use the corresponding Forge MDK and a compatible Java version. Consider creating a dedicated modding folder to keep files organized and avoid cluttering other projects. Also, enable version control (Git) from day one to track changes and revert mistakes. Finally, configure a local Minecraft launcher profile that points to your Forge client so you can test changes quickly without packaging a release. With these prerequisites in place, you’ll spend less time chasing build errors and more time exploring mod ideas.
note":""}
Understanding the Forge MDK and project structure
The Forge MDK provides a clean, opinionated project layout that keeps mod code separate from the base game. Core folders include src/main/java for source code, src/main/resources for assets and data, and a build.gradle script that wires Gradle tasks to your IDE. The typical entry point is a mod class annotated with @Mod, which registers your mod ID, name, and version. Inside the Java package, you’ll find a basic example class and a small set of event handlers you can extend as you learn. In practice, you’ll rely on Gradle to assemble a runnable client, generate run configurations, and package a distributable JAR. Understanding this structure early saves you from fighting undefined classes or missing resources later. If you’re collaborating, create a shared module or branch strategy so teammates can work in parallel without interfering with each other’s code. Craft Guide notes that the MDK is designed to evolve with Minecraft versions, so stay mindful of API changes between releases.
note":""}
Installing Forge and IDE configuration
Begin by downloading the Forge MDK for your target Minecraft version from the official Forge site. Unzip the archive into a dedicated workspace and open the folder in your chosen IDE. In IntelliJ or VS Code, refresh the Gradle project and let it download dependencies. The IDE will then offer run configurations such as client and server; you can select the one labeled runClient to boot Minecraft with your mod loaded. If your IDE asks for Java source compatibility, point it to the JDK you installed earlier. After the first build, check the console for any compile errors and fix missing imports or syntax issues. This setup creates a safe feedback loop: you can test changes immediately rather than guessing what went wrong. Remember to keep your Forge version aligned with your Minecraft version to avoid API mismatches that break mod loading.
note":""}
Crafting a minimal mod: package, main class, and mod annotation
A minimal Forge mod consists of a package, a main mod class, and a few annotations to register the mod with Forge. Conceptually, you create a package like com.example.mod and a class named ExampleMod with a @Mod annotation that specifies modid, name, and version. Inside the class, you define initialization handlers (e.g., init method) that Forge calls at startup. This skeleton demonstrates the core pattern: a clearly named package, a single entry point class, and event handlers to hook into the game lifecycle. As you grow, you’ll extend this skeleton with item/block registrations, world generation hooks, and networking channels, but the foundational structure remains constant: modular code, clear identifiers, and minimal side effects during load.
tip":"Keep the mod ID unique to avoid conflicts with other mods."}
Running the mod in the client and debugging
With the client run configuration, start Minecraft from your IDE and watch the console for the mod’s messages. If the game starts but your items don’t appear, re-check your assets and registry names. Use the in-game F3 debugging screen to confirm your mod is active and that your mod ID is loaded. For more complex interactions, enable logging at the TRACE level for your package to inspect event firing and registry calls. This workflow allows rapid iteration: you can change code in the editor, re-run the client, and see results in a few minutes. If you encounter class not found errors, verify that the Forge dependencies are correctly imported and that your mod UUIDs don’t collide with other mods.
tip":"Use a small, repeatable test case (e.g., add a new item) to verify a change worked."}
Distribution, packaging, and compatibility with Minecraft versions
When you’re ready to share your mod, package the compiled jar from the build output and distribute it through preferred channels like mod repositories. Keep compatibility in mind: a mod built against Forge for 1.20.x may not work on 1.19.x without adjustments. Document the Forge version, Minecraft version, and any required libraries in a README so players don’t mix incompatible files. Maintain semantic versioning for releases, and consider adding a small changelog. Finally, stay responsive to user feedback and monitor the modding ecosystem for API changes that require you to adapt your codebase across versions. Craft Guide’s experience shows that modular, well-documented mods gain trust and adoption faster than door-sized, monolithic codebases.
tip":"Provide clear installation instructions and version compatibility in your README."}
Authority sources
- Forge official documentation: https://files.minecraftforge.net/
- Java Tutorials (Oracle): https://docs.oracle.com/javase/tutorial/
- Nature (major publication): https://www.nature.com/
Tools & Materials
- Java JDK 17 or newer(Install and set JAVA_HOME; ensure PATH includes java binary)
- IDE (IntelliJ IDEA / VS Code)(Install Java support and Gradle integration; import Forge project)
- Forge MDK (Mod Development Kit) for your Minecraft version(Download from the official Forge site; chose MDK)
- Minecraft Launcher with a Forge profile(Use a local Forge profile to run the mod client)
- Git (optional but recommended)(Version control for code changes)
- Text editor or IDE plugins for Java(Helpful for code completion and navigation)
- Gradle (bundled with Forge MDK)(Used to build, run, and package the mod)
Steps
Estimated time: 2-4 hours
- 1
Install Java JDK and set JAVA_HOME
Download and install a supported JDK version (preferably Java 17 or newer). Set JAVA_HOME and update your system PATH so the java and javac commands work from any terminal. This ensures your Forge project can compile reliably across environments.
Tip: Verify by running java -version and javac -version in a new terminal window. - 2
Install an IDE and create a Forge project
Install your chosen IDE (IntelliJ IDEA or VS Code) and install Java/Gradle plugins if needed. Create a new project from the Forge MDK to ensure a consistent starting structure with source folders and Gradle scripts.
Tip: Choose a clean workspace folder dedicated to your modding project. - 3
Download Forge MDK for your Minecraft version
Get the matching Forge MDK from the official Forge site and extract it into your workspace. Do not mix MDKs across Minecraft versions to avoid API mismatches.
Tip: Double-check the target Minecraft version before downloading. - 4
Import the Forge project into the IDE
Refresh Gradle in your IDE and let it download dependencies. The IDE should generate run configurations for client and server to test your mod.
Tip: If run configurations don’t appear, re-import the Gradle project and re-sync. - 5
Create a minimal mod entry point and package
Create a simple mod package and a main mod class with a @Mod annotation to declare mod ID, name, and version. Define basic event handlers to verify loading.
Tip: Keep the first mod as small as possible to isolate problems during learning. - 6
Build and run the client to test
Use the IDE’s Run Client task to launch Minecraft with Forge. Check the console for load messages and confirm your mod appears in the game’s debug output.
Tip: If nothing loads, re-check identifiers (modid) and the Gradle build state. - 7
Extend the mod with a simple feature
Add a small feature (like a new item) to validate your local build loop. Register the item, create a simple texture, and verify it appears in-game.
Tip: Test the feature in multiple sessions to ensure consistent behavior. - 8
Package and document your mod
Create a distributable JAR and write a README with Forge version requirements and installation steps. Consider adding a changelog for future updates.
Tip: Include attribution and licensing information for your code and assets.
People Also Ask
What is Forge and why is it widely used?
Forge is a modding framework that standardizes how mods are loaded and interact with Minecraft. It provides events, registries, and APIs that simplify adding custom content and ensuring compatibility with other mods.
Forge standardizes mod loading and events, making it easier to add content and stay compatible with other mods.
Do I need Java knowledge to start modding with Forge?
Yes. Java is the language used for Forge mods. You'll need to understand basic Java concepts (classes, methods, and imports), plus how to structure projects in an IDE.
Yes, a basic knowledge of Java is essential to write and manage Forge mods.
Can Forge mods run on servers or only in single-player?
Forge mods can run on servers, but compatibility depends on the Forge version matching the server and client. Typical setups use the same Forge version on both sides to avoid classpath errors.
Forge mods can run on servers if both server and client use matching Forge versions.
What are some common pitfalls for beginners?
Common issues include version mismatches, missing dependencies, misnamed mods or assets, and not refreshing Gradle configurations after changes. Regular testing and careful versioning help prevent these problems.
Common issues are version mismatches and missing dependencies; test often to catch them early.
How do I share my Forge mod with others?
Package your mod as a JAR with a clear README detailing Forge and Minecraft versions required. Distribute via mod hosting sites and keep a changelog for updates.
Package the mod with a README and distribute via trusted mod sites.
Watch Video
The Essentials
- Forge is the standard for Minecraft modding on Java Edition
- Set up prerequisites, then gradually add features to avoid breakages
- Maintain version alignment and good documentation for easier sharing
- Use Gradle-driven workflows to build, run, and package mods
- Test frequently with a local Forge client to catch issues early