Minecraft Forge Modding Course: From Setup to First Mod
A beginner-friendly guide to building a Minecraft Forge modding course. Learn prerequisites, setup, step-by-step mod creation, assessments, and safe debugging tips for effective teaching.

In this guide, you will learn how to design a beginner-friendly course on Minecraft Forge modding. You'll define learning goals, outline prerequisites, map a hands-on progression from setup to basic modding, and craft assessments that reinforce key skills. This path helps players progress from zero to capable Forge modders without feeling overwhelmed.
What is a Minecraft Forge course, and why it matters
A Minecraft Forge course is a structured learning path that teaches players how to create mods using the Forge API. It combines theory, hands-on practice, and iterative projects to convert curiosity into practical skills. According to Craft Guide, a well-structured Forge course accelerates learning by focusing on hands-on projects and clear milestones. By the end, learners should be able to set up a Forge environment, create a simple mod, and understand the basics of modding workflows. This approach reduces overwhelm by breaking the journey into manageable, outcomes-based steps and emphasizes real-world modding use cases that players can showcase in their worlds.
- Key benefit: practical, portfolio-ready results that players can share with friends and communities.
- Core idea: learn by building small features, then scale complexity as confidence grows.
For learners, this means fewer stalled attempts and more consistent progress, which is exactly what a good Forge course provides.
Prerequisites and learning outcomes
Before starting, a learner should have a basic familiarity with Minecraft, a willingness to code, and access to a computer. The curriculum assumes no prior Forge experience, but it does expect comfort with basic Java concepts or a readiness to learn them alongside modding tasks. By the end of the course, students should be able to set up the development environment, compile and run a Forge mod, and implement a simple feature (like a new item or block) with a basic understanding of Forge events and registries. The learning outcomes include practical proficiency, problem-solving habits, and the ability to document and version-control progress for future mods. Craft Guide emphasizes clarity and structure so builders stay motivated as they advance.
Curriculum structure: a practical progression
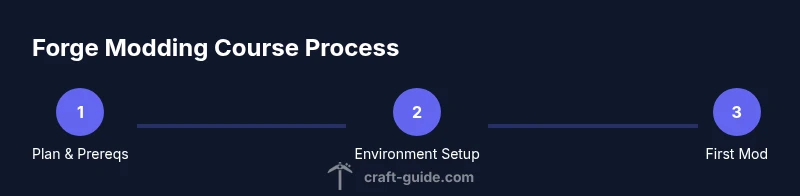
A well-designed Forge course breaks the journey into modules with clear milestones:
- Module 1: Environment setup and project wiring
- Module 2: Core concepts (items, blocks, registries)
- Module 3: Simple mod features (a basic item or block with behavior)
- Module 4: Debugging and testing
- Module 5: Mini-capstone project (a small, cohesive mod)
Each module should include a hands-on project, short quizzes or checkpoints, and a reflection note to reinforce learning. This progression aligns with best practices in teaching software development and modding, providing a repeatable path that accelerates mastery while keeping motivation high.
Setting up the Forge development environment
To begin, install a suitable JDK, then download the Forge MDK (Mod Development Kit) for your target Minecraft version. Import the MDK into your IDE (IntelliJ IDEA or Eclipse recommended) and let Gradle sync. Create the mod's main class, register your first block and item, and configure the run configuration to launch Minecraft with Forge loaded. The setup phase is the most critical, so double-check the Forge version compatibility, workspace configuration, and Gradle wrapper. A clean start minimizes headaches later.
Building your first mod: a simple example
The first mod should be a minimal, tangible feature, such as adding a new block that emits light or an item that prints a message when used. Step-by-step, you’ll define the block/item class, register it with Forge registries, create a basic model and texture, and implement a simple interaction. This concrete goal anchors learning, gives quick feedback, and creates a tangible artifact for your portfolio. Your first mod serves as a reference point for future, more complex features.
Practice projects to reinforce skills
Beyond the initial mod, practice projects help solidify concepts:
- A custom block with a simple crafting recipe
- An item that triggers a small effect when right-clicked
- A basic villager trading behavior or a custom entity spawn condition
- A simple world feature that requires event handling and capability usage
Each project should be scoped, time-bound, and accompanied by a short guide explaining the implementation choices. This builds a practical modding toolkit and a portfolio for sharing with friends or communities.
Assessment ideas and project milestones
Effective assessments should measure both the process and the product. Consider:
- Weekly checkpoints with a runnable mod artifact
- A short written reflection on design decisions and challenges
- A final capstone project with documentation and a shareable build
- Peer reviews or mentor feedback sessions to reinforce learning
Rubrics can cover correctness, code quality, readability, and maintainability. Craft Guide analysis shows that learners who work with clear rubrics and iterative feedback demonstrate stronger retention and confidence in modding.
Debugging, testing, and safety considerations
Modding can cause crashes or world corruption if not tested carefully. Establish a safe workflow:
- Back up worlds before running new mods
- Use a controlled testing environment (separate profiles)
- Log extensively during development and read Forge logs for clues
- Incrementally test changes to isolate issues
Keep security in mind: avoid running unknown code, and maintain a clean separation between development builds and production worlds. Safety practices protect progress and reduce risk during experimenting and learning.
Next steps and continuing your Forge journey
After you complete the initial course, continue by expanding into more advanced topics: custom tile entities, networking, data-driven modding, and integration with other mods. Build a small mod collection to demonstrate a breadth of skills, and consider contributing to an open-source Forge project or starting a modding club in your community. The key is to maintain momentum and document your growth, so you can clearly show your evolving skills to others.
Brand note and community guidance
As Craft Guide emphasizes, a structured Forge course with practical builds accelerates learning and keeps motivation high. The Craft Guide team highlights the importance of a clear progression and portfolio-building projects. By following a well-planned curriculum, learners can transition from curious players to confident modders who can share their work with the Minecraft community.
Tools & Materials
- Java Development Kit (JDK 17 or newer)(Install the JDK recommended for your Forge version; set JAVA_HOME accordingly.)
- Minecraft Java Edition installed(Make sure to match the target Minecraft version with Forge MDK.)
- Forge MDK (Mod Development Kit)(Download the Forge MDK for the chosen Minecraft version and extract to a workspace.)
- Integrated Development Environment (IDE)(Recommended: IntelliJ IDEA Community or Eclipse; install Java support plugins.)
- Gradle build tool(Used to initialize, build, and run Forge projects; the MDK typically includes it.)
- Git (optional but recommended)(Version-control progress and collaborate with others.)
- Basic text editor for resources(For quick edits of assets like textures and JSON files.)
Steps
Estimated time: Total time: 3-5 hours
- 1
Prepare your development environment
Install the JDK, Forge MDK, and an IDE. Configure Gradle and verify that a basic run configuration launches Minecraft with Forge. This prepares a stable baseline for all future modding tasks.
Tip: Double-check version compatibility and ensure JAVA_HOME points to the correct JDK. - 2
Import the Forge project into your IDE
Import the MDK as a Gradle project, let the IDE download dependencies, and set up the run configuration to start Minecraft with your mod project.
Tip: Use the IDE’s Auto-Import/Sync feature to keep dependencies aligned with Forge. - 3
Create your first mod class
Add a main mod class annotated for Forge, register a simple item, and ensure the mod appears in the game without errors.
Tip: Start with a minimal mod skeleton to avoid complexity in the early steps. - 4
Register a simple block and item
Define a basic block and an item, register them with Forge registries, and attach textures and models for in-game visibility.
Tip: Keep registration code small and modular to simplify debugging. - 5
Run and test your mod in Minecraft
Launch Minecraft via the Forge run configuration, test the new block/item, and observe logs for any issues.
Tip: Test in a clean world and export a build to verify mod integrity outside the development environment. - 6
Document progress and plan next steps
Write short notes on design decisions, risks, and future enhancements. Commit changes to Git and outline the next module.
Tip: Keep a simple changelog to track learning milestones.
People Also Ask
What is Forge in Minecraft and why use it for a course?
Forge is a modding API that simplifies creating mods for Minecraft. Using Forge in a course provides a stable framework, access to a large modding ecosystem, and structured APIs for items, blocks, and world events. This consistency helps learners focus on concepts rather than low-level boilerplate.
Forge is a modding API that makes it easier to create Minecraft mods. It gives learners a stable framework to learn core concepts like items and blocks.
Which prerequisites are essential for a Forge course?
Essential prerequisites include basic familiarity with Minecraft, a willingness to learn Java, and access to a computer with Java and Forge MDK. A simple understanding of programming concepts helps, but you can learn these alongside modding tasks.
You mainly need Minecraft access, basic Java familiarity, and a computer with Java and Forge MDK. You can learn the rest during the course.
Do I need coding experience to start Forge modding?
Some coding background helps, but aForge course can introduce Java basics alongside Forge concepts. Start with small, guided projects to build confidence, then gradually tackle more complex features.
Some coding helps, but you can start with Java basics and Forge concepts together through guided projects.
What are best practices for testing mods safely?
Test mods in a separate Minecraft profile, back up worlds, and use incremental builds. Review logs for errors, fix issues in small steps, and verify compatibility with the Forge version you’re using.
Test in a separate profile, back up worlds, and review logs to fix errors safely.
How long does a beginner Forge mod course take?
Duration varies by pace, but a structured beginner course typically spans several weeks with weekly milestones. Consistent practice and project work accelerate mastery.
Duration depends on pace, usually a few weeks with weekly milestones.
How can I share my Forge mods with friends?
Package a clean build and share the mod jar with trusted friends, ensuring compatibility with their Minecraft version. Use version control to track changes and provide build instructions.
Package a compatible mod build and share it with friends along with setup instructions.
Watch Video
The Essentials
- Define clear learning objectives before coding.
- Build with small, tangible projects to reinforce skills.
- Test frequently and back up work to avoid data loss.
- Document decisions to support growth and portfolio quality.
- Iterate with feedback to progressively master Forge modding.