How to Build a Minecraft Car: Step-by-Step Guide
Learn how to build a Minecraft car using vanilla blocks, redstone, and optional mods. This step-by-step guide covers chassis, wheels, steering, power, testing on tracks, and customization for both creative and survival play.

By the end of this guide you will be able to build a functional Minecraft car using simple redstone and minecarts. You’ll learn core design principles, wheel placement, steering mechanisms, and how to power and safely drive your vehicle on custom tracks. This tutorial also covers vanilla options and modded alternatives for enhanced realism.
What is a Minecraft car?
A Minecraft car is a modular build that mimics a vehicle using wheels, a chassis, and a drive mechanism rather than a real-world car. According to Craft Guide, the most satisfying designs balance realism with playability, using minecarts, rails, and simple redstone to simulate movement. The goal is to create a visibly car-like object that players can ride or push on a track. In vanilla Minecraft, you mainly rely on minecarts and rails to create motion, while optional mods can add more authentic wheel shapes and physics. This section explains why a car is a logical design choice in a block-based world, the core components involved, and the game-mode constraints you’ll face as you experiment with wheels and tracks.
Core components: chassis, wheels, track, and power
- Chassis: A low, wide base using blocks like oak planks or stone to maintain stability.
- Wheels: In vanilla, minecarts serve as wheels; you’ll align them in pairs to simulate car axles.
- Track: Rails or powered rails guide movement and speed control.
- Power: Redstone or minecart momentum can provide propulsion; mods can offer more realistic power sources.
Craft Guide emphasizes planning your vehicle around these elements so your build remains both plausible and functional. When you test, watch for alignment gaps that cause derailing or wobble, and adjust wheel spacing accordingly.
Vanilla constraints vs. mods: what's feasible in the base game
In pure vanilla Minecraft, you can achieve a convincing car silhouette and rolling action with minecarts, rails, and a chassis. The design is limited by block shapes and friction, which means you’ll prioritize stability and steering geometry over ultra-realistic physics. Mods expand options for wheel shapes, suspension, and smoothing; if you’re playing on a modded server, you can push toward more complex simulations while still appreciating vanilla aesthetics. Craft Guide recommends mastering a solid vanilla version first, then iterating with mods if you want deeper realism.
Designing for playability: size, visibility, and access
A practical car fits comfortably within your world’s scale and provides easy access to sit inside or ride. Make the cockpit large enough for a player to enter, include clear color cues for visibility, and ensure the vehicle won’t clip into nearby blocks during turns. Plan a simple track layout that lets you practice acceleration, deceleration, and turning without repeated collisions. This approach keeps your build fun and repeatable in both creative and survival modes.
Wheels and axles: layout and alignment
The most convincing wheel setup uses paired blocks that resemble axles and tires. Start with a symmetrical wheelbase—two wheels on each side at the same height. Use a combination of blocks to simulate tires and hubs and keep the wheels flush with the chassis so they don’t snag tracks. If your wheels grind against blocks, raise or lower the chassis by a block to improve clearance, then retest. Craft Guide’s perspective: iterate on wheel spacing until steering is smooth and wobble-free.
Steering fundamentals: achieving predictable turns
Steering in Minecraft is a geometry problem as much as a mechanic one. A common vanilla approach is to attach a control mechanism to the front axle that nudges a rail cart to move left or right. For a more stable design, keep steering inputs consistent and limit the maximum angle by restricting wheel offset. In modded builds, you may gain more organic steering with independent suspension and hinge blocks. The key takeaway is to keep steering predictable and repeatable across multiple tests.
Power and drive: propulsion options
You can power your car with momentum from a pushed minecart or with redstone-powered rails for consistent speed. Some builders place a powered rail along the track to maintain speed, while others rely on the cart’s inertia. If you’re integrating redstone, ensure your wiring doesn’t interfere with wheel movement and that power runs are compact to avoid lag on lower-end devices. Testing shows the best results come from a balance of momentum and controlled power.
Braking and safety features: brakes, bumpers, and rudimentary systems
Braking can be simulated by introducing close-tying rails with braking blocks that slow a cart, creating a sense of controlled deceleration. Adding bumpers or visual cues helps prevent cart derailments when turning at higher speeds. In vanilla builds, a simple braking illusion works best when the track includes a small straight segment followed by a gentle curve. If you’re using mods, you can implement true braking logic and smoother deceleration curves.
Aesthetics and customization: color, texture, and detail
Color blocks, banners, and glass panes let you customize the look of your Minecraft car. Choose a color scheme that stands out on your track and communicates your vehicle’s identity. Textures and materials can imply different eras or styles—modern, vintage, or futuristic—without altering gameplay mechanics. Craft Guide highlights that strong visuals keep your build engaging even if performance isn’t perfectly realistic.
Track design and testing: making sure your car performs well
A simple test circuit helps you evaluate wheels, steering, power, and track compatibility. Use a looped rail path with occasional straights and gentle curves to reveal rigidity or wobble. Document the results, adjust wheel alignment, and re-test. Craft Guide recommends testing in a controlled environment before taking your car onto longer tracks or into a survival world where resources are limited.
Modded realism: when and how to bring mods into your build
Mods can introduce new wheel designs, suspension systems, and physics that simulate a true road vehicle. If you’re curious about realism, experiment with mods that add more granular control over acceleration, braking, and steering feedback. Always check compatibility with your Minecraft version and server rules before adding mods. In many communities, vanilla builds remain a gateway to modded experiments, ensuring you have a solid baseline.
Maintenance and future upgrades: keeping your car dependable
Regularly inspect wheel alignment, track clearance, and redstone wiring for lag spikes or misfires. Save a copy of your blueprints so you can rebuild or expand later. Plan incremental upgrades, such as improved steering or a bumpier track for testing durability. A well-documented project is easier to iterate, both for you and any collaborators.
Tools & Materials
- Minecarts(At least 1 for basic movement; 2-4 for smoother wheels)
- Rails(Include straight and curved sections; extra for testing loops)
- Powered rails(Optional for sustained speed on longer tracks)
- Blocks for body/chassis(Oak planks, stone, or brick; choose consistent material)
- Slime blocks(If exploring bounce-inspired designs)
- Redstone dust(Power delivery for basic drive systems)
- Redstone torches(Optional power indicators or simple on/off switch)
- Pistons(For modular drive or steering aids)
- Sticky pistons(Alternative to suspension when modding)
- Slab and stair blocks(For adjusting clearance and interior access)
- Color blocks (wool/concrete)(Aesthetic customization)
- Scaffolding(Easier construction and adjustments)
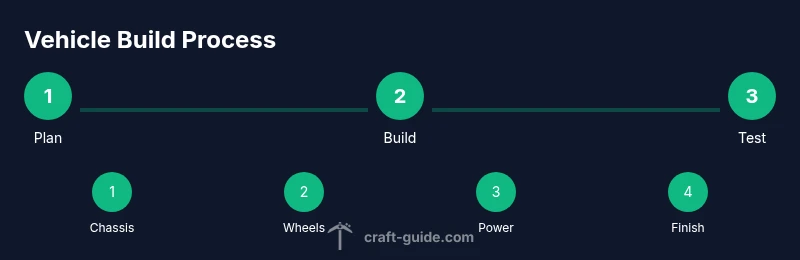
Steps
Estimated time: 90-120 minutes
- 1
Plan and concept
Define the scale, wheelbase, and basic silhouette before placing blocks. Decide if you’ll rely on vanilla wheels or mods for extras, and sketch a simple track layout to test on.
Tip: Sketch a quick blueprint on paper or in-game notes to keep geometry consistent. - 2
Lay the chassis
Build a flat, stable base using chosen blocks. Keep the center of gravity low and symmetric to prevent tipping on curves.
Tip: Use even block counts on both sides for balance. - 3
Attach wheels and axles
Place paired wheels on each side at equal heights. Ensure axles sit flush with the chassis to avoid clipping.
Tip: Test wheel movement on a short straight section first. - 4
Add a drive mechanism
Install minecarts on rails or a simple redstone-powered track to provide propulsion. Keep power distance short to reduce lag.
Tip: Start with a low speed and gradually increase via powered rails. - 5
Implement steering
Link steering input to front wheels or a dedicated steering rail arrangement. Aim for predictable turns with minimal drift.
Tip: Limit steering angle to prevent abrupt wheel alignment changes. - 6
Create a test track
Build a loop with straights and gentle corners to evaluate stability and steering responsiveness.
Tip: Document results and adjust wheelbase if wobble appears. - 7
Power and braking
Decide between momentum-based propulsion or rail-based power. Include a braking method to slow down safely.
Tip: Test braking at varying speeds to avoid derailments. - 8
Add cosmetics
Finish with color, banners, and interior details to improve visual appeal and recognition on tracks.
Tip: Choose contrasting colors for visibility. - 9
Test in varied terrain
Challenge the car on different surfaces or elevations to assess resilience and wheel clearance.
Tip: If slopes cause tipping, lower the chassis or widen the wheelbase. - 10
Consider mods
If you’re curious about realism, experiment with mods that enhance wheels, suspension, and physics.
Tip: Always verify compatibility with your world version. - 11
Document and share
Take notes or screenshots of your blueprint so you can recreate or iterate later.
Tip: Create a simple blueprint key for future builders. - 12
Plan upgrades
Identify incremental improvements (steering, braking, aerodynamics) to extend your build over time.
Tip: Keep upgrades modular to swap parts easily.
People Also Ask
Can you build a Minecraft car in vanilla Minecraft without mods?
Yes. A convincing vanilla Minecraft car uses minecarts, rails, and a well-planned chassis. Mods can add realism, but a solid vanilla version demonstrates the core concepts clearly.
Yes. You can build a convincing vanilla Minecraft car using minecarts and rails. Mod options exist, but a strong vanilla design teaches the basics.
Do Minecraft cars work in Survival mode as you explore?
They can, but survival mode imposes resource constraints and movement physics that differ from creative mode. Plan for durability and resource availability when building a track and test thoroughly.
They work in survival, but you’ll face resource limits and different movement behavior. Plan and test carefully.
What Minecraft version is best for car builds?
Car builds work across most modern Minecraft versions. Start with the latest stable release to ensure compatibility with any mods you plan to use later.
Use the latest stable release for compatibility with mods and features.
How can I steer reliably in vanilla designs?
Steering relies on geometry and consistent wheel alignment. Use symmetric wheel placement and limit the steering angle to keep turns predictable.
Keep steering symmetric and limit steering angle for predictable turns.
Are cars limited to flat tracks, or can they handle terrain?
Vanilla cars are easier on flat or gently sloped tracks. For rough terrain, adjust wheelbase and clearance, or reserve steeper sections for testing in modded setups.
They’re easier on flat tracks. For rough terrain, modify clearance or try mods for better terrain handling.
Can I automate a Minecraft car with redstone or mods?
Automation is possible with redstone for basic control, or with mods that add advanced movement logic. Start simple and gradually add automation features.
Yes, you can automate with redstone or mods, starting with simple systems.
Watch Video
The Essentials
- Plan before placing blocks to ensure balance.
- Test frequently on a dedicated track for feedback.
- Vanilla designs teach core concepts before mods.
- Color and texture choices boost visibility and style.
- Document your blueprint for future iterations.