How to Build a Simple Home Minecraft: A Step-by-Step Guide
Master the basics of building a simple home minecraft with a clear, expandable design. Learn layout, materials, lighting, and room planning in beginner-friendly steps.

You will learn to build a simple home minecraft with a compact footprint, essential rooms, and an expandable design. This beginner-friendly guide covers layout, materials, lighting, and a safe crafting corner to start your world.
Why a simple home design matters
According to Craft Guide, starting with a simple, functional home design helps players focus on core skills and reduces resource waste. A straightforward, expandable plan is perfect for a world where resources are earned block by block. For anyone exploring the concept of a simple home minecraft, the goal is to create a space that feels cozy, efficient, and easy to grow over time. A modest footprint reduces the risk of getting overwhelmed by too many rooms, too many blocks, or decorative ideas that complicate the build. In practice, a well-chosen palette, clear sightlines, and smart door placement make navigation easy and leave room for future upgrades. Craft Guide analysis, 2026, shows that players who start with a recognizably simple home often complete more builds and enjoy smoother survival runs. If you’re a beginner, this approach keeps you focused on fundamentals like lighting, storage, and accessibility while still allowing you to apply texture and style as you gain confidence. The phrase simple home minecraft should anchor your plan so you stay aligned with a pragmatic, growth-friendly goal.
In real play, a simple home acts as a practical hub from which you can explore caves, farm resources, or set up a basic mob-proof base. The key is to balance function and aesthetics from the start. Start with a clean, rectangular footprint, keep the interior space modular, and choose materials that are easy to gather. A well-lit interior reduces hostile mob spawns at night, while a compact kitchen-like crafting corner provides a reliable workflow for upgrading tools and armor. Over the course of a session, a simple home becomes a dependable shelter that supports your long-term ambitions in a world where exploration and building go hand in hand. Craft Guide’s approach emphasizes clarity, speed, and repeatable patterns that novices can replicate without getting bogged down in minutiae.
If you want a quick mental model: think compact, modular, and expandable. The initial build should contain a door, a window for visibility, a small work area, a storage zone, and a bed. By prioritizing these essentials, you’ll have a strong foundation for more ambitious projects, such as additional rooms, a second floor, or a customized exterior facade. Craft Guide recommends focusing on reliable materials and avoiding overly complex rooflines in the first pass. This ensures a sturdy, aesthetically pleasing result that can be enhanced after the core shelter is in place.
note
Tools & Materials
- Oak wood planks(Main wall material; aim for at least 64 to start)
- Cobblestone(Foundation and accents; good for durability)
- Oak door(Entrance to the home)
- Glass panes(Natural light and visibility)
- Bed(Spawn point and sleep mechanic)
- Chest(Storage for early tools and resources)
- Crafting table(Crafting workspace)
- Furnace(Smelting and cooking)
- Torches(Lighting to prevent mobs)
- Oak stairs(Optional for interior level changes)
- Wooden slabs(Roof edges and decorative trim)
Steps
Estimated time: 45-60 minutes
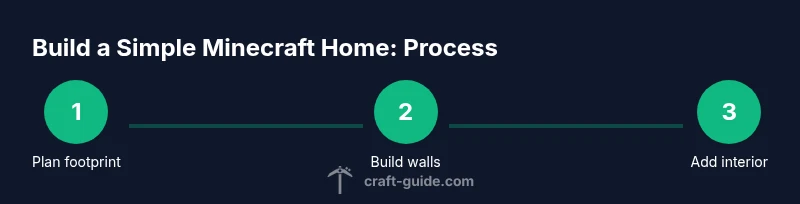
- 1
Plan footprint
Decide on a compact base, such as 6x6 or 7x7 blocks, to keep the build approachable. This footprint should accommodate a door, two windows, a small crafting area, and a bed.
Tip: Sketch mental or paper-based outlines; keep door and window spacing consistent for easy access. - 2
Lay foundation and walls
Place a simple rectangular foundation using cobblestone highlights or a wood base. Build up walls with oak planks, leaving space for a door and windows. Maintain vertical consistency to avoid a rough, uneven look.
Tip: Use a single material for walls to reduce texture complexity and speed up the build. - 3
Install roof and exterior
Choose a straightforward roof style (flat or single-slope) and cap it with slabs or stairs to create dimension. Add a small overhang to protect entrances and emphasize the home’s silhouette.
Tip: Keep the roof line simple to avoid leaks in your aesthetic — even in a digital sense, less is more. - 4
Doors, windows, and interior walls
Place the door on the most convenient side for access to your world. Install glass panes for windows; add interior walls to carve out a compact crafting nook and a storage zone.
Tip: Position windows to maximize daylight while keeping mobs away at night. - 5
Interior furniture and rooms
Create a dedicated crafting area with a crafting table and furnace near the storage. Put a bed against a wall with easy access to torches and chests. Ensure circulation space is clear for movement.
Tip: Arrange items in a logical loop so you can walk around the center of the room without obstacles. - 6
Lighting and safety check
Place torches at chest height around the interior and along entrances to prevent mob spawns. Do a quick walk-through at night to verify visibility and access to essential tools.
Tip: Proactively light the area to avoid surprises when you log in after sunset.
People Also Ask
What is the best footprint for a simple home in Minecraft?
A compact footprint, such as 6x6 or 7x7 blocks, provides a balanced base that’s easy to build and expand. It keeps rooms proportionate and makes routing simple for beginners.
A compact 6-by-6 or 7-by-7 footprint works well as a starting point for a simple Minecraft home.
Which materials are easiest for beginners to work with?
Wood planks (oak or birch) and cobblestone are reliable starting materials. Glass panes light the interior, while a bed and chest organize storage and progress.
Oak planks and cobblestone are great beginner-friendly materials for a simple home.
Can this design be expanded later?
Yes. Start with a single-story, then add a second floor or a basement as you gather resources. Use a modular approach so future rooms align with the existing walls.
Absolutely—build with expansion in mind from day one.
How can I improve lighting to prevent mob spawns?
Place torches around the interior, near the doorway, and at corners to ensure daylight-like coverage. Good lighting reduces the chance of hostile mobs spawning indoors.
Keep lighting consistent to stop mobs from spawning inside your home.
Is this design suitable for survival mode?
Yes. The design supports survival gameplay by providing a safe shelter, a basic crafting area, and storage for resources accumulated during exploration.
Perfect for survival—it shelters you and keeps essential tools handy.
Where should furniture be placed for efficiency?
Place the crafting table and furnace near the storage to minimize walking distance. Keep the bed accessible in a direct line from the door for quick respawning and easy navigation.
Put crafting, storage, and furnace close together for a smooth workflow.
Watch Video
The Essentials
- Start small, focused, and expandable.
- Choose a simple material palette to speed up build time.
- Prioritize essential rooms: storage, craft area, bed, and lighting.
- Plan for future growth to avoid reworking the base layout.
- Craft Guide recommends clarity and practicality for beginners.