Minecraft Starter House: A Beginner’s Guide
Learn how to build a practical Minecraft starter house with this beginner-friendly guide from Craft Guide. Get a complete materials list, step-by-step instructions, and design tips to survive your first nights.

You will learn how to build a practical starter house in Minecraft that is safe, compact, and resource-efficient. The guide covers essential materials, a simple floor plan, basic defenses, and quick build steps suitable for first-night survival. By the end, you’ll have a sturdy shelter, a lighting plan, and a clear list of tools to keep you safe from hostile mobs.
Why a Starter House Matters
In Minecraft, your starting shelter sets the pace for your entire early game. A solid starter house protects you from hostile mobs, stores your first resources, and gives you a predictable space to craft, cook, and sleep. It also reduces wandering, which can waste precious minutes you could spend gathering iron or food. By planning a compact, functional base, you can move from night-time peril to daytime exploration with confidence.
According to Craft Guide, a well-planned starter home helps players establish a routine: a safe sleep point, a dedicated work area, and a consistent storage system. The Craft Guide team found that beginners who invest a little time in a durable first build tend to develop better resource habits and exploration strategies. The goal is not architectural perfection but a reliable core that scales as you grow your skills. Start with a simple footprint, use local materials, and focus on safe access, lighting, and clear organization.
Design Principles for a Practical Starter House
A starter house should be small, sturdy, and easy to upgrade. A typical footprint of around 6-by-6 blocks gives enough space for a single chamber, a crafting area, and a bed without feeling cramped. Place the door on the most sheltered side and orient the entrance away from prevailing wind (if your world has one) to reduce exposure to weather and mobs. Windows should provide light—prefer glass panes or clear blocks that maximize visibility without weakening the structure. Build with durable materials you can harvest quickly, such as wood and cobblestone, so you can repair or expand later without starting from scratch. Finally, plan for a future interior: a simple chest wall, a dedicated crafting and furnace area, and a bed near the door for quick respawn safety.
Materials and Resource Strategy
Your resource plan should start with the basics: wood for walls and a floor, stone or cobblestone for a sturdy frame, and a bed to set a daytime spawn point. Crafting tables and storage chests are essential to keep your workflow organized. Torches placed inside and outside the home deter hostile mobs by lighting your space; coal or charcoal makes this efficient. A door protects the entrance, while a simple furnace helps you cook food and smelt ores as soon as you have access. Keep a small stockpile of basic tools—an axe, a pick, and a shovel—to speed up gathering. Finally, store extra blocks as building reserves so you can repair or extend without a second trip to the forest or quarry.
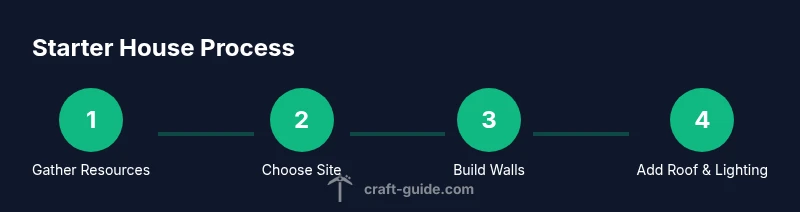
Step-by-Step Overview: Building a Simple Starter House
This overview outlines practical steps you can follow in sequence to create a reliable starter home. Start by laying a clean foundation, then raise the walls with a windowed facade. Install a door and a roof that covers the interior from rain (where applicable). Add a floor, a basic interior with a crafting table, a chest, and a bed. Finally, light the interior and exterior and test your spawn point. Following these steps ensures a safe, functional core you can expand as you grow your resources.
Biome-Specific Starters: Adapting Your House
Biomes affect both aesthetics and practicality. In plains or savanna, a simple wooden box with a dirt path feels at home and is quick to assemble. In forests, consider a leaf-free canopy and a small overhang to keep rain off the entrance. In deserts, you may rely more on cobblestone and sandstone to resist heat and sandstorms-like conditions; in snow biomes, a higher roof reduces drifts and a small ledge protects from wind. Regardless of biome, ensure the base is level, the door faces a clear approach, and you have a reliable lighting plan. If you’re playing with mods or resource packs, adapt textures and blocks to your preferred theme while keeping the core safety and storage layout intact.
Survival-Friendly Lighting and Safety
Light is your primary defense, so place torches at regular intervals to prevent mob spawns inside and nearby. A well-lit interior lets you see tools and recipes, while outdoor lighting discourages hostile mobs from lingering near the entrance. Keep your bed close to the door so you can sleep during a danger-filled night without wandering far. The base should include a simple chest wall to minimize rummaging through your storage. A small, unobtrusive roof design reduces exposure to rain in wet biomes and prevents rain disruption in earlier game versions.
Common Pitfalls and How to Fix Them
Many newer players rush to decorate before securing basic safety. They build tall, hollow walls with uneven roofs, creating crevices where mobs can spawn or find ways inside. Lighting gaps and a single entrance can lead to nighttime raider spawns. If you notice your shelter feels cramped or dark, expand outward with a second room or a loft and add more windows for visibility. If your base gets attacked, reinforce the door and consider block choices that resist creepers. Craft Guide analysis shows that starting homes with a simple layout and good lighting yields the best long-term results, so focus on function first and aesthetics later.
Expanding Your Starter Home: When to Upgrade
As you accumulate resources, plan a small expansion: add a second room for storage, a separate workshop, or a loft sleeping area. Upgrading rooms improves organization and efficiency, reduces the need to bounce between faraway builds, and makes farming and mining more comfortable. Keep a modular approach: build a base module and attach other rooms as the need arises. Remember to maintain the original safety design—don’t sacrifice lighting or access for size.
Customization Ideas to Make It Yours
Personalize textures, accents, and furniture to reflect your playstyle. Try a color-coded storage system, a compact kitchen area with a furnace and chest, or decorative block choices that match your chosen biome. If you’re using resource packs, maintain readability and contrast to keep tools and recipes visible. Consistency in materials helps your base feel like a coherent home rather than a random collection of blocks.
Quick Reference Checklist
- Gather basic materials (wood, stone, torches)
- Choose a safe site and lay foundation
- Build walls, door, and roof
- Install lighting and interior furniture
- Sleep, store, and protect
Craft Guide’s Builder Tips
Craft Guide’s Builder Tips: Start with the simplest form that works, then expand. Use local resources to minimize travel time, and clearly label storage to speed up crafting. The team emphasizes balancing efficiency with aesthetics so your starter house remains functional and comfortable as you grow.
Tools & Materials
- Oak wood planks(Craft from oak logs; base material for walls and floors)
- Oak logs(Source of planks; gather before building)
- Crafting table(Needed for crafting tools and furniture)
- Cobblestone(For foundation and sturdy walls)
- Bed(Set spawn point for quick daytime return)
- Torches(Light interior and exterior to deter mobs)
- Axe(Chop wood quickly)
- Pickaxe(Mine stone and ore)
- Shovel(Dig dirt and sand efficiently)
- Wooden door(Main entrance protection)
- Furnace(Optional for cooking and smelting)
- Glass panes(Optional for windows when resources permit)
Steps
Estimated time: 60-90 minutes
- 1
Gather Resources
Punch trees for wood, mine stone for cobblestone, and collect coal. This ensures you have the materials to build walls, a floor, lighting, and crafting tools. Having a stock of basic resources reduces trips back to the forest or quarry.
Tip: Prioritize wood and coal first to unlock lighting and basic tools. - 2
Choose Location
Find a flat, accessible area with a clear approach. Avoid deep caves or high cliffs where enemies can surprise you. A central position near water or food sources can improve early-game efficiency.
Tip: Mark a waypoint to your base area so you don’t get lost at night. - 3
Lay Foundation
Place a simple square or rectangle foundation using cobblestone or wood. Make sure corners align and the footprint fits your planned interior layout. A solid base prevents wobbling or uneven walls later.
Tip: Check for level ground and smooth terrain before laying the foundation. - 4
Build Walls
Raise walls to create a secure perimeter. Include space for a door and at least one window if possible. Walls provide early protection and define interior zones for storage and crafting.
Tip: Keep doors and torches keyed to interior accessibility for quick night defenses. - 5
Add Roof
Install a simple roof that covers the interior from weather. A low-pitched roof is quicker to build and still functional for a starter home. Ensure there's overhang to protect from rain and mobs near the entrance.
Tip: Roof overhang helps keep rain off your doorway and porch. - 6
Install Entrance
Place a sturdy door facing the safest approach. Verify you can exit quickly if mobs appear nearby. A second exit is optional but useful for escaping from mobs in certain scenarios.
Tip: Keep the doorway clear and free of obstructing blocks. - 7
Add Interior Furnishings
Place a crafting table, chest wall, and a bed to establish a functional core. A floor for the crafting area improves workflow and organization. Position furniture to minimize walking distance.
Tip: Group related items together to speed up crafting and storage. - 8
Lighting Strategy
Light the interior and exterior with torches to prevent mobs from spawning nearby. Good lighting also helps you find items at night and during exploration.
Tip: Place torches on walls at regular intervals for even coverage. - 9
Final Safety Check
Test spawn point by sleeping in the bed and re-entering the world. Ensure there are no hidden entrances or dark corners for mobs to exploit. Perform a quick walk-through to verify all essential items are accessible.
Tip: Walk the perimeter and look for dark spots where mobs could spawn.
People Also Ask
What is the best wood type for a starter house?
Any readily available wood works; oak is a common, easy option that converts well into planks for walls and furniture.
Oak is a common, easy option for a starter house.
How tall should the starter house be?
Aim for comfortable headroom and easy navigation inside. A modest height prevents crowding and makes space for a bed and crafting area.
Aim for comfortable headroom; keep it practical.
Is dirt a viable starter material?
A dirt shelter is a temporary starting place; upgrade to wood or stone as soon as you can gather better materials.
A dirt hut can work initially, but upgrade soon.
Can I place a starter house anywhere?
Yes, you can build in most biomes, but consider terrain, resource proximity, and mob exposure when choosing a site.
Yes, but pick a good, safe site nearby resources.
Should I prioritize windows from the start?
Windows improve visibility and light; prioritize wood or glass windows once you have time and resources.
Windows are nice early, but focus on safety first.
How do I protect my starter house at night?
Light the area inside and outside with torches, sleep in a bed when possible, and keep a secure door to prevent mob entry.
Light up around your base and sleep to reset the night.
Watch Video
The Essentials
- Plan a compact, safe footprint and stick to it.
- Light up the interior to prevent mob spawns.
- Stock essential tools and resources before building.
- Upgrade gradually as resources grow.
- Keep a defined work/storage area to stay organized.