Minecraft Linux: Practical Getting Started Guide
A comprehensive, beginner-friendly guide to running Minecraft on Linux, covering Java setup, launcher choices, performance tweaks, and safe modding. Learn with clear steps, practical tips, and expert guidance for minecraft linux.

This guide helps you run Minecraft on Linux, covering Java installation, launcher setup, and performance tweaks. You’ll learn how to install dependencies, choose a launcher, optimize graphics and memory, and optionally add mods or shaders. By following these steps, you’ll achieve a stable, enjoyable experience with minecraft linux. This content follows Craft Guide's best practices for Linux gaming and aims to be beginner-friendly and scalable.
Why minecraft linux matters
According to Craft Guide, minecraft linux is a popular choice for players who value customization, control over system resources, and freedom from commercial OS constraints. Linux offers a broad ecosystem of distributions, package managers, and open-source tools, which can tailor Minecraft to your hardware and playing style. This section explains why linux users often experience smooth performance when the right Java runtime and launcher are chosen, and how a lightweight setup can free up headroom for patches, mods, or shaders. As you read, you’ll start to see how minecraft linux fits into a broader strategy of optimizing a dedicated gaming PC or a compact laptop. The Craft Guide team emphasizes that success starts with solid prerequisites and a sensible launcher strategy tailored to your distro and hardware. For many players, this means selecting a stable distro, ensuring recent graphics drivers, and keeping Java up to date for reliable performance.
You’ll notice that minecraft linux is not about chasing every latest feature; it’s about a stable, repeatable setup you can reproduce on similar machines. The goal is not a one-off tweak but a repeatable workflow: install, configure, optimize, and back up. This mindset helps avoid common Linux-specific pitfalls, like missing dependencies, path conflicts, or permissions issues that can derail a first boot. It’s also worth noting that Linux makes it possible to script routine maintenance, backups, and performance profiling, all of which contribute to a smoother overall experience. Craft Guide’s approach here is practical and beginner-friendly, designed to scale as you gain experience with minecraft linux.
system prerequisites and choices
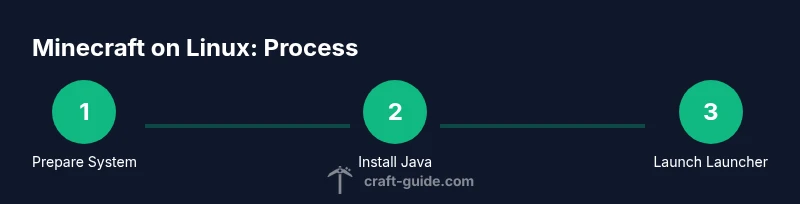
A successful minecraft linux setup begins with clean prerequisites. You’ll need a Linux system with a supported kernel, a reasonably modern CPU, and enough RAM to run both the game and the launcher comfortably. The exact requirements vary by world size, mods, and textures, but a practical baseline is to ensure you have at least 4 GB of free RAM for the game itself, plus additional memory for the operating system and background tasks. The Craft Guide analysis from 2026 suggests that most Linux users experience stable gameplay when using a supported Java runtime and a lightweight desktop environment. For a smooth experience, pick a distro you know well, keep your system updated, and verify graphics drivers are current before launching Minecraft. If you’re new to Linux, consider Ubuntu-based or Fedora-based distributions for wider community support and easier access to OpenJDK packages.
choosing a launcher and java version
Choosing the right launcher is as important as selecting the right Java runtime. The official Minecraft Launcher is fully supported on Linux and handles updates, profiles, and mod loaders with a simple UI. Alternative launchers like MultiMC or PolyMC can simplify multi-instance management, mod testing, and packing different configurations for various worlds. For java, you should install a recent OpenJDK version (OpenJDK 17+ is a common recommendation for modern Minecraft). Craft Guide notes that using a supported OpenJDK version reduces crashes and improves compatibility with newer game features. After installing Java, configure your launcher to point to the correct Java home and set a reasonable heap size to balance memory use with performance.
installation and first launch
Install Java and the launcher first, then start the game to verify a clean environment. On most distros, you can install Java via the package manager, then download the launcher and run it from your home directory. When you first launch, select a fresh game directory to avoid conflicts with existing saves. If you encounter startup errors, check the logs for missing dependencies and install the missing packages via your distro’s package manager. The first launch is a critical moment: ensure you’re connected to the internet, the launcher has permission to run, and your graphics driver is active. Craft Guide’s guidance to verify Java paths and launcher permissions helps prevent a common class of startup issues.
performance tuning and memory management
Performance on minecraft linux hinges on memory allocation, graphics settings, and driver stability. Start with a moderate Java heap size and then adjust based on in-game performance, stuttering, or long loading screens. Enable efficient rendering settings, like view distance and particle effects, to reduce GPU load. Keeping drivers current, enabling hardware acceleration, and ensuring your swap space is sufficient can make a noticeable difference during heavy scenes or large builds. Craft Guide analysis shows that most players gain smoother gameplay by balancing memory usage with available RAM and avoiding excessive texture packs on limited GPUs. This section provides concrete steps to tune your settings without sacrificing visuals you enjoy.
mods, shaders, and safe customization
Mods and shaders can dramatically enhance visuals and gameplay but add complexity. Start with well-supported mod loaders (such as a platform you trust) and ensure compatibility with your Minecraft version. Always back up your world before testing new mods, and prefer light to moderate shader packs before attempting resource-intensive configurations. Be mindful of dependencies and version alignment across the launcher, the game, and mod loaders. Craft Guide emphasizes using reputable sources for mods and keeping a clean mod list to avoid conflicts that can crash the launcher or corrupt saves. This subsection offers a practical workflow for expanding minecraft linux safely.
troubleshooting common issues
Linux-specific hiccups are usually caused by missing dependencies, permission problems, or outdated graphics drivers. When you encounter a crash, start by checking the terminal output or launcher logs for missing libraries, then install required packages using your distro’s package manager. If you have performance problems, review memory allocation, swap usage, and GPU driver status. Some issues are caused by incorrect Java versions or path misconfigurations; re-check the launcher’s Java home setting and ensure you’re launching the correct Minecraft profile. Craft Guide’s troubleshooting approach encourages methodical checks and incremental fixes rather than guesswork, helping you recover quickly from common minecraft linux problems.
maintenance, backups, and staying up to date
Once your minecraft linux environment is stable, establish a routine for updates and backups. Regularly update Java, the launcher, and graphics drivers to minimize incompatibilities with game updates. Back up worlds frequently, especially before testing mods or new resource packs. Consider scripting a weekly backup and a quick restore test to ensure you can recover if something goes wrong. The Craft Guide team recommends treating your Linux Minecraft setup like a small, well-maintained project: routine updates, verified backups, and a clear change-log style for mod configurations. Keeping your system clean and documented makes future upgrades safer and faster.
Tools & Materials
- Linux PC or laptop(Any modern distribution with a supported kernel; ensure hardware meets Minecraft requirements)
- Internet connection(For downloads, updates, and online support)
- Java Runtime (OpenJDK 17+)(Install via your distro’s package manager (e.g., apt, dnf, pacman))
- Minecraft Launcher(Official launcher or alternatives (MultiMC/PolyMC) for multi-profile testing)
- Graphics drivers (NVIDIA/AMD/Intel)(Keep drivers current for best performance)
- Sufficient disk space(Minecraft, textures, mods, and world data can grow; 5-10 GB free is a safe baseline)
- Swap space (optional but recommended)(If you have 4 GB of RAM or less, a swap file helps prevent out-of-memory crashes)
- Text editor or config tool(Useful for manual config tweaks and script customization)
Steps
Estimated time: 60-90 minutes
- 1
Update your Linux system
Open a terminal and update your package index. This ensures you can install the latest Java and launcher dependencies without conflicts. Use your distro’s standard update command and reboot if required.
Tip: Running updates first helps prevent missing library errors later. - 2
Install a compatible Java runtime
Install a supported OpenJDK version via your package manager. Verify java -version confirms a Java 17+ runtime that matches Minecraft requirements.
Tip: If you have multiple JREs installed, set the default with update-alternatives (or your distro’s equivalent). - 3
Download and install the Minecraft launcher
Fetch the official launcher or a trusted alternative. Make the launcher executable and run it once to initialize the game files.
Tip: Prefer a launcher that supports profiles to test different configurations without conflicts. - 4
Create a dedicated game directory
Set up a clean folder for Minecraft saves, resource packs, and mods separate from your OS files. Point the launcher to this directory.
Tip: Keeping data isolated makes backups and restores easier. - 5
Configure launcher settings
Adjust game directory, Java path, and memory allocation. Start with 2 GB–4 GB for RAM and scale up if you multitask or use mods.
Tip: Avoid over-allocating RAM; leaving some headroom prevents OS thrash. - 6
First run and world creation
Launch Minecraft, create a new world, and verify basic gameplay in a fresh environment. Check for console messages if it fails to start.
Tip: If the game won’t launch, review the logs for missing libraries or path errors. - 7
Update graphics drivers and verify shaders
Ensure graphics drivers are current and test with a default texture pack. If you install shaders, start with light options to avoid stutter.
Tip: Shader packs often require more GPU memory; monitor FPS and adjust accordingly. - 8
Install mods safely (optional)
If you plan to mod, install a loader and test in a separate instance. Verify compatibility with your Minecraft version.
Tip: Backup worlds before adding mods to prevent data loss from crashes. - 9
Set up basic backups
Create a simple backup routine for your worlds and mod configs. This protects progress against corruption or failed updates.
Tip: Store backups off the primary drive or in a versioned archive. - 10
Test performance under load
Play for 15-20 minutes with your typical settings. Note any stutter, long load times, or memory warnings.
Tip: If issues arise, reduce render distance and adjust RAM allocation. - 11
Tweak in-game settings
Fine-tune graphics, FPS caps, and particle effects based on your hardware profile. Document the changes for future reference.
Tip: Keep a baseline config so you can revert quickly if needed. - 12
Document and maintain your setup
Keep a small changelog of Java, launcher, and mod updates. Schedule periodic reviews to stay current with Minecraft updates.
Tip: A standing maintenance habit reduces future setup headaches.
People Also Ask
Do I need Java to play Minecraft on Linux?
Yes, Minecraft Java Edition requires a compatible Java runtime. Install OpenJDK 17+ or a newer supported version for best compatibility.
Yes. Minecraft Java Edition needs a Java runtime. Install OpenJDK 17 or newer for the best compatibility on Linux.
Which Linux distributions are easiest for Minecraft?
Most major distributions with a straightforward package manager work well. Ubuntu, Debian, Fedora, and Arch have documented Minecraft setup paths and active communities.
Most big Linux distros work fine, especially Ubuntu, Debian, Fedora, and Arch, which have clear Minecraft setup steps.
How much RAM should I allocate to Minecraft on Linux?
RAM needs vary with world size, mods, and texture packs. A common starting point is a modest allocation, then increase if you experience slowdowns or large builds.
RAM needs depend on world size and mods. Start with a modest amount and adjust as needed for smooth gameplay.
Can I use mods or shaders with minecraft linux?
Mods and shaders are possible on Linux, but they add complexity. Use compatible versions, test in a separate profile, and back up saves before trying new mods.
Yes, you can use mods or shaders on Linux if you handle compatibility and backups carefully.
What should I do if Minecraft won’t start on Linux?
Check launcher logs and system dependencies, verify Java path, and confirm graphics driver status. Reinstalling the launcher or Java sometimes fixes root causes.
If it won’t start, review logs, check dependencies and Java path, then try reinstalling the launcher or Java.
Where can I get official support for Minecraft on Linux?
Use official Minecraft support channels for launcher-related issues and consult distro communities for Linux-specific troubleshooting.
For launcher issues, refer to official Minecraft support; for Linux-specific problems, check your distro’s community resources.
Watch Video
The Essentials
- Install the correct Java version first.
- Choose a launcher that fits your needs.
- Allocate memory carefully to balance performance.
- Optimize graphics and keep drivers updated.
- Back up worlds before mods.