How to Get in Minecraft Java Edition
Learn how to access Minecraft Java Edition from purchase to launch. This beginner-friendly guide covers account setup, the launcher, and getting into your first world with practical, step-by-step instructions.

Get into Minecraft Java Edition by purchasing the game, installing the official launcher, signing in with your Microsoft account, and launching into your first world. This quick guide covers setup basics, common hiccups, and essential steps to start playing within minutes, plus tips to avoid missteps. Whether you're on Windows, macOS, or Linux, this approach works.
What it means to get into Minecraft Java Edition
Getting into Minecraft Java Edition means more than launching a program; it’s about having access to the classic PC experience with Java-based modding potential and a vast ecosystem of community servers and builds. For many players, the Java Edition is the original flavor that supports texture packs, mods, and cross-compatibility with Java plugins. According to Craft Guide, the quickest path to playing is to ensure you have a valid license, a supported computer, and a stable internet connection. Once you have these, you can sign in with your Microsoft account and start a new world or connect to a server. Remember that Java Edition is distinct from other editions (like Bedrock), so you’ll want to make sure you’re downloading the Java launcher and the correct version for your OS. The goal is reliable access to the launcher, a smooth login, and a world ready for exploration.
Core requirements and preparation
Before you dive in, confirm your setup is ready. A modern PC with a reliable internet connection is essential for downloading the launcher and the game files. You don’t need a supercomputer, but comfortable performance helps, especially if you plan to use mods or high-resolution texture packs in the future. Ensure you have a Microsoft account or a Mojang account linked to Minecraft, and keep your login details secure. Craft Guide analysis shows that verifying your license first prevents login errors and ensures you can access updates smoothly. Prepare a comfortable workspace, close bandwidth-heavy apps, and consider backing up important worlds before experimenting with mods or texture packs.
Choosing your launcher and signing in
The official Minecraft Launcher is the gateway to Minecraft Java Edition. Download it from the official site, install it, and sign in with your Microsoft account. The launcher handles version selection, profile management, and modding options. If you previously owned Minecraft under a different account system, follow the on-screen prompts to link your account and verify ownership. Craft Guide emphasizes using the official launcher to minimize compatibility issues and to receive timely updates. After signing in, you’ll see a list of available game versions and a button to install the base game.
First launch: settings and creating a world
On first launch, adjust your video and control settings to balance performance and visuals. Start with the default “Normal” difficulty and a sensible render distance; you can tune these later for smoother play on your hardware. Create a new world to experience the core mechanics: survival basics, crafting, and exploration. Name your world, choose seed options if you want unique terrain, and set game mode. The initial world serves as your sandbox; take time to explore, gather resources, and learn how your settings impact performance and visuals. Craft Guide notes that getting comfortable with these choices early pays off in longer, more enjoyable sessions.
Online play, servers, and safety basics
Minecraft Java Edition shines when you join servers and play with friends or communities. Connect to a server by entering its address or selecting from server lists if available in the launcher. Always review server rules, safety guidelines, and what mods or plugins are allowed. Keep your account secure—enable two-factor authentication if possible—and avoid sharing credentials. If you’re new to multiplayer, start with private friends-only worlds to learn chat etiquette, server etiquette, and anti-griefing practices. Craft Guide highlights that online play expands the game’s possibilities but comes with responsibility and risk management.
Next steps and improving your setup
As you gain confidence, you may want to customize further with resource packs, texture packs, or mods that are compatible with Java Edition. Research versions and compatibility before installing mods, and back up your worlds regularly. Consider exploring creative builds, redstone contraptions, or advanced farms to expand your skills. Remember to keep your launcher and all components up to date to ensure the best performance and stability. Craft Guide’s guidance in 2026 reinforces the importance of a safe, well-organized modding workflow to minimize crashes and save files.
Tools & Materials
- Microsoft account(Needed to sign in and access Minecraft Java Edition.)
- Minecraft Java Edition license(Purchased from an authorized retailer or minecraft.net.)
- Official Minecraft Launcher(Download from the official site.)
- Compatible computer (Windows/macOS/Linux)(Ensure your OS is supported and you have admin rights to install.)
- Stable internet connection(Needed for downloading game data and signing in.)
- Backup storage (optional but recommended)(Back up worlds before mods or major changes.)
- Java Runtime (if using non-official launcher)(Most setups bundle Java; keep handy if needed for alternative launchers.)
Steps
Estimated time: 15-45 minutes
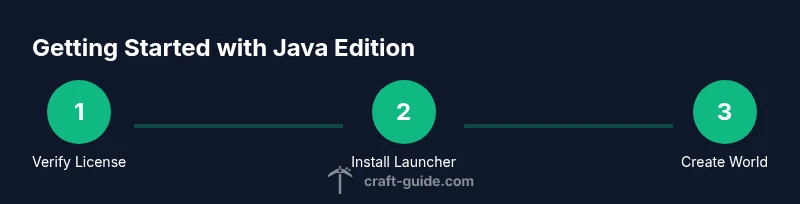
- 1
Verify license ownership
Confirm you have a valid Minecraft Java Edition license and that your purchase receipts are accessible. This prevents login errors and ensures access to updates. If you’re transferring from an older account, follow the on-screen prompts to link it to a Microsoft account.
Tip: Have your purchase email or receipt handy to speed up verification. - 2
Download the official launcher
Visit the official Minecraft site and download the official launcher for your operating system. Run the installer and follow the on-screen prompts to complete installation. The launcher manages game versions and updates.
Tip: Always download from the official site to avoid fake installers. - 3
Sign in with your Microsoft account
Open the launcher and sign in using your Microsoft account credentials. Enable two-factor authentication if available for extra security. This step authenticates your ownership of Java Edition and enables online features.
Tip: If you forget your password, use the account recovery options immediately. - 4
Install the base game
In the launcher, select the default Java Edition profile and click Install to download the base game. Ensure you have enough disk space for the game files and future updates.
Tip: Perform the install on an SSD if possible for faster loading times. - 5
Launch and create a world
Click Play to launch the game. In the main menu, choose Singleplayer or Multiplayer, then create a new world. Configure name, game mode, and seed preferences if you want a unique terrain. This is your first sandbox, so take time to explore.
Tip: Starting in Creative mode can help you learn controls before Survival challenges. - 6
Adjust settings for performance
Open Settings to tailor graphics, controls, and audio. Lower render distance, disable fancy graphics if needed, and adjust keybinds for comfort. Save these settings so future sessions launch with your preferred setup.
Tip: Test performance by reloading a world after changing settings to see real impact. - 7
Back up and plan next steps
Create backups of your world files, especially before adding mods or resource packs. Plan next goals, such as building a starter base, gathering resources, or joining a server to expand your experience.
Tip: Automate backups with cloud storage or a local backup tool if you’re tackling long-term projects.
People Also Ask
What do I need to start Minecraft Java Edition?
You need a valid Minecraft Java Edition license, a Microsoft account, the official launcher, a compatible computer, and an internet connection to download and sign in. Once set up, you can create your first world or join a server.
To start, you’ll need a valid license, a Microsoft account, the launcher, and an internet connection to sign in and download the game.
Do I need internet every time I play?
Initial login and launcher updates require internet. After that, you can play offline in existing single-player worlds, but many features like servers and cloud saves require a connection.
Internet is needed for login and updates; offline play is possible for your existing worlds, but servers require online access.
Can I play Java Edition on Linux?
Yes. Minecraft Java Edition runs on Linux with the official launcher. Ensure you have a compatible JRE if your distribution requires one, and follow the launcher instructions for Linux.
Java Edition is available on Linux with the official launcher; just follow the standard setup steps for Linux distributions.
Is Java Edition cross-platform with Bedrock?
Java Edition and Bedrock Edition are separate and do not directly connect to each other. You’ll need Java Edition on PC to access PC-specific features like mods and servers.
No, Java Edition doesn’t natively cross-play with Bedrock Edition; they’re separate ecosystems.
How do I fix login or launcher errors?
First, verify your license, check internet connectivity, and ensure the launcher is up to date. If problems persist, try signing out and back in, or reset the launcher data via its settings.
Check your license and internet, update the launcher, and re-sign in. If needed, reset launcher data.
Where can I buy Minecraft Java Edition?
Purchase Minecraft Java Edition from the official site or authorized retailers. After purchase, use the launcher to download and install the game.
Buy it from the official site, then use the launcher to install and start playing.
Watch Video
The Essentials
- Verify ownership before attempting login.
- Use the official launcher for stability and updates.
- Customize settings early for a smoother start.
- Back up worlds before mods or major changes.
- Explore both singleplayer and multiplayer to broaden your experience.