Power Rails Guide for Minecraft: Step-by-Step Tutorial
Learn how to make power rail in minecraft with a clear materials list, crafting steps, and wiring tips to create efficient minecart networks. This guide covers crafting, placement, powering, layouts, and troubleshooting for smooth rail systems.

In this guide, you’ll learn how to make power rail in minecraft, including the required materials and a clear, step-by-step method to craft powered rails and wire them for consistent minecart speed. You’ll also get optimization tips for rail networks. This quick answer gives you the basics, then the body blocks dive into materials, layout, and safety tips.
What powered rails do in Minecraft
Powered rails are a key component for any rail network in Minecraft. If you're curious about how to make power rail in minecraft, you’ll want to understand that energized rails push minecarts forward, while unpowered rails keep them at a steady pace when a cart passes over them. In practice, powered rails are used to accelerate carts, create long stretches with consistent speed, and enable dynamic routing in complex tracks. They’re especially useful in desert temples, mine entrances, or any long tunnel where you want to avoid creeper-assisted slowdowns. This section covers the fundamentals: what the rails do, how they interact with redstone power, and why planning power sections ahead improves your overall rail design. You’ll also see how to balance powered and normal rails to avoid unwanted acceleration or deceleration leaks along your route.
Materials you’ll need
To build and power rails effectively, you’ll gather a few core items. The exact counts depend on your project size and version, but you’ll typically need craftable rails, a power source, and a crafting table. Keep in mind that the in-game recipe book will show the current layout for powered rails in your version. Also plan for storage and for replenishing power if you run long tunnels. A well-planned stock of rails and torches keeps your network moving without constant trips back to a furnace lane.
- Crafting table
- Gold ingots
- Redstone torches
- Sticks
- Redstone dust (optional for certain powering methods)
Crafting power rails
Crafting powered rails requires a specific recipe within a 3x3 crafting grid. The exact arrangement can vary between Minecraft versions, so always check the in-game recipe book for your current build. In general, you’ll combine gold ingots with a redstone component and a basic support piece to yield powered rails. After gathering the materials and confirming the recipe, place the items in the grid, craft the rails, and move them to your inventory. If you’re playing in a world with custom data packs, the recipe might differ, so rely on the recipe book and any notes from your server or modded setup.
Placing and powering rails
Once you have powered rails, decide where to place them along your track. Rails can be energized by power sources such as redstone torches or power blocks placed beside or beneath the rail segment. A common approach is to put a power source beneath the rail so the track remains flat and unobstructed, then extend power along the line as needed. When you power a rail, minecarts will accelerate as they pass over it. In long tunnels, stagger power sections to maintain momentum without overheating the system or draining resources.
Common layouts and best practices
A robust rail network uses a mix of powered and regular rails to control speed, direction, and energy efficiency. Start with straight runs, then test acceleration at several points to ensure consistent speed. For curves, keep powered rails spaced so carts don’t slow down excessively. If your network branches, place power sections at the branch points to keep all carts moving. Plan ahead for expansions by leaving space for additional power sources and avoiding dead zones where a cart could come to a stop. Finally, keep your power sources accessible for quick repairs or re-wiring when you expand the track.
Troubleshooting and safety
If rails aren’t moving carts, check the power sources first. Ensure a power source is directly adjacent to or underneath the rail, and verify that the rail segment is not blocked by a solid block. If you’re using multiple power sources, ensure there is no interference from lighting or other redstone devices that might drain or disable power. For long tunnels, consider splitting the track into powered segments to reduce energy loss and simplify troubleshooting. Always test with a few minecarts before committing to a full build, and watch for creeper or skeleton interference in exposed areas.
Tools & Materials
- Crafting table(Set up a 3x3 crafting grid on solid ground)
- Gold ingots(Harvest from ores or trade with villagers; used in the rail recipe)
- Redstone torch(Crafted from redstone dust and sticks; powers rails when placed near them)
- Stick(Crafted from wooden planks; used in some component recipes)
- Redstone dust(Collected from redstone ore; powers nearby rails when connected to a power source)
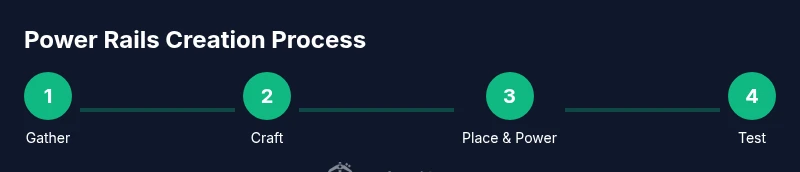
Steps
Estimated time: 15-25 minutes
- 1
Gather materials
Collect gold ingots, redstone dust, a few sticks, and a crafting table. Confirm you have everything you need before starting the craft. This reduces back-and-forth trips and keeps your build flowing.
Tip: Check your world’s version in-game to confirm the exact recipe before gathering materials. - 2
Open crafting table
Right-click or use the action button to open the 3x3 crafting grid. Ensure you have a stable area to place the rails and a nearby power source for testing.
Tip: Having an organized workbench area speeds up the crafting process. - 3
Place items to craft
Place the required items in the grid following the current recipe shown in your craft book. The exact arrangement may vary by version, so rely on the in-game guide rather than memory.
Tip: If your recipe changes in a patch, re-check the recipe book to avoid wasted materials. - 4
Craft powered rails
Craft the powered rails and move them to your inventory. Keep a few extra rails on hand for adjustments during layout.
Tip: Craft extra rails for testing different track layouts. - 5
Plan track layout
Decide where you want to place powered rails. Consider straightaways, curves, and intersections. Sketching a quick layout helps visualize energy needs.
Tip: Position power sources where you’ll easily access them during maintenance. - 6
Place rails on ground
Lay down the rails along the planned route. Ensure there are no intersecting blocks that would obstruct minecarts.
Tip: Leave space for future extensions and power sources as your rail network grows. - 7
Power the rails
Power adjacent or beneath each rail segment using redstone torches or power blocks. Test a short section first to verify it accelerates as expected.
Tip: Avoid powering too many rails at once in small builds to reduce lag or resource use. - 8
Test and adjust
Run a minecart over the track to observe speed and behavior. If sections slow or stall, adjust spacing or add power sources as needed.
Tip: Experiment with different spacing to find the most reliable balance for your setup.
People Also Ask
What is a power rail used for?
Powered rails speed up minecarts when energized. They’re essential for long tracks and busy networks. If you’re planning a railway system, powered rails help maintain momentum and reduce stalls.
Powered rails speed up minecarts and are essential for long or busy tracks.
What materials are needed to craft powered rails?
The exact recipe varies by game version. Check the in-game recipe book to confirm the current materials and layout for your build.
Check the in-game recipe book to confirm the exact materials for your version.
How do you power rails?
Power sources like redstone torches or power blocks energize rails when placed adjacent or beneath them. Place power sources at intervals to maintain momentum along long stretches.
Use nearby redstone torches or blocks to energize rails at intervals.
Do powered rails work in all versions?
Behavior and recipes can change with updates. Always refer to the version’s notes or craft guide for the exact setup.
Recipes and behavior can change with updates; check version notes.
Can I use non-powered rails for curves?
Yes, non-powered rails work for directing carts, but powered rails are needed to accelerate or maintain speed.
Non-powered rails guide carts; powered rails accelerate and maintain speed.
What’s the best way to test a new rail network?
Run a minecart across the network after each major change and observe where carts slow down or stop. Tweak power sources and spacing as needed.
Test with a minecart after changes and adjust spacing as needed.
Watch Video
The Essentials
- Gather materials and verify the in-game recipe.
- Craft powered rails using the official recipe in your crafting table.
- Place rails along the track and set a redstone power source.
- Test the minecart path and adjust spacing for consistency.
- Regularly inspect power blocks to keep trains moving smoothly.