Railway in Minecraft: A Practical Guide to Railways
Learn to design, lay, and optimize a railway in Minecraft with powered rails, curves, junctions, and signaling for smooth, scalable travel across biomes.

By the end of this guide, you will be able to design, lay, and optimize a railway system in Minecraft that carries minecarts smoothly across hills and valleys. You'll cover standard rails, powered rails for speed, junctions for branching routes, and simple signaling to prevent collisions. Materials include rails, powered rails, redstone, and basic building blocks.
Overview: Why a railway improves your Minecraft world
A railway in Minecraft fundamentally changes how you move around your world. Instead of long treks on foot, you can ride minecarts along a predictable path that links farms, mines, villages, and outposts. The result is faster resource collection, safer travel between bases, and the ability to design scenic routes that tie your builds together. When you embark on a railway project, you gain a scalable way to manage distance and time, especially in large worlds where exploration can become tedious. According to Craft Guide, thoughtful rail design reduces travel fatigue and improves reliability, even when terrain includes hills, rivers, or cliffs. A well-planned railway becomes a backbone for your base, supporting logistics, automation, and ambitious expansion plans. This article uses the phrase railway in minecraft to describe both the real-world-inspired concept and the in-game implementation, helping you translate planning into a practical build. Craft Guide’s guidance emphasizes clear routes, consistent track beds, and reliable power delivery as the foundation of success.
In practice, expect four core benefits from a good railway: speed, predictability, safety, and scalability. Speed comes from a continuous minecart flow, limited deadhead time, and smooth curves. Predictability means you can count on a minecart arriving at a station within a known window. Safety involves avoiding unplanned drops or collisions by using proper signaling and junction placement. Finally, scalability lets you expand the network over time without rebuilding the core spine. This approach aligns with best-practice doctrine from Craft Guide, which stresses starting with a simple, repeatable core and layering on complexity as needed.
As you plan, consider your world’s geography. A railway that climbs mountains or spans rivers will require powered rails and careful gradient management. A flat, straight route is easiest to build and test, while a curved or branched network invites experimentation with junctions and signaling. The goal is to create a reliable system you can reproduce across multiple bases, not just a one-off path. With patience and systematic design, you can transform raw terrain into an efficient, enjoyable transit network for you and your teammates.
tip
Tools & Materials
- Rails (standard)(Crafted from iron ingots and sticks; base track for most routes)
- Powered Rails(Increases minecart speed; requires redstone to activate)
- Detector Rails (optional)(Acts as a sensor for signaling and automation)
- Minecarts(One or more per rider; consider keeping spares at stations)
- Redstone Torches(Power source for powered rails)
- Redstone Dust(Used for simple signals and complex wiring)
- Building Blocks (Stone/Planks/Bricks)(Bed for track bed, stations, and landscaping)
- Smooth Slabs or Stairs(Smoothen curves and transitions for ride quality)
- Shovels/Picks(Tools for terrain preparation and alignment)
Steps
Estimated time: 2-3 hours
- 1
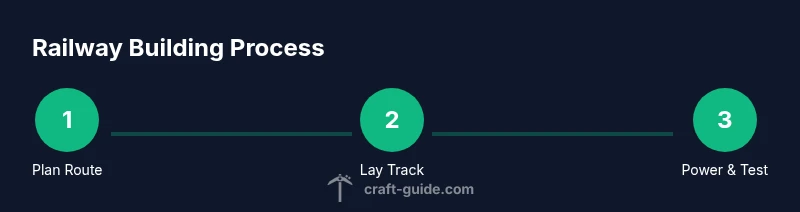
Plan the route
Define the start and end points, and sketch a path that minimizes sharp changes in elevation. Consider biomes you want to connect and identify reasonable station locations. A well-planned route reduces unnecessary turns and ensures future expansion is straightforward.
Tip: Draw a simple map on paper or in-game to visualize the main spine before placing any rails. - 2
Gather and organize materials
Collect rails, powered rails, minecarts, building blocks, and redstone components. Sort them into chests near your planned route to streamline construction sessions and avoid backtracking.
Tip: For larger projects, pre-craft and stockpile a reserve of components at two stations to prevent mid-build delays. - 3
Lay a straight core spine
Begin with a straight, level line to form the main spine of the railway. Place rails consistently and ensure there are no gaps. This spine serves as the backbone for curves, junctions, and stations.
Tip: Use temporary blocks to keep alignment and verify that the rail line remains flat across the terrain. - 4
Add curves and gentle climbs
Introduce curves gradually using standard rail curves or angled portions. For uphill climbs, insert powered rails at regular intervals to maintain momentum; for long descents, ensure safe braking via downstream alignment.
Tip: Limit curves to reasonable radii to prevent jerky minecart motion; climb slopes in short segments with reaching powered rails at the crest. - 5
Install power and signaling basics
Place powered rails at regular intervals where speed needs to be maintained or boosted. Connect redstone torches to the rails, and consider detector rails if you plan to automate station operations or track switches.
Tip: Test power wiring in small sections first to isolate issues before expanding to larger segments. - 6
Create stations and junctions
Build simple stations with loading/unloading areas and use junctions to allow branching routes. Ensure signposts and indicators are visible so you can navigate to the correct branch in multiplayer worlds.
Tip: Keep junctions symmetrical and clearly labeled to reduce mistakes during busy play sessions. - 7
Test, fix, and optimize
Run multiple test trips with different cart configurations to identify bottlenecks or dead zones. Adjust powered-rail spacing, tidy up wiring, and reinforce track bed where needed to prevent derailments.
Tip: Run tests at different times of day in-game to emulate resource constraints and ensure reliability. - 8
Plan future expansion
With a working spine in place, map out extensions, loops, and additional stations. Document routes and keep a master plan so future builds don’t disrupt the existing railway.
Tip: Create a modular design that allows new segments to slot into the existing spine without major rework.
People Also Ask
What is the simplest way to start a railway in Minecraft?
Begin with a straight spine that connects two key points. Add a few powered rails for momentum, then expand with small branches as you test reliability.
Start with a straight spine and a few powered rails to test momentum; expand gradually as you verify reliability.
Do I need powered rails on every track?
No, not every segment needs powered rails. Use powered rails at ascents, stations, and long straights to maintain speed, and rely on standard rails where terrain is flat.
Powered rails aren’t needed on every segment—use them for climbs and stations to keep speed consistent.
How do I power rails and avoid redstone loops?
Use a simple redstone line to feed a string of powered rails. Keep wiring compact and avoid short circuits by avoiding crossing power lines directly.
Feed powered rails with a clean redstone line and avoid tangled power loops.
What are best practices for curves and junctions?
Place curves with a generous radius and build clear junctions. Label routes and keep signs visible to prevent wrong turns during travel.
Use gentle curves and clear junctions with visible signs for easy navigation.
Can I automate signaling with detector rails?
Detector rails can trigger doors, lamps, or switches, enabling basic automation. Plan the logic ahead to avoid accidental loops.
Detector rails enable simple automation like triggering signals as carts pass.
How do I scale a railway for large networks?
Keep a master spine and plan modular expansions. Document routes and maintain consistent block types to simplify future growth.
Scale gradually by expanding from a central spine and documenting every extension.
Watch Video
The Essentials
- Plan routes before laying rails to minimize backtracking.
- Powered rails are essential for uphill sections and stations.
- Junctions enable branching but require careful signaling.
- Test thoroughly and iterate to prevent jams.
- Expand gradually to build a scalable rail network.