How to Build a Railway in Minecraft
Learn to build a practical and expandable Minecraft railway, with powered rails, curves, stations, and signaling. This step-by-step guide suits beginners and seasoned builders seeking efficient layouts and reliable minecart transport.

You’ll learn to plan, lay a base rail system, add powered rails for speed, and design stations and signaling for smooth minecart travel. The guide covers rail types, layouts, and testing to ensure reliability, expandability, and easy maintenance as your Minecraft world grows.
Design goals and planning
Before placing any rail, define the route's core goals: efficiency, aesthetics, and future expandability. In Minecraft, scalable tracks begin with a clear plan, a main straight line, and well-placed branches. According to Craft Guide, thorough planning reduces misplacements and backtracking, saving time during the build. Start by sketching a rough map of terrain, noting elevation changes, water, and potential station sites. Decide on track width, tunnel or bridge needs, and how you’ll handle curves. Consider whether you want a simple testing loop or a larger network connecting multiple bases. Write down required components and craft a basic shopping list. A solid plan minimizes rerouting and streamlines sequence of operations, especially on large maps or multiplayer servers.
Rail types and basic components
Minecraft offers several rail variants to support different functions. The basic rail provides a straightforward path for minecarts and forms the backbone of any railway. Powered rails accelerate and maintain speed, especially on inclines; place them at intervals and power with redstone. Detector rails can trigger redstone devices when a cart passes, enabling automations like gates or signals. Minecarts are the vehicles you’ll use to test traffic. Build a simple loop or straight segment first to understand how carts interact with rails. Remember that rails require solid support blocks; use a stable bed such as dirt or stone under the track. If you plan to tunnel or go underground, account for height clearance and ventilation. This section lays the foundation for more advanced layouts and helps prevent misalignment later.
Materials and planning for supply
Gathering materials before you start saves time and prevents mid-build shortages. Collect rails in their variants (normal, powered, detector) as per your design, along with minecarts for testing. Prepare solid blocks for the track bed and walls, plus a crafting table and basic tools like a shovel and pickaxe. Redstone dust or other powering items are needed to energize powered rails. Always check your game version to confirm crafting recipes and rail behavior, as updates can change how things work. Create a rough bill of materials that includes at least twice the number of rails you expect to place, allowing for mistakes and detours. Label chests so teammates can gather what they need. Planning materials first reduces interruptions and keeps momentum. Craft Guide Analysis, 2026 emphasizes predictable supplies for larger projects.
Laying the base track layout
Begin with a straight segment to set the rhythm, then add curves and turns while maintaining a gentle gradient. Place rails on flat ground or gently slope them to avoid derailments. Ensure each straight section is long enough for safe deceleration and acceleration. When curving, use a gentle radius to minimize speed loss; in tight spaces, consider a longer layout with a small tunnel or bridge. Use temporary blocks to hold the line during alignment, then replace them with final blocks. Test with a single minecart to confirm alignment, gravity, and collision avoidance. This stage establishes a reliable foundation for long-distance travel. Pro tip: keep a reference diagram handy to avoid misalignment.
Power, signaling, and speed control
Strategically place powered rails along gradients and long straightaways to keep carts moving smoothly. Space powered rails evenly to prevent stalls, and power them with a reliable source (redstone signals or torches behind blocks). Introduce signaling concepts using detector rails or visible blocks to notify other players or automated systems when a cart passes. Choose a speed balance that feels natural; too fast on uneven ground increases risk of derailment. Test with different cart loads to ensure stability. This section helps you prevent chokepoints and manage traffic efficiently.
Station design and traffic flow
Design stations that accommodate boarding, alighting, and orderly departure. Build platforms on both sides of the track for two-way traffic or single-wide platforms for simplicity. Include signage, lighting, and easy access to main routes. Plan clear entry/exit paths for carts to reduce crowding and accidental derailments. Store spare rails and minecarts near stations for quick maintenance. A well-planned station system reduces wait times and improves overall experience for players and guests.
Advanced layouts: junctions, loops, and double-track design
For complex networks, introduce junctions with careful alignment to minimize misclicks and cart collisions. Mirror patterns on double-track sections to allow bi-directional travel without interference. Use longer curves and multiple rails to handle varying cart speeds, and consider small bridges or tunnels to maintain a smooth route. When expanding, add new branches gradually to keep testing manageable. Reference simple schematics and test each addition with at least one minecart before committing to the live map.
Troubleshooting common issues
Common problems include misaligned rails, derailed carts on curves, and stalled trains on inclines. Re-check ground support blocks and ensure there are no gaps in the rail bed. If carts stall, re-evaluate the spacing of powered rails and the gradient of the track. For congestion, consider adding passing loops or additional parallel tracks. Keep a maintenance kit handy: extra rails, blocks, and a spare minecart.
Aesthetics, expansion, and maintenance
A railway should look as good as it functions. Add rail-side lighting, landscaping, fences, and signs to guide travelers. Plan for expansion by leaving space for future branches and stations. Regularly inspect rails for wear, adjust alignments after terrain changes, and upgrade stations as your world evolves. A well-maintained network remains enjoyable for players and reduces future headaches.
Testing and iteration
Test the entire route under various conditions—different cart loads, speeds, and times of day—to identify weak points. Walk the route to check for hidden gaps or blocks that may cause derailments. Iterate on track layout, rail spacing, and station timing until the system runs smoothly. Keep notes on changes and update your schematic for teammates to follow. Continuous testing ensures durability as your world grows.
Tools & Materials
- Rails (normal)(Critical for the base track. Ensure you have enough for planned length.)
- Powered rails(Needed to maintain speed on long runs and inclines.)
- Detector rails(Optional for automations and signaling.)
- Minecarts(Multiple carts help test traffic flow.)
- Redstone dust(Powers powered rails and signaling systems.)
- Blocks for track bed(Solid blocks (dirt/stone) under rails.)
- Crafting table(Needed to craft rails and related items.)
- Shovel(Prepare ground and clear terrain.)
- Pickaxe(Mine stone and adjust terrain as needed.)
Steps
Estimated time: 2-4 hours
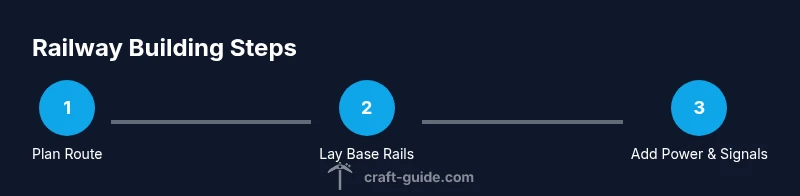
- 1
Plan the route
Define the goals, sketch the route, and note terrain features. Decide on straights, curves, stations, and potential branches. This planning reduces wasted work and helps coordinate with teammates.
Tip: Refer to Diagram RailLayout-01 for a quick schematic reference. - 2
Gather materials
Collect rails, minecarts, blocks for the bed, redstone, and crafting tools. Create a simple inventory checklist to avoid mid-build shortages.
Tip: Double-check version-specific recipes to avoid crafting errors. - 3
Lay the base track
Place a straight section to establish rhythm, then add curves with gentle radii. Ensure ground support and smooth alignment throughout the path.
Tip: Use temporary blocks to test alignment before finalizing. - 4
Install powered rails
Place powered rails along gradients and long straights to sustain speed. Space them evenly and wire them to redstone power sources.
Tip: Test with light cart loads first to gauge response. - 5
Test with minecarts
Run at least one cart along the entire route to check for misalignments, gaps, or derailments. Note any weak spots.
Tip: Keep a spare cart ready for quick testing during adjustments. - 6
Build stations
Create boarding platforms, stairs, and safe entry/exit paths. Add signage and lighting for visibility during night runs.
Tip: Ensure boarding zones align with the rails for smooth access. - 7
Add junctions and loops
If expanding, add junctions carefully with mirrored patterns to avoid collisions. Use loops to test traffic flow and prevent backups.
Tip: Test every junction with varying cart speeds. - 8
Implement signaling
Use detector rails or visible signals to manage train flow and prevent collisions. Plan simple, scalable signaling as you grow.
Tip: Document signal rules for multiplayer servers. - 9
Test under load
Simulate real operation by running multiple carts and trains simultaneously. Observe for slowdown or detours on inclines.
Tip: Adjust powered-rail spacing and gradient as needed. - 10
Finalize and expand
Lock in the current layout and plan future expansions. Update your schematic and communicate changes to teammates.
Tip: Keep a maintenance log to track changes and improvements.
People Also Ask
What is the first step to building a railway in Minecraft?
Begin with planning: map the route, identify terrain features, and decide on the overall layout. This helps prevent backtracking and saves time during construction.
Start with planning the route and layout to avoid backtracking later.
Which rails should I use for a simple track?
For a simple track, start with normal rails for the straight sections and powered rails for any required speed or elevation changes. Detectors can be added later for automation.
Use normal rails for basics, add powered rails on hills or long straightaways.
How can I power rails effectively?
Power rails with redstone sources or power signals. Place powered rails at regular intervals along climbs and long straights, then test with carts to balance speed.
Power rails with redstone so carts keep moving smoothly.
How do you prevent minecarts from derailing at turns?
Ensure rails have gentle curves and solid support. Test with carts and adjust gradient or rail bed to reduce wobble and derailment.
Make curves gentle and test with carts to prevent derailing.
Can I run a two-way railway safely?
Yes. Use double tracks with clear spacing and pillars or barriers to prevent collisions. Consider simple signaling to manage direction and timing.
Two-way tracks are possible with proper spacing and signals.
Is there a quick way to test and fix issues?
Run a small section with a few minecarts, observe behavior, and adjust rail alignment or gradient. Keep a log of changes for future reference.
Test small sections, then adjust as needed.
Watch Video
The Essentials
- Plan first, then build.
- Choose rail types based on terrain.
- Test early and test often with minecarts.
- Design stations for smooth traffic flow.
- Expand gradually to avoid overcomplication.