Minecraft to Command: Turning In-Game Actions into Commands
Learn how to convert common Minecraft actions into exact commands. A practical guide from Craft Guide covering block placement, entity spawning, and movement—with step-by-step examples and testing tips for beginners to advanced players.

You will learn how to translate common in-game actions into direct Minecraft commands. This quick guide covers identifying actions, choosing the right commands, and building simple examples. You’ll see how to convert block placement, entity spawns, and player movement into /give, /setblock, /summon, and related syntax, with version-specific notes for consistency, and practical testing tips for safe practice, collaboration, and reuse. for beginners and advanced players alike.
What "minecraft to command" means
"Minecraft to command" is a workflow that maps in-game actions—what you click, place, or spawn—onto exact command strings that reproducer or automate the same effect. This approach helps you build repeatable setups, test ideas quickly, and transfer builds between worlds or servers. The core idea is to capture a player action as a parameterized command and then adjust coordinates, targets, and data values to fit your world. When done well, your builds can be recreated with a simple copy-paste of commands. This block discusses how to think about actions, how to group related actions, and how to verify that the commands produce the same result as your in-game action, all while noting version-specific quirks that can affect selectors, coordinate syntax, and block data.
Core command syntax you’ll use
Most Minecraft commands share a basic structure: a slash command name, then a space, then data arguments that specify what to act on, and optional targets or data values. The essential commands you’ll rely on include /give for items, /setblock for changing blocks in the world, /fill for large-area edits, /clone for copying structures, /tp for movement, and /summon for creating entities. You’ll also encounter /execute to layer commands in context. A minimal example: /give @p minecraft:stone 64 to grant a player 64 stone blocks. As you translate actions, you’ll customize target selectors, coordinates, block types, and NBT data to reflect your exact in-game scenario.
Translating block placement to commands
Translating a block placement from the game into a command requires capturing the block type, coordinates, and any facing or metadata. The typical pattern is: /setblock x y z block_name [data_value] [replace|keep], followed by parameters for exact data values. For example, placing a stone block at a specific coordinate: /setblock 100 64 -20 minecraft:stone replace. If you need a block with orientation, such as a stair facing east, you’ll append the data value or use NBT. For larger areas, /fill replaces blocks in a rectangle, with: /fill x1 y1 z1 x2 y2 z2 minecraft:stone 0 replace. The goal is to produce a repeatable script that mirrors your in-world placement using coordinates and block IDs.
Spawning entities and mobs via commands
Entity creation is a core part of translating actions. The /summon command creates a single entity at a location or relative to another object, while /execute can scope the spawn to a certain condition. Example: /summon minecraft:zombie ~ ~1 ~ {isbaby:0} creates a standard zombie above the command block. You can also specify rotation, names, or equipment through NBT data. When translating an action like “spawn a hostile mob in front of the player,” you’ll compute the coordinates relative to the player and use a targeted /summon with data values that reflect desired attributes. This approach enables precise scripting for adventure maps or automated defense farms.
Moving players and entities with /tp and /summon
Player and entity movement can be scripted with /tp and relative coordinates. Example: /tp @p ~1 ~0 ~0 teleports the nearest player forward by one block. For mobs or NPCs, you can combine /summon with a specific spawn location and anchor coordinates so that the entity appears in the intended position. When your action is about repositioning a group, use the target selectors with a loop-like structure in your command files, if supported by your server or launcher. This ensures consistent movement across sessions.
Using /execute to chain actions and context
The /execute command lets you apply a command under certain conditions, such as location, nearest player, or entity type. A typical pattern uses a subcommand like /execute as @e[type=zombie,distance=..5] run say Hello to spawn a message. You can chain multiple actions, for example: /execute as @p at @s run summon minecraft:zombie ~ ~ ~ {CustomName:"Helper"} run setblock ~ ~1 ~ minecraft:stone. This capability enables context-aware builds where one action triggers several dependent outcomes, closely mirroring complex in-game sequences.
Working with command blocks and data values
Command blocks store commands that run automatically in response to redstone or timers. You’ll learn to place a command block, wire it to redstone, and program it with a single command or a chain of commands, using conditional vs. unconditional modes. You’ll also learn to edit NBT data or block states to tailor behavior, such as conditional chain blocks that only fire when the previous block succeeds. This is essential for large builds that rely on automation and timing to reproduce the exact actions you’ve translated to commands.
Testing, debugging, and version differences
Testing is essential when translating actions to commands. Build a controlled test world, document each command, and verify outcomes by comparing visuals, entity counts, and world state. Version differences can alter selectors, coordinate range, and data tags, so you should confirm compatibility with your target Minecraft version. Maintain a simple changelog that notes changes in syntax or behavior between versions, keeping a reusable template that you can apply when upgrading. A disciplined approach minimizes surprises and helps you scale from small experiments to full builds.
Practical build workflow: from idea to command file
A practical workflow starts with a concept sketch, then a mapping list of actions to commands. You’ll draft templates for common actions (placing blocks, spawning mobs, moving players) and test them in isolation before combining them into larger scripts. Save each command as a line in a .txt file, annotate with comments using // or #, and group related commands into function-like blocks if your environment supports them. Finally, run tests in a safe creative world, adjust coordinates for your map, and refine NBT data to reflect your custom preferences. This process turns vague ideas into reliable, reusable command sets.
Common patterns and templates you can reuse
To speed up your translations, create a library of templates for frequent tasks. For example, a block-placing template uses /setblock with a coordinate parameter and block ID, a spawn template uses /summon with optional NBT data, and a movement template uses /tp with relative coordinates. You can externalize these into a shared module or script, annotate with notes about when to adjust, and tailor to different world layouts. Over time, your templates become a potent toolkit that makes translating actions into commands fast, accurate, and scalable across multiple projects.
],
toolsMaterials({
items
Tools & Materials
- Minecraft installed (Java Edition recommended)(Ensure you can run single-player test worlds or a local server.)
- Text editor or IDE(For editing command files and NBT data templates.)
- Creative test world(Use a fresh world with cheats enabled for testing.)
- Reference sheet of core commands(Keep a quick syntax cheat sheet handy.)
- Pencil and planner(Sketch actions before translating to commands.)
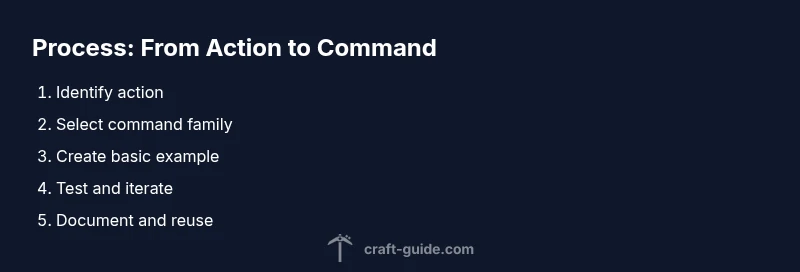
Steps
Estimated time: 45-60 minutes
- 1
Identify the action to translate
Choose a concrete in-game action to translate, such as placing a block or spawning a mob. Note the target coordinates, object type, and any conditions. This first step establishes scope for the command(s) you will write.
Tip: Write the action in plain language first, then map to exact command syntax. - 2
Select the command family
Pick the appropriate command family (setblock for blocks, summon for entities, tp for movement, etc.) based on the action. This decision reduces complexity and organizes your translation strategy.
Tip: Think in terms of what the command changes rather than how it changes it. - 3
Create a basic command example
Write a minimal, working command for the action with placeholder coordinates. Verify the syntax by running it in a test world and observe the outcome.
Tip: Start simple; verify core functionality before adding data values. - 4
Test in a safe environment
Run the command in a controlled creative world. If needed, duplicate the area to compare expected vs. actual results. Correct any errors related to coordinates or data tags.
Tip: Keep a test map separate from your main project. - 5
Expand to a template or script
Once you have a working command, generalize it by parameterizing coordinates and data so it can be reused in multiple situations. Document the inputs clearly.
Tip: Use placeholders like {x}, {y}, {z} for easy reuse. - 6
Save, document, and reuse
Store the final commands in a file or function set with comments explaining each line’s purpose. This makes it easy to reproduce the build in other worlds or share with teammates.
Tip: Maintain a changelog and version the files for upgrades.
People Also Ask
What does \"minecraft to command\" mean in practice?
It means turning in-game actions into exact command strings so you can reproduce or automate those actions. This includes block placement, entity spawning, and movement, expressed as /setblock, /summon, /give, and related commands.
It means turning what you do in-game into exact command strings to reproduce or automate actions.
Which commands should I start with when translating actions?
Begin with simple, foundational commands like /give for items and /setblock for blocks. As you grow comfortable, add /summon, /tp, and /execute to build more complex sequences.
Start with /give and /setblock, then add /summon and /tp for more complexity.
How do I test commands safely?
Test in a dedicated creative world with cheats enabled. Compare expected vs. actual results and keep a change log to track what you changed.
Use a dedicated test world with cheats enabled to safely check your commands.
Can I translate redstone sequences into commands?
Yes, but redstone circuits can be complex. Break the sequence into individual actions, translate each into commands, and then chain them with /execute or function blocks.
You can, by breaking complex redstone actions into individual command steps and chaining them.
Are there version differences I should know about?
Yes. Command syntax, selectors, and data tags can vary between Minecraft versions. Always test in the target version and note any changes in your templates.
Commands can change between versions, so test in the version you’re targeting.
What is the best workflow to translate actions into commands?
Plan actions on paper, map to commands, test each one in a safe world, then package into templates or functions for reuse.
Plan first, test often, and reuse templates for efficiency.
Watch Video
The Essentials
- Translate actions into repeatable commands
- Use a safe test world to verify commands
- Document templates for reuse
- Version-aware testing improves reliability