Minecraft Mod Server Hosting: A Complete Setup Guide
Learn how to choose, install, and manage Minecraft mod server hosting with practical steps. Cover Forge/Fabric, mod management, performance tuning, backups, and security for smooth multiplayer.

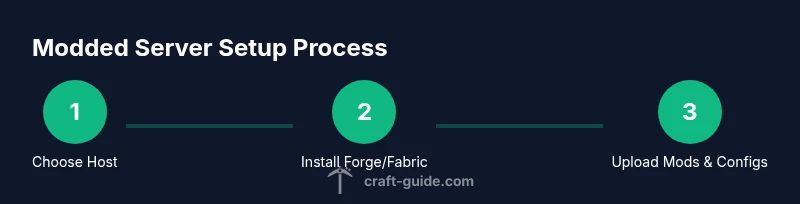
According to Craft Guide, in this guide you’ll learn how to choose a hosting plan, install Forge/Fabric, upload mods, and run a stable Minecraft mod server hosting setup. We cover performance, security, and practical tips tailored for mods and multiplayer, with budget-conscious recommendations and best practices drawn from Craft Guide analysis. By the end you’ll have a clear, actionable setup plan.
What is Minecraft mod server hosting?
Minecraft mod server hosting means choosing a provider and configuring a server that runs Forge or Fabric mods alongside the base game. It enables you to run custom mod packs, install server-side mods, and host multiplayer games with friends or a community. Unlike vanilla hosting, mod server hosting requires compatible mod loaders, a predictable Java version, and more memory headroom to keep mods responsive. According to Craft Guide, the right hosting setup starts with a clear mod list and a compatible launcher environment. Understand your goals: number of players, desired mod depth, and whether you want on-demand backups or automatic updates. This decision shapes the plan you choose, from entry-level to high-capacity offerings. In practice, you’ll balance technical needs with budget, then scale as your community grows.
Why modded hosting requires different resources
Mods add code, scripts, and assets that run on the server. This increases CPU cycles, RAM usage, and disk I/O, especially when players explore large tech trees, magic systems, or voxel-heavy worlds. Forge and Fabric mod loaders differ in how they load mods at startup, which affects startup time and memory fragmentation. Craft Guide analysis shows that most modded servers benefit from at least 1-2 GB more RAM than equivalent vanilla setups for small groups, with additional headroom for large mod packs. Plan for peak load: allocate RAM for the loader, the modded game, and any plugins that run in parallel. Consider storage speed (SSD recommended) and network bandwidth, since mods can increase world size and datapack usage. Finally, ensure your chosen host supports the specific Minecraft version and mod loader you intend to run, without forcing you into frequent migrations.
Key considerations when choosing a host
- Mod compatibility: Verify Forge/Fabric versions match your mod list.
- Server specs: RAM, CPU, and SSD speed determine how smoothly mods run under load.
- Control panel: A user-friendly interface makes updating mods, managing backups, and adjusting settings easier.
- DDoS protection and backups: Public modded servers need robust security and scheduled snapshots.
- Scalability: Look for easy upgrades as your mod suite grows or player count increases.
- Support and reputation: Check response times and community feedback. According to Craft Guide, a thoughtful blend of specs and tooling reduces friction during growth and minimizes downtime.
Forge vs Fabric and mod loader compatibility
Forge is the de facto standard for many popular mods, offering broad compatibility but sometimes slower startup and heavier resource use. Fabric focuses on lightweight, modular design and faster startup, which can be ideal for servers with smaller mod lists or frequent mod updates. Your choice affects mod compatibility, performance, and update cadence. If you plan to run a diverse mod pack, you may need both environments on different worlds or servers, or rely on loader adapters. Always confirm mod loader version compatibility before starting your server to avoid runtime crashes.
Installing Forge/Fabric and uploading mods
Begin by selecting the correct loader version that matches your mod list and Minecraft version. Upload the loader jars to the server's mod folder, then place your mods in the corresponding mod directories. Start with a small, test world to verify that mods load without crashes before migrating to a larger world. Keep a clean backup of your server files before adding new mods. If you need reference visuals, consult your host’s tutorials and the loader’s official docs. This step sets the foundation for a stable, modded multiplayer experience.
Performance tuning and security best practices
Modded servers require careful RAM budgeting and CPU headroom. Monitor JVM flags and adjust heap size to optimize garbage collection and prevent crashes under peak load. Use SSD storage and ensure sufficient network bandwidth to keep player connections stable. Implement automated backups, firewall rules, and least-privilege admin access to reduce security risks. Regularly update mod loaders and mods to fix bugs and close security gaps. Finally, run performance tests with the expected player load to anticipate bottlenecks before players join.
Common pitfalls and safe practices
A common pitfall is mismatched mod versions across players, which causes crashes or desync. Always align client and server mod lists, and avoid mixing beta mods with stable builds. Another issue is insufficient backups, which can cause data loss after a crash or update. Establish a backup cadence (daily or per event) and store copies off-site if possible. Finally, avoid overloading the server with too many resource-intensive mods; scale gradually and monitor impact on TPS (ticks per second) to maintain a smooth experience for players.
The Craft Guide approach to mod server hosting
Craft Guide emphasizes a practical, scalable path: start with a modest hosting plan, confirm mod compatibility, and build up capacity as your community grows. A deliberate approach to performance tuning and backups protects you from common disruptions. For players at every level, the guide provides clear steps and checks to reduce guesswork and accelerate progress. By following a measured plan, you ensure a stable, enjoyable modded experience for your Minecraft community.
Tools & Materials
- Hosting plan with mod support(Choose a plan that meets RAM and CPU requirements for your expected player count and mod load.)
- Forge/Fabric launcher files(Identify the mod loader version compatible with your mods.)
- FTP/SFTP client or hosting panel file manager(For uploading mods and server files.)
- Java Runtime Environment (JRE) 8+ or Java 17(Check hosting provider requirements.)
- Mod packs and mods(Only compatible with your Forge/Fabric version.)
- Backups and snapshot tools(Optional but recommended.)
- Security tools (firewall, DDoS protection)(Important for public servers.)
- RCON/SSH access(Useful for admin automation.)
Steps
Estimated time: Estimated total time: 2-3 hours
- 1
Choose a hosting plan
Assess expected peak player count, mod depth, and required headroom. Compare RAM, CPU, and storage options. Select a plan that accommodates future growth and provides easy upgrades. If you expect frequent mod updates, prioritize providers with fast disk I/O and responsive support.
Tip: Pro tip: start with a slightly over-provisioned plan to avoid immediate upgrades during growth. - 2
Install Forge or Fabric on the server
Upload the loader for your chosen mod loader version and verify the launcher loads without errors. Ensure the Minecraft version matches all mods. This step determines compatibility and stability for subsequent mod installation.
Tip: Pro tip: use a clean test world first to validate mod loading before touching your main world. - 3
Upload mods and verify compatibility
Place mod files in the correct mod folder and check for version conflicts. Start the server in a test mode to confirm mods load and do not crash the server. Remove incompatible mods before proceeding to a full launch.
Tip: Pro tip: keep a changelog of mod versions to track updates and compatibility. - 4
Configure server settings for performance
Tune Java heap size, enable compression, and adjust tick rate settings for your hardware. Enable appropriate world and entity settings to balance performance with gameplay quality.
Tip: Pro tip: profile memory usage during peak times and adjust JVM flags accordingly. - 5
Set up backups and security
Configure automated backups, test restore procedures, and enable firewall rules. Create separate admin accounts with least privilege and apply strong passwords or key-based access.
Tip: Pro tip: schedule backups after major events or world changes to minimize data loss. - 6
Test with players and monitor
Invite a small testing group to join and stress test the server. Monitor TPS, latency, RAM usage, and CPU load. Collect feedback and adjust as needed.
Tip: Pro tip: use server dashboards to flag issues before players notice them. - 7
Scale and optimize over time
As the community grows, upgrade RAM/CPU, streamline mod lists, and optimize world settings. Regularly review backups, logs, and mod updates to maintain stability.
Tip: Pro tip: plan quarterly reviews of performance metrics and mod compatibility. - 8
Document your setup
Create a runbook detailing the chosen loader, mod versions, backup schedule, and admin credentials. This enables quick recovery and easier onboarding for new admins.
Tip: Pro tip: keep this document in a secure, access-controlled location.
People Also Ask
What is Minecraft mod server hosting and why is it different from vanilla hosting?
Mod server hosting runs Forge or Fabric alongside the base game, enabling mods that modify gameplay. It requires mod loaders, version compatibility, and typically more RAM and disk I/O than vanilla hosting. You must coordinate client and server mod lists for a stable multiplayer experience.
Mod server hosting runs Forge or Fabric with mods, requiring compatibility checks and more resources than vanilla hosting. Coordinate client and server mods for stability.
How much RAM do I need for a modded server?
RAM needs depend on the number of players and the mod load. Start with a baseline and increase as you monitor usage. Plan for headroom during peak times to avoid lag or crashes.
RAM needs depend on players and mods; begin with a baseline and expand as you monitor usage.
Can I run mods and plugins together on the same server?
Some servers support modded environments with specific plugin ecosystems, but compatibility varies. Ensure your mod loader version and plugin framework are compatible, and test in a controlled environment before opening to players.
Mods and plugins can work together in some setups, but check compatibility and test thoroughly.
What’s the best way to backup a modded server?
Use automated backups with periodic snapshots and test restoration regularly. Keep backups in a separate location and verify integrity after restoration.
Set up automated backups, test restores, and store copies offsite when possible.
How do I update mods safely?
Update mods in a controlled sequence: test in a staging world, check compatibility, then apply to the live server with a verified backup in place.
Test mods in a staging world first, then update live with a backup.
What should I monitor on a modded server?
Monitor TPS, CPU usage, RAM consumption, disk I/O, and player latency. Use logs to diagnose crashes and crashes to identify conflicting mods.
Keep an eye on TPS, CPU, RAM, and latency; use logs to diagnose issues.
Watch Video
The Essentials
- Choose a host that supports Forge/Fabric and matches mod requirements
- Plan for RAM and I/O headroom based on load and mods
- Validate mod compatibility before going live
- Prioritize backups, security, and scalable upgrades
- Document setup for smooth operations and onboarding