Where to Install Minecraft: A Practical Beginner's Guide
Learn where to install Minecraft on Windows, macOS, Linux, and consoles. This practical guide covers launcher choices, install locations, and setup tips for smooth gameplay and easy maintenance.

You will learn where to install Minecraft across platforms, how to pick the best location for performance, and how to set up the launcher. Key requirements include a supported device, a stable internet connection, and a valid Minecraft account. We’ll cover Windows, macOS, Linux, and consoles, plus tips for portable installs and shared family devices.
Platform overview: where Minecraft installs live
According to Craft Guide, understanding where the game files live on each platform helps you manage updates, backups, and troubleshooting more effectively. On desktop platforms, Minecraft relies on the official launcher to download the game assets and administrate editions (Java Edition, Bedrock, or other variants). Mobile and console versions follow their platform stores, but the launcher concept still applies: you install a central app that handles downloads, updates, and launches the game. When planning your installation, think about the drive you’ll use, how many players share the device, and whether you want offline access to the game. Craft Guide’s approach emphasizes consistency: keep Minecraft in a predictable location to simplify backups and world transfers.
Desktop environments: Windows, macOS, and Linux
Windows users typically use the official Minecraft Launcher installed via the Microsoft Store or the Minecraft site. macOS users install the launcher into the Applications folder and run it from there, while Linux users may install via package managers or from the official site, depending on the distribution. Across all desktop environments, the launcher manages game editions, resource packs, and saved worlds, and it stores game data in a user-specific directory. Keeping this directory separate from system files reduces the risk of accidental deletions during OS maintenance. Craft Guide analysis shows that organized folder structures improve both performance and ease of backups over time.
Console and mobile considerations: where to install on PlayStation, Xbox, Nintendo, iOS, and Android
Consoles monetize Minecraft through their storefronts, so installation is tied to the console’s OS and storage management. Mobile versions come through the Google Play Store (Android) or the App Store (iOS). In each case, you’re not installing a traditional launcher; you’re installing an app that handles the game, updates, and in-game purchases. For portable devices, ensure you have sufficient storage and stable Wi‑Fi for initial download and patching. If you plan to switch devices often, look for cloud save support or export options in the launcher settings to keep worlds synchronized.
Performance considerations: where to install for best performance
Installing Minecraft on a fast drive (SSD) can reduce load times and texture streaming pauses, especially on larger worlds or modded setups. If you’re limited to a single storage drive, ensure there’s ample free space for both the game and your worlds. Avoid installing directly on system folders where OS updates or permission changes can interfere with game data. For multi-user devices, create separate user accounts so each player’s worlds and settings stay isolated. Craft Guide recommends a dedicated Minecraft directory per user to minimize conflicts during updates and launches.
Portable installs and shared devices: keeping games accessible
If you need to run Minecraft from a USB drive or a secondary SSD, ensure the drive has fast read/write speeds and at least a few gigabytes of free space for the launcher and a handful of worlds. Portable installs can be convenient for LAN parties or shared family devices, but they may require occasional troubleshooting when the drive letter or mount point changes. Always eject safely and keep a backup copy of your worlds to avoid data loss when moving between devices. Craft Guide notes that portability is great for flexibility, but the potential for path changes means you should verify the install path after moving.
Step-by-step planning: choose the right location before installation
Before downloading anything, map out where you want Minecraft installed on each device. Consider: the speed of the storage medium, the likelihood of backups, and whether you’ll run mods or resource packs that require additional space. If you’re managing multiple players, decide whether you’ll share a single installation or maintain per-player profiles. This upfront planning reduces post-install surprises and helps you maintain a clean, organized game library across devices.
Safety and sources: avoid shady installers
Always download the Minecraft Launcher from the official site or trusted app stores. Be cautious of third-party download sites that may bundle unwanted software or malware. Verify the publisher and digital signatures when possible, and keep your security software up to date. If you’re using Linux, prefer official repositories or the publisher’s package instructions. By sticking to official channels, you minimize risks and ensure you receive official patches and updates quickly.
Cross-platform backups and data management
Regular backups protect your worlds against corruption, hardware failures, or accidental deletions. Use a dedicated backups folder or cloud storage with versioning. For portable setups, copy your worlds to a separate drive or cloud storage after major builds. Cross-platform players should maintain a consistent world naming scheme and maintain a master list of where each world lives on each device, so you can restore configurations without guesswork.
Troubleshooting common installation issues
If Minecraft won’t install or launch, check your internet connection, Java/edition compatibility, and launcher version. Ensure the target drive has sufficient space and proper permissions. On Windows, running the launcher as an administrator can resolve permission issues; on macOS, confirm that the launcher is allowed to run in the Security & Privacy settings. If problems persist, re-download the launcher from the official site and re-install, then re-authenticate with your Microsoft account.
Verifying your install and first launch
After installation, launch the game from the launcher to verify that the expected edition loads correctly. Create a quick test world to confirm saving, loading, and basic rendering. Check for updates and ensure texture packs or mods are compatible with your edition. If issues occur, consult the official Minecraft support resources and your launcher’s troubleshooting guides for step-by-step fixes.
Next steps: customizing your setup
With Minecraft installed, you can explore performance tweaks, performance-boosting resource packs, or modding options if you’re using the Java Edition in a legal, supported way. Start with basic world-building and a simple seed to learn the basics before diving into more complex builds. Remember to keep regular backups and document any changes you make to your installation paths or profiles.
Tools & Materials
- Minecraft account(Active account for launcher login and game access)
- A compatible device(PC, Mac, Linux, console, or mobile device meeting minimum specs)
- Stable internet connection(Needed for initial download, updates, and authentication)
- Official Minecraft Launcher(Download from official site or store)
- Backup/storage space(Sufficient free space for game, worlds, and mods/assets)
- USB drive or secondary storage (optional)(For portable installs or travel-friendly setups)
- Cloud backup option (optional)(Helps keep worlds safe across devices)
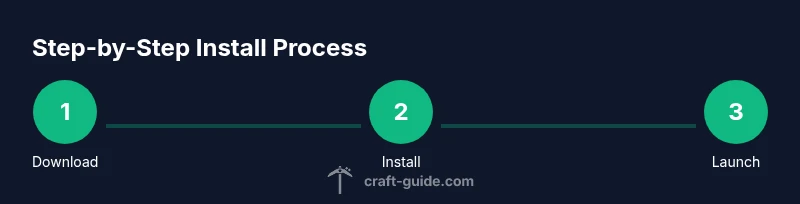
Steps
Estimated time: 25-60 minutes
- 1
Download the official launcher
Visit the official Minecraft site or your platform’s store and download the official launcher. This ensures you receive the latest, unmodified version. Create a quick note of the launcher location for easy access in the future.
Tip: Always verify you are downloading from an official source to avoid malware. - 2
Install the launcher
Run the installer and follow on-screen prompts to complete installation. Choose a default install location you can easily remember. If prompted, allow necessary permissions for proper operation.
Tip: Install on an SSD if possible to reduce load times and improve performance. - 3
Sign in with your account
Open the launcher and sign in with your Microsoft account (or the appropriate account for the edition). This authenticates your license and downloads the core game assets. Keep your login credentials secure and enable two-factor authentication if available.
Tip: If you have multiple accounts, organize them into profiles to avoid confusion. - 4
Choose an install location
Select the folder where Minecraft will be downloaded and stored. A dedicated Minecraft directory per user helps keep worlds and settings organized and minimizes conflicts during updates.
Tip: Label the folder clearly, e.g., \Minecraft\Java_Edition or Minecraft_Bedrock. - 5
Install any preferred editions
From the launcher, select the edition you want (e.g., Java or Bedrock) and initiate the download. Note that some editions require separate installers or accounts and content licenses.
Tip: If you plan to mod, start with the edition that supports modding and follow the official modding guides. - 6
Update and configure settings
Check for updates, adjust video and performance settings, and configure audio and controls. If you’re on a low-end device, enable performance-friendly presets and allocate appropriate RAM if the launcher allows.
Tip: Test a small world first to confirm settings work well before building. - 7
Create or import a world
Create a new world or import a saved world. Ensure the world path is saved in the launcher profile so you can quickly switch between editions or profiles.
Tip: Back up important worlds before making major changes. - 8
Verify the install by launching
Launch the game from the launcher and verify that the game runs without errors. Check for missing assets or texture packs and address them before playing extensively.
Tip: If the game crashes, take note of any error messages and consult official support resources.
People Also Ask
What is the best place to install Minecraft on Windows?
For Windows, install Minecraft in a dedicated folder under your user directory to keep game data separate from system files. Use the official launcher to manage editions and updates. This approach makes backups and world transfers smoother.
On Windows, install Minecraft in a dedicated user folder and use the official launcher to keep editions and backups organized.
Can I run Minecraft from a USB drive?
Yes, you can run portable Minecraft from a USB drive, but performance depends on the drive speed. Make sure the drive has enough free space for the launcher and several worlds, and keep backups in cloud storage when possible.
You can run Minecraft from a USB drive, but performance varies with drive speed; back up your worlds regularly.
Do I need internet to play Minecraft after installation?
Initial installation and launcher updates require internet. Once installed and updated, you can play offline in many cases, though some features require online access such as authentication and syncing saves.
You need internet for installation and updates, but you can play offline if the world is saved locally.
What’s the difference between Java Edition and Bedrock installation?
Java Edition and Bedrock Edition use different launchers and have separate file structures. Install and manage them via their respective launchers, noting that some features and mods apply only to one edition.
Java and Bedrock use different launchers and files; choose the edition you want and install accordingly.
How do I transfer Minecraft to a new computer?
Back up your worlds and launcher settings, then restore them on the new computer. If possible, use cloud saves or manual copies of the world folders and profile configurations.
Back up your worlds and settings, then restore on the new PC; use cloud saves if available.
Watch Video
The Essentials
- Choose a per-user install location for clarity and safety.
- Use official launchers to ensure updates and security.
- Back up worlds regularly to guard against data loss.
- Test performance with a sample world before deep builds.
- Keep different editions organized with distinct profiles.