Pumpkin Minecraft: A Practical Farming Guide
Learn how to grow, harvest, and use pumpkins in Minecraft with practical farming layouts, crafting ideas, and optimization tips. This educational guide covers seeds, farmland, bone meal, and jack-o'-lanterns to boost pumpkin production in pumpkin minecraft.

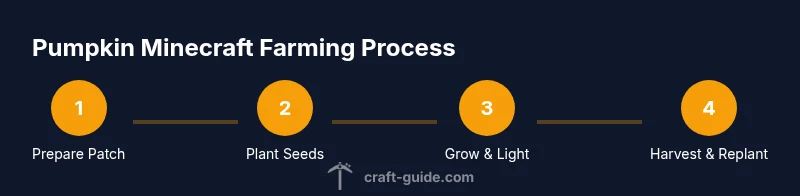
According to Craft Guide, you’ll learn how to grow and harvest pumpkins efficiently in pumpkin minecraft. Plant seeds on hydrated farmland, provide light, and harvest ripe pumpkins for food, pies, or lanterns. This quick guide covers seed placement, growth timing, and practical layouts to maximize yields while keeping it beginner-friendly.
Pumpkin Minecraft: Overview and uses
In pumpkin minecraft, pumpkins are a versatile crop that provides food, light sources, and decorative blocks. This section explains what pumpkins are, where to find them, and why they matter in your world. You gain seeds by breaking pumpkins and can plant them on any farmland block, provided it is hydrated by nearby water. Pumpkins appear in plains and some biomes, but with a single seed you can create a reliable patch. The Craft Guide team notes that pumpkins ease early game food shortages. In practice, patches can be scaled with simple layouts that maximize space and yield. From a tiny 3x3 bed to a larger grid, pumpkins are forgiving and rewarding. Carved pumpkins add a personal touch to builds, and jack-o’-lanterns light paths and caves. This section introduces core concepts you’ll use throughout the guide and sets the stage for efficient pumpkin minecraft farming.
Growth mechanics and prerequisites
Pumpkin minecraft growth relies on hydrated farmland, adequate light, and a healthy seed setup. Plant pumpkin seeds on farmland (dirt turned to farmland) and ensure water is within four blocks to hydrate the soil. In-game light levels influence growth, so keep patches near torches or other light sources if you’re farming during the night cycle. Bone meal can speed up growth for impatient builders, though it isn’t required. Seeds come from breaking pumpkins or from crafting, and replanting seeds after harvest keeps your patch productive. This section also explains how growth stages work in Minecraft, helping you plan harvest windows and storage logistics for pumpkin minecraft farming.
Farm layouts: compact and scalable designs
Effective pumpkin minecraft farming favors compact, scalable layouts that minimize space while maximizing yield. A simple 3x3 patch can be expanded into a grid-based design with interlocking water sources to hydrate farmland efficiently. Place water sources at regular intervals so every patch remains hydrated, and space stems to support nearby vines without crowding. Lighting should be arranged to prevent idle despawn of crops during night cycles. For larger builds, combine elevated platforms and walkways to keep patches accessible while you work on maintenance and harvesting. Craft Guide recommends modular patches: start small, then stack modules as you gain experience.
Harvesting, storage, and replanting strategies
When pumpkins reach maturity, harvest promptly and store pumpkins in accessible chests. Replant seeds immediately to maintain continuous production, ensuring your next harvest window is ready. Gather extra pumpkin seeds during harvest to reseed multiple patches and diversify layouts. Consider creating separate seed patches to keep your main harvest area streamlined. This approach minimizes downtime between harvests and helps you manage supplies for recipes like pumpkin pies and lanterns. Regularly check hydration and light levels to prevent stalling growth in pumpkin minecraft patches.
Crafting with pumpkins: recipes and decorative uses
Pumpkins have multiple practical applications. Craft pumpkin pie by combining pumpkins with sugar in a crafting table, and use carved pumpkins for aesthetic builds. A jack-o’-lantern provides light without consuming fuel, making it ideal for cave systems and outdoor paths. You can also use pumpkins as blocks for themed builds or trade with villagers depending on your server rules. This section highlights efficient crafting paths and how pumpkins contribute to both survival and creative modes in pumpkin minecraft.
Troubleshooting common issues and optimization tips
Growing pumpkins can be impacted by hydration, lighting, seed quality, and soil health. If growth stalls, check that water is within reach, light sources are sufficient, and that you're planting seeds on farmland. Use bone meal sparingly to accelerate growth when you’re ready to harvest, but avoid wasting resources on patches that aren’t ready. If pumpkins refuse to grow, consider expanding your patch layout to reduce crowding and ensure vines have enough room to spread. Craft Guide’s optimization tips focus on consistent hydration, compact layouts, and practical storage solutions to streamline your workflow in pumpkin minecraft.
Advanced layouts and best practices from Craft Guide
As you gain experience with pumpkin minecraft, you’ll discover that layout choice affects yield and ease of maintenance. Advanced patches use modular blocks with centralized water and staggered growth cycles to balance harvest timing. Keep patches near your base for quick access, and design storage that aligns with your crafting goals (pies, lanterns, carved pumpkins). Craft Guide’s best practices emphasize accessibility, consistent hydration, and proactive planning to maximize pumpkin production with minimal effort.
Tools & Materials
- pumpkin seeds(Harvested from pumpkins or obtained via crafting; plant on hydrated farmland.)
- farmland blocks (dirt turned into farmland)(Hydration is required for crop growth; ensure soil remains moist.)
- hoe (any tier)(Used to convert dirt/grass into farmland; higher durability speeds setup.)
- water source (bucket or nearby water)(Hydrates farmland within a 4-block radius; essential for growth.)
- light source (torches, lanterns, glowstone)(Provides ambient light when farming at night or indoors.)
- bone meal (optional)(Speeds growth on a patch with available resources.)
- pumpkins(Harvest yields and seeds for replanting; main product of the crop.)
- storage (chests)(Organize harvested pumpkins and seeds for easy access.)
- crafting table (optional)(Needed for crafting pumpkin pies and carved pumpkins.)
Steps
Estimated time: Estimated total time varies with growth rate and bone meal use; typical play sessions span several in-game days from planting to first harvest.
- 1
Prepare farmland and water
Choose a flat area and lay out a grid of farmland blocks. Place water nearby so every patch stays hydrated; this is essential for steady growth.
Tip: Keep water sources central to reduce walking distance during maintenance. - 2
Plant pumpkin seeds
Plant seeds on the prepared farmland, spacing them to allow vine growth and avoid crowding.
Tip: Healthy spacing improves maturation odds and makes harvest easier. - 3
Provide lighting
Place light sources to ensure continuous growth, especially if you play with long nights or in caves near plots.
Tip: Lighting also helps prevent hostile spawns near your patch. - 4
Use bone meal to speed growth
Apply bone meal to accelerate growth if you want faster results or to seed multiple patches quickly.
Tip: Don’t waste bone meal on patches that aren’t ready; apply where growth is progressing. - 5
Harvest mature pumpkins
Harvest pumpkins when mature and collect seeds for replanting; store in accessible chests.
Tip: Harvest promptly to prevent seed loss and replant immediately. - 6
Replant and expand
Replant seeds in the same area or expand to new sections to grow your patch over time.
Tip: Modular growth keeps management simple as your patch grows. - 7
Store and craft
Move harvested pumpkins to storage; craft pies or carve pumpkins for decorative and lighting uses.
Tip: Plan recipes in advance to maximize your pumpkin minecraft workflow.
People Also Ask
What are pumpkins used for in Minecraft?
Pumpkins serve multiple purposes: food via pumpkin pie, light with jack-o’-lanterns, decorations with carved pumpkins, and seeds for replanting. They’re a versatile crop in both survival and creative modes.
Pumpkins are useful for food, light, and decoration, and you can reuse their seeds to keep your patch going.
Do you need pumpkin seeds to start farming?
Yes. Seeds are obtained from harvesting pumpkins or breaking other planted patches. Plant seeds on hydrated farmland to start a pumpkin farm.
Seeds come from pumpkins; plant them on hydrated soil to begin growing.
Can pumpkins grow in any light level?
Pumpkins grow best with adequate light, but they can progress through growth stages with basic lighting. Supplemental light helps during nighttime farming.
They need light to grow, but you can provide extra light to keep growth steady.
Is bone meal faster to grow pumpkins?
Bone meal speeds up growth for patches where you’re patient or want quicker harvests. It’s optional but helpful for larger operations.
Bone meal speeds growth if you have extra bones to spare.
How do I craft a jack-o’-lantern?
Craft a jack-o’-lantern by placing a carved pumpkin on top of a torch or glowstone in the crafting grid. It provides light without fuel consumption.
Carve a pumpkin and place it with a light source to create a jack-o’-lantern.
What is the best layout for a pumpkin farm?
A modular, hydrated, well-lit patch layout that scales gradually tends to be the most efficient. Start small, then add modules as you collect seeds.
Start small with a modular layout and expand as you gather seeds.
Watch Video
The Essentials
- Plant seeds on hydrated farmland near light sources.
- Harvest and replant to maintain a steady supply.
- Use pumpkins for food and decorative blocks.
- Bone meal speeds growth for faster yields.
- Organize storage for quick access and efficiency.