How to Draw Minecraft: Step-by-Step Guide for Beginners
A comprehensive, beginner-friendly tutorial on drawing Minecraft characters with grid-based planning, blocky shapes, and flat colors. Learn tools, techniques, shading, and practice drills to master the iconic style, with clear steps and practical tips.

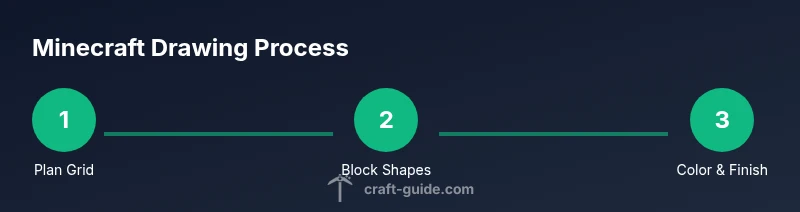
Learn how to draw a Minecraft character step by step, using simple shapes, a structured grid method, and bold blocky shading to match the game's iconic look. This guide covers essential materials, accurate proportions, basic perspective, and color choices that stay true to the style. It also includes practical drills and common mistakes to avoid so beginners can build confidence quickly.
Foundations: Minecraft’s Blocky Proportions
Minecraft characters are built from rectangular blocks, with limbs and torsos expressed as cube-like shapes. This establishes a readable silhouette even when drawing at small sizes. To begin, visualize the figure as a stack of boxy volumes rather than organic curves. According to Craft Guide, embracing this blocky language helps you stay true to the core aesthetic while allowing room for personal style. Start by identifying the major masses: head, torso, arms, and legs, then map how they connect at right angles. Use light construction lines to explore proportions before committing to final outlines. The key is consistency: maintain uniform square corners and straight edges so every part feels like it belongs to the same world.
- Pro tip: Work with a grid to lock proportions; it makes scaling and symmetry much easier.
- Pro tip: Keep lines light in the initial pass so you can adjust without heavy erasures.
Grid Method: Translating 3D Into 2D
The grid method is your friend when translating 3D Minecraft blocks into a flat drawing. Start with a light grid on your paper or digital canvas. Each square becomes a reference for one block unit, guiding you to align the head, body, and limbs in a consistent, orthogonal fashion. This approach not only simplifies the drawing process but also makes shading decisions more predictable. As you sketch, treat every major feature as a grouping of squares: head equals a cube head, torso as a rectangular prism, and limbs as columnar blocks. The grid helps you preserve sharp corners and straight edges that define the style. A well-constructed grid reduces errors and speeds up refinement.
- Pro tip: Double-check vertical alignment between the shoulders and hips to avoid tipped silhouettes.
- Warning: If the grid is too dense, outlines can feel cramped—scale the grid to a comfortable size before starting.
Step Plans: From Block to Character
A clear plan prevents wandering into inconsistent shapes. Begin by outlining the head block, followed by the torso and limb blocks. Use larger blocks for the limbs and thinner blocks for fingers or subtle details. Keep the overall height in mind and respect the typical Minecraft proportion where the head is about one-quarter of the total height. This planning phase is where your grid and block language pay off: it becomes a blueprint you can follow rather than a series of uncertain lines. Once the basic plan is sketched, you can refine edges, reconnect joints, and ensure the pose reads as deliberate and sturdy.
- Pro tip: Outline in light strokes first; switch to heavier lines only after you’re satisfied with the proportions.
- Pro tip: Place the character against a simple pose (standing, walking) to study balance and stance.
Color and Texture: Keeping the Style Consistent
Flat colors and clean shading are the signature of Minecraft art. Choose a limited palette—shades of the same color family with one or two highlight tones. Avoid soft gradients; instead, use hard, distinct color blocks to suggest light and shade. Shading should emphasize the outer edges and the top-facing surfaces, echoing a consistent light source (for example, a light coming from the upper-left). This deliberate simplification helps maintain readability at small sizes while staying faithful to the game's aesthetic. If you’re drawing digitally, use layered blocks for skin, clothing, and accessories so adjustments are easy without reworking the entire image.
- Pro tip: Test swatches on a separate area before filling major shapes to prevent palette drift.
- Note: Textures should be implied with color blocks rather than detailed brushwork.
Common Mistakes and How to Fix Them
Beginners often rush the outline, misplace joints, or misalign grid squares, leading to an awkward silhouette. Another frequent error is using too many colors or shading that tries to imitate realism instead of the blocky style. To fix these issues, revert to the grid plan and redraw sections with light lines, focusing on maintaining squared edges and consistent block sizes. Regular checks after each major shape (head, torso, limbs) help catch proportional errors early. Also, avoid tiny details that break the strong, simple silhouette the style relies on.
- Pro tip: Step back frequently to judge overall proportions and silhouette; small misalignments become obvious from a distance.
- Warning: Over-inking can ruin crisp block edges; preserve a clean, bold outline strategy.
Practice Drills and Progression
Progress comes from repetition and deliberate practice. Start with a few quick silhouettes in your grid, then gradually add color blocks and shading. Schedule short, focused sessions—15 to 20 minutes daily—before attempting longer, more ambitious drawings. Use reference images of Minecraft characters and compare your work to the grid plan to identify recurring mistakes. As you gain confidence, try variations with different poses and outfits to expand your repertoire while maintaining the core blocky look.
- Pro tip: Keep a practice notebook with different poses and color palettes to track improvement over time.
- Note: Incremental complexity builds skill; don’t rush to finish complex characters before you’re ready.
A Simple Project: Steve-Style Character Build
Consolidate what you’ve learned by drawing a Steve-like character, a classic option familiar to most players. Start with the grid-free head and torso, then implement block limbs and the signature blue shirt, purple pants palette, and gray shoes in flat tones. Use a simple three-step workflow: plan with grid, outline blocks, color in solid areas. After finishing, compare your result with a reference and note where alignment or shading can improve next time. This project reinforces practices and prepares you for more nuanced builds, like paler skin tones or different armor sets.
- Pro tip: Break the drawing into three passes: blueprint, outline refinement, and color completion.
- Warning: If colors bleed outside block boundaries, erase small areas and re-fill with crisp lines.
References, Resources, and Next Steps
This guide aligns with the Minecraft art principles taught by established art education resources and the Craft Guide methodology. For further learning, you can explore foundational drawing techniques, color theory, and grid-based composition from credible sources. The idea is to reinforce skills gradually, so you can tackle more ambitious Minecraft builds without losing the distinctive block-y feel. Practice often, seek feedback, and steadily increase the complexity of your characters as your confidence grows.
Tools & Materials
- Pencil (HB)(Graphite lead for light guidelines)
- Ruler(For accurate grid lines)
- Eraser(Kneaded or vinyl for clean corrections)
- Grid paper or squared sketchbook(Aids proportion and alignment)
- Colored pencils or markers(Optional for finishing color)
- Fine liner or ink pen(For crisp outlines)
- Digital drawing tablet(If drawing digitally)
Steps
Estimated time: 60-90 minutes
- 1
Prepare your workspace
Set up a clean area with good lighting. Gather pencils, erasers, a ruler, grid paper or a digital canvas, and a color collection. This ensures you won’t have to pause to search materials, which helps maintain focus as you begin the plan.
Tip: Organize tools within easy reach to keep your momentum. - 2
Draw the head block
Outline a square or cube for the head using light lines on your grid. Keep the head proportions consistent with the body, ensuring the edges stay straight. This is the anchor for the rest of the figure.
Tip: Check that the head is aligned with the torso to avoid a tilted look. - 3
Add the torso and limbs as blocks
Sketch the torso as a rectangular prism beneath the head, and attach the arms and legs as elongated blocks. Maintain the blocky aesthetic with right angles and clean intersections.
Tip: Keep limb lengths proportional to the torso for a balanced pose. - 4
Refine the silhouette
Smooth out rough edges while preserving the boxy feel. Erase unnecessary construction lines and sharpen corners where needed so the figure reads clearly at small sizes.
Tip: Use light strokes and verify symmetry between left and right sides. - 5
Apply flat color blocks
Fill major planes with flat colors, avoiding gradients. Assign a limited palette that matches the Minecraft style and keeps the image readable.
Tip: Test colors on a swatch strip before applying them to the drawing. - 6
Add minimal shading
Introduce subtle shading on top-facing surfaces to imply light direction, using a darker version of the same color. Preserve the flat, crisp lines that define the style.
Tip: Shade only where it enhances readability, not for realism. - 7
Finalize details and outline
Boldly outline final shapes and details such as eyes or clothing seams with a fine liner or darker pencil. This helps the character pop against the background.
Tip: Keep outlines consistent in thickness for a cohesive look. - 8
Review and practice
Compare with references, note where proportions or color choices could improve, and repeat the process with variations. Practice leads to smoother builds over time.
Tip: Document your progress to see growth and identify recurring issues.
People Also Ask
What basic tools do I need to start drawing Minecraft characters?
A pencil, eraser, ruler, and grid paper are enough to begin. Optional items include colored pencils or markers for color, a fine liner for crisp outlines, and a digital tablet for easy corrections.
You can start with just a pencil and paper; add color or a digital tablet later as you grow more confident.
Should I draw digitally or on paper first?
Starting on paper helps you learn proportions and grid planning without the distractions of layers. Digital tools are great for corrections, layers, and experimenting with colors once you’re comfortable.
Begin on paper to learn the basics, then try digital to refine your work and make adjustments easily.
How long does it take to learn this style?
Progress comes with regular practice. Expect weeks of steady practice to notice meaningful improvements in proportions and color usage.
With consistent practice, you’ll see steady improvement over a few weeks.
Can I adapt this to other Minecraft characters?
Yes. Start from the same grid-based approach and adjust proportions for different outfits or equipment. The core blocky language stays consistent.
Absolutely—keep the grid approach and adjust the character’s gear.
What mistakes are common and how can I avoid them?
Rushing outlines and misaligning the grid are common. Take time to plan with the grid, check alignment often, and keep lines light until you’re ready to finalize.
Take it slow with grid alignment and outlines; you’ll avoid most issues.
Is shading necessary for the Minecraft look?
Shading in Minecraft is minimal. Flat colors read clearly, but light shading on exposed surfaces can add depth if kept subtle and consistent with a single light source.
A little shading can help depth, but keep it simple and consistent.
Watch Video
The Essentials
- Start with a grid to lock proportions
- Use flat colors to match the style
- Practice regularly for steady progress
- Refine outlines before shading
- Experiment with simple textures