How to Build a Roof in Minecraft: A Practical, Step-by-Step Guide
Learn how to build a sturdy, visually appealing Minecraft roof with beginner-friendly steps, material tips, and style options suitable for any house or biome.

By the end of this guide you’ll be able to add a sturdy, visually appealing roof to any Minecraft house, using clear, beginner-friendly steps. We cover common roof styles, material choices, and how to measure dimensions so your roof fits perfectly. Whether you’re starting a new build or upgrading an existing shelter, this roof-building approach works in all biomes.
The strategic value of a roof in Minecraft
According to Craft Guide, a roof is more than a cover — it's the defining silhouette of your home and a practical tool for microclimates. A well-placed roof controls how light enters rooms, which determines mob spawning patterns and interior ambience. In survival mode, weather protection translates into fewer blocks that burn, and overhangs can shield doors and windows from rain, reducing the need for constant repairs. Start by imagining your house as a box; the roof sits on top and must align with the footprint while leaving a modest overhang of 1-2 blocks on all sides. This ensures rain runs off efficiently and helps protect walls from weathering. Try to keep the ridge height proportional to the house height; a roof that is too tall can look cartoonish, while one that’s too shallow can fail to shed water. The choice of materials also matters: lighter blocks may show dust quickly in dunes or deserts, while darker blocks create a stronger contrast in forests and caves. With these considerations in mind, you can plan a roof that looks great and serves your build's function.
Roof styles you can adapt to most builds
There are several classic roof shapes in Minecraft you can adapt, depending on your house's size and style. The most common is the gable roof, a simple triangle silhouette that’s easy to craft with stairs and slabs. For a chunkier, more volumetric look, try the hip roof, which slopes on all sides and yields a rounded profile when built with multiple layers. A shed roof provides a flat, modern vibe and works well for contemporary builds with large floor-to-ceiling windows. When deciding, consider the house width; longer spans benefit from a longer ridge and more gradual slopes to avoid steep angles that can cause awkward stair-step gaps. For tall frames, you may combine layers to create dormers or skylights, which add interior space and light. In practice, most beginners start with a simple gable roof, then experiment with hip or shed variants as confidence grows. Remember: uniform block choices simplify construction, while contrasting materials can highlight architectural features or create visual depth.
Planning: measuring, margins, and geometry
In Minecraft, good roof planning reduces wasted materials and avoids messy gaps. Begin by measuring the building footprint: count the number of blocks along each wall and determine the roof’s edge overhang. A common approach is to add 1-2 block overhangs beyond the walls to shed rain and protect the walls. Next, decide the ridge height: for a two-story house, set a ridge roughly 3-5 blocks above the top line of the walls; for single-story, 2-4 blocks may suffice. Use a consistent slope: many Minecraft roofs use a 1:2 ratio (one block rise for every two blocks of run) to keep slopes comfortable and easy to lay with stairs or slabs. If you plan windows or dormers, map their positions early to integrate with the roof’s lines. Finally, sketch your plan on paper or in your mind, then translate it into in-game coordinates as you place the first blocks. Precision at this stage saves material and time later.
Materials and block choices by style
Different roof styles benefit from different materials. For a classic wood-and-earth look, oak planks and spruce planks with matching stairs convey warmth and texture. Stone bricks or smooth stone offer a sturdier, medieval aesthetic, especially when paired with dark prismarine accents in darker biomes. Concrete and glazed variants enable bright, modern roofs that catch the eye but may require careful lighting to avoid mob spawns. When planning color, aim for contrast with the walls: a lighter roof on a dark wall or vice versa creates a bold silhouette. Accessibility matters: use slabs to soften the edges and stairs for clean lines on the slopes. If you want an attic or loft, consider adding dormers by stepping up blocks along the ridge and lowering interior ceilings with additional walls. Don’t forget lighting: place torches or lanterns high enough to avoid shadows that attract mobs but low enough to illuminate the stairs.
Common mistakes and quick fixes
Many players rush to build a roof and end up with steep gables that shed water poorly or with flat edges that look unfinished. To fix, adjust the overhangs, ensuring they extend 1-2 blocks beyond the walls. Misplacing stairs can create awkward lines; use consistent stair orientation and alternate with slabs for smoother slopes. Another frequent error is mismatch between the roof and wall-height; ensure the ridge height is proportional to the building's height. Lighting is often neglected, causing mobs to spawn inside attics; plan internal lanterns or glowstone accordingly. Finally, never ignore interior space: a roof that creates a dark corner can reduce usability; consider adding skylights or dormer windows to increase natural light and air flow.
Quick design ideas you can try today
If you’re unsure where to start, copy one of these quick setups: a compact gable with a single ridge and 1-block overhang; a hip roof with two tiers for depth; a modern shed roof with a long, flat slope and exposed beams; or a pseudo-dormer with a small vertical window. Mix materials slightly for texture, but keep the overall silhouette clean. With practice, you’ll be able to tweak pitch, overhang length, and ridge height to achieve a look that matches your base’s theme, whether rustic, medieval, or futuristic.
Tools & Materials
- Blocks for roofing (e.g., oak planks, stone bricks, bricks, or concrete)(Choose a material that matches your build; consider color and texture for visual impact)
- Stairs and slabs in the same material(Used to create slopes and clean lines on the roof edges)
- Scaffolding or ladders(Helpful for tall builds or precise edge work; can be removed after construction)
- Measuring reference (grid counting in-game)(Count blocks along each wall to determine overhang and ridge length)
- Lighting (torches or lanterns)(Place for attic spaces and to prevent mob spawns inside the roof area)
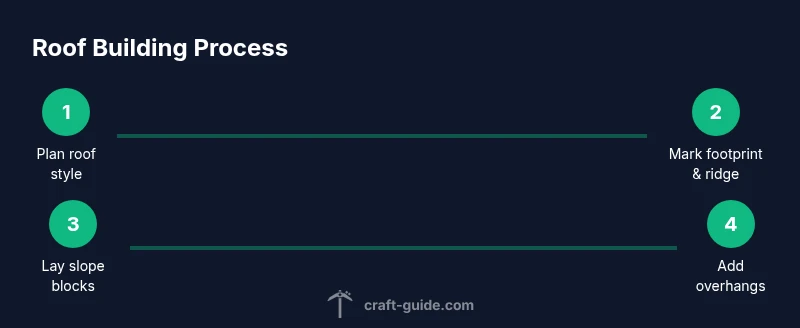
Steps
Estimated time: 30-50 minutes
- 1
Choose roof style and plan
Decide whether you’ll build a gable, hip, or shed roof and sketch the ridge location on the footprint of your house.
Tip: Having a clear plan reduces material waste and misaligned slopes. - 2
Mark the footprint and ridge
Measure the building width and mark the outer edges; place a basic ridge line above the wall tops to guide slope.
Tip: Keep the ridge centered for symmetrical slopes. - 3
Lay the base frame with stairs
Starting at the edges, place stairs or slabs to form the first slope layer; ensure consistent orientation.
Tip: Use a single reference direction to avoid inverted stair patterns. - 4
Build up the slope to ridge
Add successive layers of blocks to achieve the chosen slope; count blocks to keep even height across both sides.
Tip: A 1:2 rise/run ratio is a comfortable and buildable slope for most styles. - 5
Create overhangs and eaves
Extend the roof 1-2 blocks beyond the walls; this sheds water and protects walls.
Tip: Overhangs improve weather resistance and the roof’s silhouette. - 6
Add dormers or skylights (optional)
If you want interior space or light, carve small dormers or skylights along the ridge with careful block placement.
Tip: Dormers should align with interior walls to maximize usable space. - 7
Light and finalize
Place lighting to prevent mobs and verify visibility under overhangs; adjust any mismatched lines.
Tip: Test from inside to ensure attic access and shadow-free paths.
People Also Ask
What is the easiest roof style for beginners?
The simplest for beginners is a basic gable roof built with stairs and slabs. It requires minimal overhang and uses a straightforward ridge line. This version teaches the core techniques before moving to more complex forms.
The easiest roof style for beginners is a simple gable roof; it teaches the core techniques without getting overwhelmed.
Which materials should I use to match my house theme?
Choose a material that complements your walls; wood for rustic themes, stone for medieval, and concrete for modern. Use stairs and slabs in the same material to ensure seamless slopes.
Match your roof materials to your house theme for a cohesive look.
How do I calculate ridge height for a two-story house?
Aim for a ridge about 3-5 blocks above the top wall for a typical two-story; adjust based on your house scale and preferred slope. If you want attic space, raise the ridge a bit more.
Ridge height for two-story homes is usually a few blocks above the top wall.
What common mistakes happen in survival builds?
Common mistakes include shallow slopes, improper overhangs, and gaps where mobs spawn. Use consistent stair orientation and ensure proper lighting inside the roof space.
Watch out for shallow slopes, gaps, and poor lighting in survival builds.
Can I add dormers or skylights?
Dormers and skylights add light and interior space. Build small raised sections along the ridge and place windows that align with interior walls for best effect.
Dormers give you more light and usable space.
Do roof overhangs affect mobs or weather exposure?
Yes. Longer overhangs shade walls and reduce rain exposure, which helps prevent weathering and nearby mob spawns. Keep them balanced at 1-2 blocks for practicality.
Overhangs help shade and protect walls; keep them modest.
Watch Video
The Essentials
- Plan roof style first; consistency simplifies build.
- Overhangs protect walls and improve weather resistance.
- Use stairs/slabs to craft smooth slopes.
- Choose materials that complement the walls for cohesion.
- Light interiors to prevent mob spawns.