Roof Minecraft: Master Roof Designs for Builds Today
Learn practical, step-by-step roof-building techniques for Minecraft. From pitch and materials to gable and hip styles, discover durable, aesthetically pleasing roof minecraft designs for survival and creative modes.

Learn how to design and build durable, visually appealing roofs in Minecraft. This guide covers roof minecraft concepts, roof pitch calculation, material choices, and step-by-step construction for various roof styles, from simple shed roofs to complex gabled and hip designs. You’ll get practical, easy-to-follow techniques that work in survival and creative modes.
Foundations: Core principles of roof design in roof minecraft
In Minecraft, a roof isn’t just a cap on top of a house—it defines the silhouette, controls interior space feel, and affects lighting and mob behavior. The term roof minecraft refers to how builders use blocks to craft sloped surfaces that shed rain, snow, and mobs while contributing to the overall aesthetic. Start with four fundamentals: pitch, overhang, material, and scale. A higher pitch creates drama but uses more blocks; a shallow pitch saves material but may look flat. Overhangs shade walls and prevent moisture in real-life terms, and in Minecraft they help prevent water from pooling against walls near entrances. Choose materials that complement your walls for cohesion and ensure the scale matches the footprint to avoid awkward gaps. In survival, pick materials you can gather efficiently. Mastering these foundations makes it easier to pick a roof style that fits your build and gameplay needs.
Craft Guide notes: To optimize performance in your world, keep roof minecraft designs consistent with your block palette and game stage.
Quick tip
- Start with a 1:4 to 1:2 pitch range for medium-sized houses; adjust based on the visual weight you want for the build.
Voice hint: Craft Guide analysis suggests you sketch the roof layout on graph paper or in a screenshot to keep symmetry intact.
Key takeaway: Establish pitch, overhang, material, and scale before block placement to avoid rework.
Tools & Materials
- Wood planks, stone blocks, or brick blocks(Choose a material that matches the walls for a cohesive look; this forms the roof surface.)
- Slabs(Used to create gentle slopes and interior ceilings without adding full blocks.)
- Stairs(Create step-down slopes for pronounced roofs and clean eaves.)
- Rafters/Support blocks (logs or stripped logs)(Visible raffters can add realism if you want a rustic look.)
- Scaffolding or dirt blocks(Pour height and reach while building; scaffolding is ideal for safety in survival.)
- Glass panes or skylights (optional)(Optional for natural lighting; plan light sources if skylights aren’t used.)
- Lighting (torches/lanterns)(Place strategically to avoid mobs spawning on the roof and inside attics.)
Steps
Estimated time: 1-2 hours
- 1
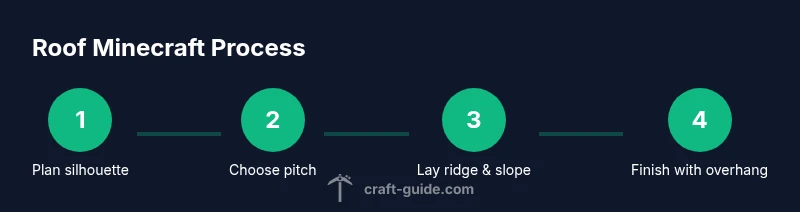
Plan your roof silhouette
Decide the overall shape (gable, hip, shed) and sketch the silhouette for your roof minecraft. Confirm the footprint and height in relation to doors and windows to avoid obstructing light and movement inside the building.
Tip: Use a simple chalk line or grid paper to map where the ridge or peak will run across the top of the house. - 2
Measure base footprint and decide pitch
Choose a pitch that complements the house length and height. A taller building typically benefits from a steeper pitch for drama, while a compact home can use a shallow pitch for balance.
Tip: A 1:4 ratio (rise to run) is a good starting point for mid-sized builds; adjust to taste. - 3
Lay the ridge line or peak
Place the central ridge or peak blocks to mark the roof’s highest point. Ensure symmetry across the central axis for a balanced look.
Tip: Check both sides of the ridge with a quick walk around the structure to verify alignment. - 4
Place rafters or starter blocks
Add rafters or starter blocks along the ridge to define the slope. For a simple shed roof, place a single layer of blocks at the chosen pitch.
Tip: Sticks or logs placed diagonally can help visually plan the slope before finishing blocks. - 5
Apply slabs and stairs for smoothing
Fill in with slabs or stairs to create gradual slopes. This avoids a blocky look and produces smoother edges.
Tip: Alternate slab and stair placements to create a more natural transition on curved or stepped roofs. - 6
Add overhang and eaves
Extend the roof beyond the walls to create an overhang. In Minecraft, this helps shade walls and adds depth.
Tip: Overhang length should look proportional to the house width; too long can look ungainly. - 7
Detail with dormers or gables (optional)
Introduce extra visual interest with dormers or decorative gables. Keep the interior space in mind; ensure headroom is preserved.
Tip: Dormers are easiest with a small block pattern that follows the main roof slope. - 8
Apply outer material and shading
Finish with the chosen surface blocks, ensuring consistent color and texture with the walls. Add shading blocks like dark oak trim for contrast.
Tip: Consistency in color palette helps roof minecraft look intentional, not accidental. - 9
Install lighting and safety features
Place lighting under overhangs or inside the attic to prevent hostile mobs from spawning at night.
Tip: Avoid placing torches on exposed roof blocks to prevent accidental visible torches; use lanterns where possible. - 10
Test in survival and adjust
Switch to survival mode or simulate resource gather to check how many blocks you’d need and where you’d spend your time sourcing them.
Tip: If you’re short on resources, simplify the roof or map a resource plan before committing.
People Also Ask
What is the simplest way to start a roof in Minecraft?
Begin with a flat silhouette, mark the ridge line, then add a basic pitch using stairs and slabs to form the slope. This gives you a solid framework to build outward.
Start with a simple ridge line, then add sloped blocks using stairs and slabs for an easy, sturdy roof.
Which materials are best for roofs in survival mode?
Choose materials that are easy to gather or farm, such as wood planks or stone bricks. Match the roof to the walls for cohesion and minimize resource costs by using slabs and stairs to craft slopes.
In survival, pick wood or stone that matches your walls, and use slabs and stairs to create slopes efficiently.
How can I add a dormer without breaking the roof's structure?
Create a small cut-out in the roof line and extend vertical space with a short vertical section, then cap it with blocks that follow the roof's slope. This preserves interior space while adding visual detail.
Make a small cut-out and extend a vertical space, then cap with slope-following blocks to add a dormer.
Can roofs be curved in Minecraft?
Minecraft roofs are usually blocky, but you can simulate curves with alternating layers of slabs and stairs to create a rounded illusion from different angles.
You can fake a curved roof by layering slabs and stairs to create a rounded look.
How do I protect roofs from snow in cold biomes?
Use a higher pitch or add ventilation gaps that shed snow more readily. Design the eaves to keep the interior dry while maintaining aesthetics.
A steeper roof design sheds snow more easily and keeps interiors drier.
Watch Video
The Essentials
- Choose a roof style that fits your build's silhouette.
- Plan pitch, overhangs, materials, and scale before placing blocks.
- Use slabs and stairs to shape smooth slopes and avoid blocky edges.
- Test designs in creative or safe environments before survival builds.
- Add lighting to prevent mob spawns and enhance aesthetics.