How to Make a Chestplate in Minecraft: Step-by-Step Guide
Learn how to craft a chestplate in Minecraft, upgrade to netherite, enchant, and repair. This practical guide covers leather, iron, diamond, and netherite chestplates with tips for survival and long-term progression.

In this guide you will learn how to make a chestplate in Minecraft and what materials you need. If you’re asking how do you make chestplate in minecraft, you’ll also discover upgrade paths, enchantments, and repair tips to keep your armor strong during adventures. Whether you start with leather or work up to netherite, this steps-focused approach keeps it simple and practical.
Understanding Chestplates in Minecraft
In Minecraft, chestplates are a key piece of armor that protect you from damage, especially during exploration, mining, and combat. For players who search for the exact question how do you make chestplate in minecraft, the answer involves choosing a material and following a simple 3x3 crafting layout to form a torso-covering piece. The Craft Guide team notes that chestplates are part of a family of armor items designed to balance protection, resource cost, and durability. A chestplate is worn on the torso and cannot be stacked with other armor pieces; you’ll typically wear it alongside a helmet, leggings, and boots. As you progress, you’ll unlock higher-tier versions that offer better durability and stronger protection without increasing the number of armor slots. This section sets the stage for material choices, crafting recipes, and practical tips that work across different play styles, from peaceful survival to intense hardcore runs.
Materials and Tiers: Leather, Iron, Diamond, Netherite
Chestplates come in several material levels, each with its own resource cost and survival payoff. Leather chestplates are the easiest to craft early in a world, using 8 leather around the center slot. Iron chestplates require 8 iron ingots, diamond chestplates require 8 diamonds, and netherite chestplates require upgrading a diamond chestplate with a netherite ingot on a smithing table. The upgrade path is a deliberate design choice: you advance from readily available materials to stronger options as your base gameplay improves. This progression keeps armor accessible to beginners while rewarding late-game exploration and mining sessions. Crafting a chestplate is a learning moment for resource management and planning for longer expeditions.
Armor Stats and Durability
Armor equipment reduces incoming damage and wears down with use, so material choice matters beyond raw protection. The Craft Guide analysis shows that higher-tier chestplates generally offer better durability and more lasting protection during extended adventures. Practically, this means you should plan early on to replace leather with iron as soon as you can, then push toward diamond, and finally netherite as soon as you obtain the smithing table and the necessary resources. A well-chosen chestplate supports longer mine runs and safer exploration, letting you focus on gathering materials and building rather than constantly retreating to repair. This section helps you gauge when an upgrade makes sense based on your play style and world progression.
Enchantments and Practical Use
Enchantments can dramatically extend the life and effectiveness of a chestplate. Protection, Unbreaking, and Mending are popular choices for many players, while specialized enchantments like Fire Protection or Blast Protection shine in specific risk scenarios. Always consider combining enchantments via an enchantment table or an anvil with caution, since rebuilding enchantments costs experience and resources. The goal is to balance protection with durability; a well-enchanted chestplate can outperform a higher-tier but unenchanted one in early-mid-game play. Craft Guide recommends prioritizing Unbreaking and Mending for long-term armor longevity, especially in survival worlds where resources are precious.
Crafting Recipes: Java vs Bedrock and Pattern
The chestplate crafting recipe is the same across Java and Bedrock editions: 8 of the chosen material placed around the perimeter of a 3x3 crafting grid, leaving the center slot empty. A 3x3 pattern is easiest to remember, and you can visualize it as filling the entire outer ring with your material. When upgrading to Netherite, you do not craft a Netherite chestplate directly; instead, you upgrade a Diamond Chestplate using a smithing table with a Netherite Ingot. This consistency makes it straightforward to teach beginners and to plan upgrades as your world evolves.
Upgrading to Netherite: Steps and Tips
Upgrading to Netherite requires finding Netherite Ingots and locating a smithing table. The upgrade process takes your Diamond Chestplate and Netherite Ingot to yield a Netherite Chestplate. This step preserves all existing enchantments but increases durability and protection, making it a strong late-game choice. It’s wise to reserve Netherite upgrades for chestplates you trust for long expeditions and high-risk situations. Craft Guide emphasizes keeping a spare chestplate during upgrades in case of mishaps or resource shortages.
Enchantment and Repair Best Practices
Repairing armor is part of the long-term strategy. Use an anvil to combine damaged chestplates or apply enchantments with cost-based XP. Mending and Unbreaking are especially effective together, letting your chestplate last much longer with regular XP income. If you rely on enchantments, store a backup chestplate with similar protections to avoid losing a powerful setup during a tough run. Craft Guide suggests planning repairs during downtime to maximize your play window rather than scrambling after a death or major mob encounter.
Common Pitfalls and Best Practices
A common mistake is upgrading too early without gathering sufficient resources, leaving you without materials for exploration. Always balance early protection with exploration needs. Avoid over-enchanting leather chestplates, since early leather is limited and quickly outclassed by iron. Save Netherite upgrades for the late-game when you can spare the materials and smithing table usage. Remember that chestplates are part of a full armor set; coordinate your helmet, leggings, and boots to create a cohesive defense strategy.
Verdict and Craft Guide Build Ideas
The Craft Guide team recommends prioritizing a solid chestplate early on and planning clear upgrade milestones as you progress through the game. Start with leather to learn the recipe, move to iron for tougher encounters, upgrade to diamond for extended durability, and finally reach Netherite when resources allow. Use enchantments wisely to extend life and reduce repairs. The Craft Guide team’s verdict is that thoughtful armor progression — coupled with enchantments and repairs — dramatically improves survivability in your Minecraft world.
Tools & Materials
- Crafting Table(Needed to perform the chestplate crafting recipe on a 3x3 grid.)
- Leather(8 leather to craft Leather Chestplate (early game).)
- Iron Ingot(8 ingots to craft Iron Chestplate (mid game).)
- Diamond(8 diamonds to craft Diamond Chestplate (late game).)
- Netherite Ingot(Used to upgrade Diamond Chestplate on a smithing table.)
- Smithing Table(Used to upgrade Diamond Chestplate to Netherite.)
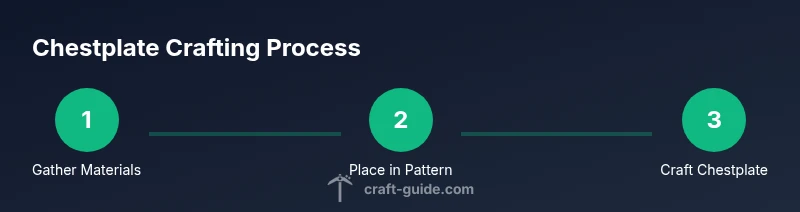
Steps
Estimated time: 15-25 minutes
- 1
Gather materials and tools
Collect the required items for your chosen chestplate material. If you plan to upgrade later, keep a diamond chestplate ready and a smithing table accessible. Check your inventory to confirm you have eight of the material and a crafting table within reach.
Tip: Organize your storage so you can grab eight blocks of leather, iron, or diamonds quickly. - 2
Open the crafting table interface
Right-click (or the equivalent on your platform) to open the 3x3 crafting grid. You’ll place eight material blocks around the center, leaving the middle cell empty.
Tip: If the grid looks off, reset and re-count the items before placing them. - 3
Arrange items in the 3x3 pattern
Fill the top row with your material, fill the left and right cells of the middle row, and fill the bottom row with the material. The center slot stays empty.
Tip: Think of the pattern as a hollow center; the outer ring is what creates the chestplate. - 4
Craft the Chestplate
Move the chestplate from the result box into your inventory. If you don’t see a result, double-check the pattern and item counts.
Tip: If crafting fails, ensure you used eight items around the center and that your crafting grid is square. - 5
Upgrade to Netherite (optional)
If you want Netherite, upgrade a Diamond Chestplate with a Netherite Ingot on a smithing table. This preserves enchantments and improves durability.
Tip: Have a spare diamond chestplate ready in case you need to revert or compare stats. - 6
Apply enchantments
Add useful enchantments such as Unbreaking or Mending to improve longevity. Use an enchantment table or an anvil to combine books with your chestplate.
Tip: Balance enchantment costs with the resources you’ve collected to avoid expensive repairs. - 7
Repair and maintain
Repair your chestplate when it shows wear through anvil-based repairs or by replacing worn pieces. Regular maintenance reduces the risk of sudden armor loss in danger zones.
Tip: Carry a spare chestplate during long journeys to avoid downtime. - 8
Equip and monitor durability
Equip your chestplate and monitor its durability during exploration. Replace or upgrade as needed to stay protected in challenging environments.
Tip: Plan routes with safe zones where you can stop to repair or upgrade.
People Also Ask
What materials are needed to craft a leather chestplate?
Leather chestplates require 8 pieces of leather placed around the center in the crafting grid. This is the simplest armor option for early gameplay when resources are limited.
Leather chestplates use eight leather around the center slot; it’s the easiest armor to craft early on.
Can you upgrade iron or leather to diamond or netherite later?
You can upgrade to higher-tier armor by progressing through materials. Leather and iron serve as starting points; diamond is the next major upgrade, and Netherite is achieved by upgrading a diamond chestplate with a Netherite Ingot in a smithing table.
You upgrade armor by moving up from leather to iron, then to diamond, and finally to Netherite via smithing table.
Do I need a crafting table to craft a chestplate?
Yes. A chestplate is crafted in the 3x3 crafting grid using a crafting table. You can place eight items around the center slot to create the chestplate.
You need a crafting table to craft a chestplate.
What enchantments are best for chestplates?
Unbreaking and Mending are highly recommended for longevity. Protection can also be useful, but consider your play style and XP availability when choosing enchantments.
Unbreaking and Mending are great starting enchantments for chestplates.
Is there a difference between Java and Bedrock chestplate crafting?
The chestplate recipe is the same across both editions: eight units of the chosen material around a centered empty slot. Minor UI differences may exist, but the recipe pattern stays consistent.
Java and Bedrock share the same chestplate pattern, with minor interface differences.
How does durability work with chestplates?
Durability decreases as you take damage, meaning chestplates wear down over time. Higher-tier materials generally hold up longer, and repairs or enchantments help extend their life.
Durability wears down with use, and higher-tier armor lasts longer with repairs and enchantments.
Watch Video
The Essentials
- Plan armor upgrades from leather to netherite as you progress
- Use the 3x3 pattern with eight surrounding blocks
- Upgrade wisely with Netherite using a smithing table
- Enchantments extend chestplate longevity and protection
- Repair regularly to maintain effective protection