Gold Farm in Minecraft: A Practical Efficiency Guide
Learn how to build a reliable gold farm in Minecraft to harvest gold ingots and XP. This comprehensive, beginner-friendly guide covers designs, redstone basics, and server considerations for 2026.

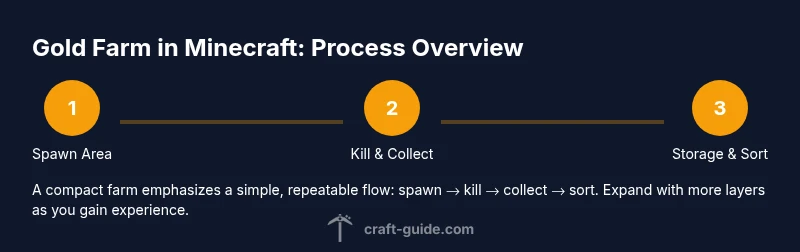
A gold farm in Minecraft is a purpose-built design that reliably yields gold ingots and XP by guiding mob spawns into a controlled killing and collection system. This guide walks you through compact and scalable designs, essential redstone basics, and maintenance tips to optimize output. According to Craft Guide, starting small with a simple, repeatable setup helps players learn the flow before expanding.
What a gold farm in minecraft is and why it matters
A gold farm in minecraft is a purpose-built structure that converts mob spawning events into gold drops and experience points. The core idea is to create a predictable flow: mobs spawn on a designated platform, move toward a kill mechanism, and drop gold drops that are directed into storage. For players, gold is more than a collectible: it powers powered rails, beacons, lanterns, and villager trades. Craft Guide’s team notes that a well-tuned farm saves grinding time and becomes a steady source of resources, especially for long-term worlds or servers. The best designs balance reliability with ease of maintenance, ensuring you can repair or expand without a complete rebuild. As you begin, focus on a compact, easy-to-run variant that you can scale up later without compromising your day-to-day play.
How a gold farm produces gold and XP
Gold farms rely on mob spawning surfaces and targeted pathways to direct lifeless drops into storage while granting XP to the player. In most designs, mobs appear on a controlled spawning pad and are funneled toward a killing chamber, where they are eliminated using a simple method such as fall damage or a basic redstone-triggered mechanism. Drops are collected by hoppers and routed into chests or sorting systems. The XP from defeated mobs can be collected passively, or sometimes through a dedicated XP feeder that allows you to enchant or repair gear more efficiently. The end result is a predictable yield of gold ingots (and other related drops) without constant manual farming. Craft Guide emphasizes starting with a reliable, small-scale version to learn the mechanics before expanding.
Design options: compact vs colossal farms
You can approach a gold farm in minecraft with two broad goals: a compact, beginner-friendly design or a colossal setup that maximizes spawning surfaces and drops. A compact farm prioritizes simplicity, quick construction, and minimal maintenance, making it ideal for new players or small bases. A larger design uses multiple layers, longer collection runs, and enhanced item sorting to increase output. Both approaches share core elements: an efficient spawning area, a reliable kill mechanism, a fast transportation method for drops, and a clean storage system. Craft Guide recommends choosing a design that fits your world version, available space, and comfort level with redstone. As you gain experience, you can tailor the layout to your terrain while keeping the workflow intuitive.
A practical blueprint for a compact gold farm
This section outlines a compact gold farm blueprint intended for beginners. Start by establishing a small spawning platform with a protected kill zone. Create a straightforward transport path that channels mobs to a kill mechanism, then connect a hopper line to a chest-based storage system. Keep the layout open to avoid accidental mob escapes and maintain easy access for maintenance. The intent is to establish a working, repeatable flow you can replicate in other worlds or scale up later. Craft Guide highlights that problem-free operation comes from simplifying the path and reducing complex redstone until you’re ready to optimize.
Nether vs Overworld: location considerations
Where you place your gold farm can influence performance and accessibility. Net her-based farms exploit high spawn rates in certain biomes but require cross-dimension travel and potentially more complex logistics. Overworld designs may be easier to maintain and test, especially when you’re learning the mechanics. Consider proximity to your main base, ease of access to storage, and how often you’ll run the farm. Craft Guide notes that testing in a safe environment, then relocating or expanding once you confirm the base design works, helps avoid wasted effort.
Redstone and automation basics for gold farms
A successful gold farm often hinges on reliable automation. Start with simple redstone circuits that control the kill mechanism, item transport, and storage sorting. Modularize the design: a kill chamber that triggers with a basic pulse, a collection line of hoppers feeding into a chest, and optional sorting rails. Keep the circuitry clean to reduce lag or misfires. As you gain confidence, you can swap in more advanced timing or pulse generators, but only after you’ve validated the base flow works consistently. Craft Guide suggests documenting every change you make to prevent confusion during later expansions.
Efficiency tuning: maximizing output and safety
To boost efficiency, fine-tune spawn timing, ensure light levels outside the farm suppress unwanted spawns, and verify that mobs are not accumulating in unintended areas. A reliable gold farm also requires a robust damage or kill mechanism so drops are produced consistently. Regular checks for clogs in hoppers or storage lines help prevent bottlenecks. Safety should be a priority: build fences or walls, place lighting in nearby corridors, and consider anti-lag strategies if you’re on a server. Craft Guide emphasizes iterative testing and incremental improvements rather than sweeping redesigns.
Common mistakes and fixes
Beginners often battle with misplaced spawn pads, leaky kill zones, or unsealed storage that causes drops to vanish. Avoid accidental spawns outside the intended area by lighting nearby spaces and preserving a clear boundary around the farm. Misrouting items to the wrong storage or overflowing chests slows down progress and invites maintenance headaches. Regularly inspect the pathway for blockages, confirm hopper orientation, and ensure the kill method remains effective after terrain changes. Craft Guide recommends keeping a changelog for any modification to diagnose issues quickly.
Maintaining your farm on servers and with mods
On servers, performance matters as much as design. Use chunk loading judiciously and favor designs that minimize tick updates to reduce lag. If you’re using mods, verify compatibility with your Minecraft version and ensure the FARM system remains stable with other mods installed. Regular backups and testing in a controlled environment help you catch issues before they affect gameplay. Craft Guide notes that a well-documented, modular gold farm can be easily shared with the community and adapted to different server rules and playstyles.
Getting the most from your gold farm: storage and trading
Collecting gold ingots is only part of the equation; you’ll want a practical storage pipeline. Use a chain of hoppers to funnel items into sorted storage, with a clear separation between ingots, nuggets, and other drops. Sorting systems benefit from labeled chests and a simple rerouting mechanism to avoid misfires. Many players combine gold farming with villager trading or beacon farming to maximize resource efficiency. Craft Guide’s approach is to keep the farm simple enough to operate daily, yet robust enough to scale when your world grows.
Tools & Materials
- Building blocks (any solid blocks)(Frame the spawning areas and support structures)
- Hoppers(Collect drops and feed into storage)
- Chests(Storage for gold drops and nuggets)
- Redstone dust(Wiring for basic automation and timers)
- Pistons(Some designs use moving parts for funnels or doors)
- Glass(Visibility and containment for certain layouts)
- Water buckets(Optional for transporting mobs along a path)
- Redstone torches(Power sources for simple circuits)
- Signs or trapdoors(Control flow and block access in some designs)
Steps
Estimated time: 2-4 hours
- 1
Plan the spawn and kill area
Select a compact, safe area and sketch a simple spawning platform. Define a kill zone that reliably eliminates mobs without risking escape. Keeping the layout small at first helps you learn the flow and minimizes the risk of confusion later.
Tip: Document dimensions and critical parts before you place blocks. - 2
Create a straightforward mob funnel
Build a path that gently guides mobs from the spawn area to the kill chamber. Avoid sharp turns or gaps that mobs can exploit. A simple, direct route reduces misrouting and keeps the workflow predictable.
Tip: Test the path with a single mob to check for jams. - 3
Install a basic collection system
Set up a line of hoppers feeding into a chest array. Ensure each drop follows a single, unobstructed route to storage. Label chests to keep drops organized and easy to retrieve.
Tip: Double-check hopper orientation before sealing the area. - 4
Add a safe lighting plan
Light nearby areas to prevent unwanted spawns. A well-lit perimeter helps focus spawning only where you want it and reduces lag from stray mobs.
Tip: Use visible lighting so you can quickly identify hotspots during maintenance. - 5
Test the kill mechanism
Trigger the kill setup and observe how mobs die and drops appear in storage. If items vanish or fall out of the collection area, adjust the path or the kill method.
Tip: Run multiple tests with different mob counts to ensure consistency. - 6
Tune for reliability
Refine the spawn rates by adjusting lighting, block types, and pathways. Start with conservative changes and test after each tweak to isolate effects.
Tip: Keep a changelog so you can revert if a tweak reduces performance. - 7
Integrate storage and sorting
Create a clear flow from the collection line to sorted chests. A simple sorter can help separate ingots, nuggets, and junk drops to keep inventory organized.
Tip: Leave room for expansion in your storage area as output grows. - 8
Document and safeguard
Record coordinates and take screenshots for future reference. Add a fence or barrier to prevent accidental encounters with the farm during base exploration.
Tip: Back up your world before making major changes.
People Also Ask
What is a gold farm in Minecraft?
A gold farm is a dedicated build that produces gold ingots and XP by guiding specific mobs to a kill zone and collecting the drops efficiently.
A gold farm is a build designed to yield gold ingots and XP by directing mobs to a killing area and collecting their drops.
Can you build a gold farm in survival mode?
Yes. With a practical plan and gradual expansion, a compact gold farm can be built in survival, using standard blocks and redstone.
Yes. You can build a compact gold farm in survival with standard materials and careful planning.
Do I need the latest version to run modern designs?
Many designs rely on core game mechanics that are present in recent major updates; check the design notes for version requirements.
Most designs work with recent Minecraft updates; always verify version compatibility in the design notes.
Will gold farms cause lag on servers?
Large or poorly tuned farms can contribute to lag. Use chunk loading wisely and test performance in a controlled environment.
Farms can cause lag if not tuned; monitor performance and optimize chunk loading.
What design is best for beginners?
A small, straightforward spawning area with a simple kill and collection system is ideal for learning before scaling up.
Start with a small, simple design to learn the flow before expanding.
How should I transport drops to storage?
Use a line of hoppers feeding into a chest array; keep paths direct and avoid bottlenecks that slow down collection.
Direct, hopper-based transport to a labeled storage makes drops easy to manage.
Watch Video
The Essentials
- Plan a compact, scalable design first
- Keep the flow: spawn → kill → collect → sort
- Automate storage to minimize manual work
- Test and iterate to improve efficiency