Custom Minecraft Skins: Step-by-Step Guide
Learn to create and upload custom Minecraft skins with a detailed, beginner-friendly workflow. This guide covers tools, templates, palette design, testing, and safe uploading for Java and Bedrock editions.

By following this guide, you will create and upload your own custom Minecraft skins for both Java and Bedrock editions. You’ll use a pixel-perfect template, edit with your preferred image editor, and test the result in-game before sharing. Before you start, gather a Minecraft account, a skin template, and a capable image editor.
What are custom minecraft skins and why they matter
Custom minecraft skins are textures that wrap around your character to define appearance in-game. A skin is a 2D image laid out to map to the 3D model, covering the head, body, arms, and legs, with optional layers for hair or clothing. For many players, skins are a form of personal expression and role-playing within servers, especially when playing in communities that celebrate unique character concepts. The creation process hinges on the 64x64 template used by Java Edition, though Bedrock players can use skins designed to fit the same layout. The craft of skin design blends color theory, pixel placement, and precise alignment to avoid seams and misalignment. According to Craft Guide, mastering custom minecraft skins is accessible to players at all levels—from absolute beginners to seasoned builders. The basic workflow is simple: pull up a template, edit pixels with care, preview the result, and upload to your account. Yet the nuance lies in shading, seam placement, and how designs appear under varying in-game lighting. This section will demystify the essentials so you can start confidently and sidestep common pitfalls.
Getting the right tools and accounts to create skins
To create high‑quality skins, you need a few reliable tools and a valid Minecraft account. Start with a computer or tablet capable of running your editor smoothly, plus a graphics program that supports pixel art and layers. A dedicated skin template (64x64 PNG) ensures you stay aligned with the official layout. An account with Minecraft access is required to upload and apply skins across editions. Optional extras include a backup system for your original skin files and a color palette reference you can reuse across designs. Craft Guide analysis shows that players who invest in a simple, repeatable workflow—template, palette, test—tend to produce consistent results. Before diving into details, set up a comfortable workspace, enable a visible pixel grid, and decide on a naming convention for your skin files so you can track variations over time.
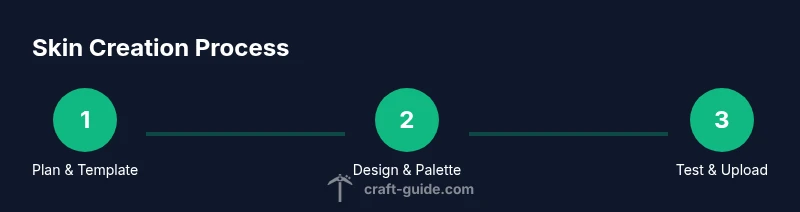
Step-by-step workflow overview
A practical skin project follows a predictable rhythm: prepare the canvas, plan the palette, paint sections in isolation, add details and shading, validate seams, and finally export and upload. The 64x64 template is organized into regions for the head, torso, arms, and legs, with additional layers used by some editors to simulate hair, armor, or clothing. Throughout this workflow, you’ll switch between editing and preview modes to verify how changes look under different lighting. The goal is a cohesive design where colors read clearly on a variety of skins and server environments. In this section we’ll outline the core steps and explain why each matters, so you can approach the process with clarity and confidence.
Designing the palette and template layout
Palette design is where most skins begin to show character. Start with a base skin tone and then add a concise set of shading colors to convey depth without creating harsh, blocky transitions. Because the skin is mapped to 3D parts, keep color blocks consistent across the head, body, arms, and legs to avoid obvious seams. Layering is your friend: use separate layers for clothing and accessories so you can adjust shading without disturbing the base skin. The template has fixed regions—head, hat/hair, torso, arms, legs, and back—that must align when wrapped around the model. Planning before painting reduces backtracking and makes edits faster. Based on Craft Guide analysis, most players who map out regions first produce cleaner skins with fewer seams and a more polished look.
Pixel editing techniques: faces, clothes, and accessories
Begin with the face and eyes, as these are the most recognizable features. Use tiny, deliberate pixels to craft expressions and character traits, then move to clothing and accessories. For clothing, establish a base color and add shading along the edges where light would naturally hit. Highlights should be subtle to avoid a cartoonish look, while shadows can imply fabric folds. Remember to keep the color palette tight—too many hues create noisy textures that read poorly in-game. If your editor supports layers, place skin on one layer and clothing on another so you can experiment freely. Regularly switch to a preview to assess how each edit reads from different distances.
Testing, exporting, and uploading to Minecraft
Testing the skin in-game is essential to catch issues the editor preview can miss. Save your work frequently during editing, and export a PNG with alpha transparency preserved. For Java Edition, go to your profile in the launcher and upload the PNG skin; Bedrock users upload via their account settings. Always maintain a labeled backup of your original template so you can revert if needed. After uploading, load Minecraft and inspect your character from multiple angles and lighting conditions—day, night, and inside buildings—to confirm seams stay aligned and textures read clearly. This iterative testing helps catch subtle misalignments before you share with friends or on servers.
Uploading and cross‑edition considerations
If you play both Java and Bedrock, you’ll want skins that look good in both ecosystems, acknowledging some practical differences in how each edition handles textures. Upload your skin to the account used by the edition you’re joining, and be mindful of licensing if you borrow ideas from someone else’s work. Some servers implement custom rules or skin packs that can affect visibility or access; always verify server-specific guidelines when sharing your design. After a successful upload, reopen the game to verify that the skin is applied correctly across different in-game environments and character poses. Keeping a log of the edits you made can help you recreate or adjust designs in the future.
Troubleshooting common issues and advanced tips
Despite best efforts, seams and color bleed can appear. Common causes include edits that shift pixel alignment, layers that aren’t merged properly, or exporting with a degraded color profile. If you see seams, recheck the affected regions against the template and ensure no stray transparent pixels exist along edges. Use a 1-pixel brush to fine‑tune seams and examine the skin under different lighting. For advanced players, layering subtle textures and using a restrained palette often yields the most professional results. Always back up before experimenting with new techniques so you can revert to a known good version if something goes wrong.
Best practices for sharing and licensing your skins
Sharing skins responsibly means respecting others’ work and maintaining clear usage boundaries. If you base your design on another creator’s texture, seek permission or use a license that allows derivative works. Consider adding a small watermark or a note in the file name to indicate authorship, and provide a link to your own profile or gallery when distributing your work. Versioning is helpful: save each major variation as a separate PNG and maintain a changelog in a text file. Finally, keep your skin files organized in a dedicated folder structure so you can quickly locate your latest designs and iterate on them as you gain experience.
Real-world examples and inspiration
Many players start from a simple, iconic silhouette (hero, villager, or fantasy archetype) and gradually incorporate personal details—hats, armor, or distinctive color blocks—to create a unique silhouette. Browsing community skin galleries can spark ideas, but aim to reinterpret inspiration rather than copy verbatim. If you post your work publicly, offer versions with and without certain details to accommodate servers that enforce stricter textures. The beauty of skins lies in their ability to reflect personality; even small changes, like a color swap or a modified eye shape, can dramatically alter the character’s vibe.
Quick-start checklist and next steps
- Download the official 64x64 skin template and open in your editor.
- Plan a concise color palette and legible shading.
- Edit the head, torso, arms, and legs with attention to seams.
- Preview frequently in a lighting cycle and adjust accordingly.
- Save as PNG with alpha, then back up your work.
- Upload to your Minecraft account and test in-game.
- Share responsibly, noting authorship and licensing.
Next, try a themed skin (e.g., knight, explorer, or mage) and document your steps so you can reproduce the design later. Practice builds confidence and helps you develop a consistent style that others will recognize.
Tools & Materials
- Computer or mobile device(Stable internet connection; ability to run an image editor)
- Image editor (GIMP, Photoshop, Paint.NET, or similar)(Pixel-art mode with a visible 1px grid recommended; preserve RGBA channels)
- Official 64x64 skin template (PNG)(Baseline layout for head, body, arms, legs, and optional layers)
- Minecraft account(Needed to upload and apply skins in-game)
- Backup copies(Save originals before major edits)
- Color palette reference(Keep palette consistent across designs)
Steps
Estimated time: 60-90 minutes
- 1
Open the skin template
Download the official 64x64 skin template and open it in your image editor. Confirm the canvas uses a pixel grid and set the color mode to RGBA to preserve transparency. The template segments map to the head, torso, arms, and legs, and you must respect these boundaries when painting.
Tip: Turn on gridlines and snap to grid to keep edits precise. - 2
Plan your color palette
Choose a concise base color and a small set of shading tones. Map out which colors correspond to fabric, skin, hair, and accessories to maintain visual balance across body parts. A tight palette reduces harsh transitions at seams.
Tip: Limit the palette to 4–6 colors for readability and easier shading. - 3
Edit the head region
Start with facial features and hair on the head. Use small, deliberate pixels to craft expression while keeping symmetry or intentional asymmetry. Check that eyes and mouth align with the template’s coordinates.
Tip: Copy patterns across symmetric areas to keep faces consistent. - 4
Paint torso and arms
Apply clothing color blocks and add shading along edges to convey depth. Use a separate layer for clothing if possible to adjust shading without disturbing the base skin. Ensure seams align across the front and back panels.
Tip: Keep edges crisp with 1-pixel brushes and frequent previews. - 5
Shade legs and feet
Extend clothing colors to the legs and add consistent shading that matches the torso. Verify that the left/right and front/back panels align in tone and pattern. Avoid creating abrupt color blocks that look pixelated at distance.
Tip: Cross-check back views to ensure continuity of shading. - 6
Add details and accessories
Introduce distinctive features such as belts, armor stripes, or hats sparingly. Limit gradients since the skin uses a limited color set. Place details in areas that are clearly visible in most poses.
Tip: Test accessory placement by switching to different character poses. - 7
Check transparency and seams
Inspect edges where panels meet and ensure transparency is intentional where used. Misplaced transparent pixels can cause visible seams in-game. Correct any stray pixels and verify the alpha channel reads correctly.
Tip: Toggle layer visibility to isolate seam problems quickly. - 8
Save, backup, and upload
Export the skin as PNG with alpha preserved. Save a backup copy before uploading. In the Minecraft launcher, upload the skin to your profile and test in-game under daylight and shade to confirm final appearance.
Tip: Label versions clearly (e.g., 'Knight_v1') and keep a local backup.
People Also Ask
What is a Minecraft skin?
A Minecraft skin is a texture that covers your character, defining appearance for the head, body, arms, and legs. Skins map to the 3D model and render differently between Java and Bedrock editions. You customize skins by editing a fixed-template PNG file and uploading it to your account.
A Minecraft skin is the texture that covers your character. You edit a fixed-template PNG and upload it to your account to change how you look in-game.
Which size should I use for skins?
The standard size is a 64x64 PNG template. Some editors and servers support variations, but for compatibility use the 64x64 layout. Always follow the guidelines of your edition when exporting.
Use the 64x64 PNG template for compatibility. Some servers may have additional requirements, so check the rules before uploading.
Can I use skins on both Java and Bedrock?
Yes, skins can be used on both editions, but you must upload to the correct account and template. A few minor differences may apply in how textures render, so test on both platforms if you play across editions.
Yes, but upload to the right edition and test both platforms to confirm how it looks.
How do I upload a skin in Java Edition?
Open the Minecraft launcher, go to your profile or skin settings, click Browse, select your PNG skin, and save. Restart the game or re-enter a world to see the new skin applied.
In the launcher, upload your PNG skin in the profile area and then load into the game to see it.
Why are seams visible or misaligned on my skin?
Seams occur when pixels shift during editing or when the template boundaries are not respected. Recheck the alignment in each region and ensure consistent shading across panels. Use grid snapping to prevent drift.
Seams show up if pixels shift or edges don’t line up; recheck the regions and preview at different angles.
Are animated skins possible?
Minecraft skins themselves are static textures. Animation effects are typically achieved via resource packs or mods, which adds complexity and may require additional permissions. Stay aware of server rules when using mods.
Skins don’t animate by themselves; animation uses resource packs or mods, which may have rules on some servers.
What’s the best way to share skins responsibly?
Give credit if you’re inspired by another creator, and avoid copying protected textures. Provide a license note when sharing publicly and link back to your own gallery so others can verify authorship.
Credit sources when inspired by others and share with a clear license or attribution.
Watch Video
The Essentials
- Plan your palette before painting.
- Keep seams in mind while editing.
- Test in-game under varied lighting.
- Save backups before uploading.
- Share skins responsibly with attribution.