Skin on Minecraft: A Practical Guide to Custom Player Skins
Learn how to design, save, and apply skin on minecraft across Java and Bedrock editions. This comprehensive guide covers templates, file formats, uploading, testing, and best practices for expressive skins that stand out.

Learn how to create, customize, and apply skin on minecraft across Java and Bedrock editions. This quick guide covers design templates, image formats, uploading workflows, and practical tips for testing in-game. By following these steps, you can express your in-game identity with unique skins while avoiding common mistakes. The quick guide provides concise actions and checks so you can get hands-on quickly.
What is a Minecraft skin and why it matters
A Minecraft skin is the texture that covers your player model, giving you a unique look in the blocky world. According to Craft Guide, skin customization is a core way to express personality and style while playing. In this guide, skin on minecraft will be treated as more than just an image; it's a small art project that travels with you across servers and adventures. A skin maps to the character's head, torso, arms, and legs, and newer editions add layers for shading and detail. When you choose or create a skin, you set tone: heroic armor, quirky animal costumes, pixel-art portraits, or a blend of themes. This matters because identity in Minecraft is built through visuals as much as through builds, farms, or redstone contraptions. For beginners, start with something simple you love and build complexity over time. The Craft Guide team found that players who test skins in multiple lighting conditions reduce obvious seams and color shifts, producing a more polished appearance. Throughout this guide, we’ll walk you through practical steps to design, save, upload, and test your skin on minecraft so it feels intentional, not accidental.
Tools & Materials
- Computer or tablet with internet access(Used to edit, save, and upload your skin)
- Image editor with PNG support(Examples: GIMP, Paint.NET, Photoshop, or online editors)
- Skin template or blank PNG file(Start from a ready-made template to ensure correct mapping)
- Color palette reference(Helpful for consistent color choices)
- Minecraft account (Java or Bedrock)(Needed to upload and apply the skin)
- Backup storage (cloud or USB)(Keep a copy of edits in case you need to revert)
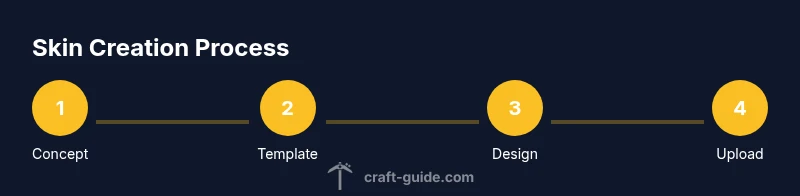
Steps
Estimated time: 60-120 minutes
- 1
Gather ideas and references
Decide on a theme and collect image references that match your desired look. This ensures your skin on minecraft stays cohesive and recognizable across lighting and environments. Tip: start with a simple concept you love, then expand details later.
Tip: Create a mood board or use a single reference image to anchor colors. - 2
Open a skin template in your editor
Launch your editor and load a standard skin template PNG. If you don’t have one, use a blank 1:1 PNG with the correct mapping for the character's zones. Saving early prevents accidental loss.
Tip: Enable grid view to align features precisely. - 3
Paint base colors
Fill large areas with the base colors corresponding to clothing, skin, or armor. Keep edge transitions clean to avoid texture bleeding in-game.
Tip: Use color swatches to maintain consistency across body parts. - 4
Add shading and detail
Layer shading to simulate light sources and depth. Subtle highlights on the top edges and darker shadows in recessed areas make your skin look more polished.
Tip: Test with a neutral light in your editor to gauge contrast. - 5
Export as PNG and verify
Save the file as PNG, keeping the correct filename and transparency if required by your editor. Reopen the image to confirm there are no stray pixels or misaligned layers.
Tip: Always keep a backup before uploading. - 6
Upload to Minecraft account
Sign in to your Java or Bedrock profile and update your skin by uploading the PNG. This syncs across the game client and servers.
Tip: If you’re on Bedrock, ensure you’re using the correct platform store or launcher. - 7
Test in-game and iterate
Load into a world or server to check seams, color accuracy, and legibility of details. Make small tweaks and re-upload as needed.
Tip: Seek feedback from friends to catch issues you missed. - 8
Finalize and back up
Once satisfied, save a final version and store copies in multiple locations. This protects your design from accidental loss or corruption.
Tip: Document version changes for easy rollbacks. - 9
Share your skin responsibly
If you post or distribute your skin, include attribution and usage notes. Respect others' creations and server rules when sharing.
Tip: Consider licensing terms to avoid misuse.
People Also Ask
What is a Minecraft skin?
A Minecraft skin is a texture that covers your player model, giving you a unique appearance in the game. Skins map to body parts and can include layers for shading. They travel with you across worlds and servers to express identity.
A Minecraft skin is the texture that covers your character. It maps to body parts and can include shading to show your identity in the game.
Can I use Bedrock skins on Java Edition?
Bedrock and Java editions use compatible PNG skins, but some features like certain texture layers may behave differently. Always test in your chosen edition to ensure correct rendering.
Yes, you can use the PNG skin, but check how it renders in your edition since some details may vary.
Do skins affect gameplay?
Skins do not affect core gameplay mechanics like combat or building. They only change appearance. Some servers may have cosmetic plugins, but base gameplay remains unchanged.
Skins only change how you look; they don’t change how the game plays.
How do I upload a new skin?
Sign in to your Minecraft account, navigate to the profile or skin section, and upload your PNG. The new skin will apply to your character in-game across supported editions.
Sign in and upload your PNG skin in the profile section to apply it in-game.
Are there rules for skin design?
Yes. Avoid content that is hateful, explicit, or violates server rules. Some servers may ban certain skins even if they’re allowed elsewhere.
Follow community guidelines and server rules when designing and sharing skins.
Where can I find skin templates?
Many editors provide built-in templates or downloadable PNGs. Look for templates that map correctly to the Minecraft model to prevent misalignment.
Use a template that matches Minecraft’s model so the skin lines up correctly.
Watch Video
The Essentials
- Plan your skin concept before starting.
- Use templates to avoid mapping errors.
- Test on multiple devices to spot seam issues.
- Save backups and document edits for easy revision.
- Respect community guidelines when sharing skins.