Minecraft Make Skin: A Practical How-To for Custom Skins
Learn how to Minecraft make skin with an easy, step-by-step guide. From base templates to final tweaks, Craft Guide provides practical tips for beginners.

In this guide you will learn how to Minecraft make skin by designing a base template, selecting colors, shading for depth, and exporting a portable skin file. You'll start with choosing a skin template, customize features (eyes, hair, clothing), and test it in Minecraft's skin picker or launcher. The guide also covers saving variants, managing skins across devices, and common pitfalls to avoid.
What a Minecraft skin is and how it works
According to Craft Guide, a Minecraft skin is a 2D texture that maps to a 3D model to define color, clothing, and patterns. In Java Edition, skins wrap around the body with seams guiding alignment; Bedrock uses a similar system but can differ in pixel placement on arms and head. Understanding this mapping helps you plan for consistent shading and readable features. Start with a strong concept—consider whether the character is a knight, explorer, or farmer—and sketch it before painting. A clear concept ensures the resulting skin looks cohesive when viewed from all angles. Remember: skins are textures, not models, so you edit pixels and rely on the game to render depth. The better you map seams and volume, the more natural the pose will feel, especially during movement.
Getting started: choose your base and tools
Begin with a base skin template that matches your edition. You’ll edit the PNG in an image editor or use a dedicated skin editor, and you may switch between color palettes during iteration. Plan on paper or in a notes app: decide features that matter (face, torso, limbs) and which accessories to add. Gather essential tools: a PNG-capable editor, a color palette, reference images, and a Minecraft launcher to test your work. If you want quick iterations, work with multiple layers for skin, clothing, and accessories so you can toggle visibility during testing. Finally, set a naming convention for files so you can track versions easily.
Designing faces and characters: color theory and guidelines
Color choice defines personality and readability. Use a limited palette to maintain contrast at small pixel scales. Consider skin tone, eye color, hair shade, and clothing hues that read well against the silhouette. Use bold primary values for major areas and reserve softer shades for shading transitions. For facial features, keep expressions readable on a tiny canvas; subtle shading around eyes and cheeks adds depth without crowding. Maintain symmetry or purposeful asymmetry to convey character traits. Always test high-contrast combinations to ensure readability in dim lighting or on mobile devices.
Building armor, clothing, and accessories
Layering is your friend. Plan separate regions for armor, belts, capes, hats, or backpacks, and keep seam lines consistent across limbs. Use darker shades along edges to imply depth, and brighter highlights where light would hit. When adding accessories, consider how they wrap around curved surfaces to avoid pixel distortion. Keep patterns simple to preserve legibility at small scales. Remember that “less is more” often yields a cleaner, more readable result.
Testing and exporting: when and how to test in-game
Testing matters more than planning alone. Save your skin as a PNG with the correct dimensions for your edition and upload it to the launcher or a server for testing. Look at it from multiple angles and under different lighting to detect seam issues or color misreads. If you see seam gaps, revise pixel alignment or adjust shading. When you’re satisfied, export a final version and back it up. Re-test after each major tweak to confirm improvements.
Cross-platform considerations: Bedrock vs Java skins
Bedrock and Java editions may render skins slightly differently, especially around transparency and seam placement. If you switch between editions, verify that your skin preserves transparency where needed and aligns with armor layers. Save separate versions for each platform if necessary, and keep both backed up. This careful approach ensures your character retains its identity across consoles, PC, and mobile.
Common mistakes and troubleshooting
Avoid mis-sizing the image or neglecting seam alignment; issues become obvious when the character moves. Ensure the PNG uses the correct color depth and avoid extra channels that can confuse rendering. Don’t underestimate how seams appear during movement—preview while walking, and test in different lighting conditions. If colors read as washed out, adjust contrast or gamma in your editor. Always keep backups so you can revert to previous versions if a revision goes wrong.
Skins for different themes: fantasy, realism, cartoon
Experiment with genre cues. Fantasy skins may feature jewel tones, metallic accents, and rune-inspired patterns. Realistic skins emphasize natural textures and subtle shading, while cartoon styles rely on bold color blocks and strong silhouettes. For each theme, plan core colors first and then add accessories that reinforce the concept. Preserve consistency by reusing design motifs and toon-style shapes across outfits.
Next steps: sharing and collaborating on skin ideas
When a skin feels solid, share it with friends and communities to gather feedback. Save multiple palettes and document the design decisions for future projects. Consider building a small skin portfolio to show range and adaptability. You can also collaborate on themed skin packs, with a shared naming convention and versioning. The Craft Guide team recommends treating this as an ongoing craft and backing up work regularly.
Tools & Materials
- Image editor (e.g., GIMP, Photoshop)(PNG support; multiple layers recommended)
- Base skin template PNG(Prepare 64x64 or 64x128 as required by edition)
- Color palette or swatches(Define a core set of 4-6 colors)
- Reference images(Optional images to guide design)
- Minecraft launcher or account(To test in-game skin in launcher)
- Notes organizer(For planning ideas and annotations)
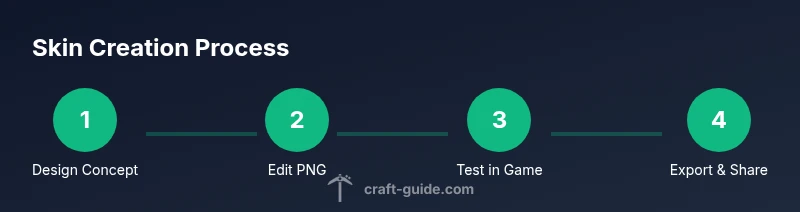
Steps
Estimated time: 2-4 hours
- 1
Choose a base template
Select a starting skin layout that fits your concept. Decide whether you want full-body design or partial edits. Consistency matters for shading and joints.
Tip: Start with a clean template to avoid misalignment. - 2
Plan design and palette
Sketch your concept and pick a limited color palette (4-6 colors) to ensure cohesion across skin, clothing, and accessories.
Tip: Limit colors to create a readable, iconic look. - 3
Edit the skin in your editor
Open the base PNG in your editor. Paint major areas first (torso, limbs), then refine eyes, hair, and patterns. Use layers to adjust shading non-destructively.
Tip: Work on separate layers for skin, clothing, and accessories. - 4
Apply shading and highlights
Add subtle shading to indicate volume with a consistent light source. Test with simple lighting to verify depth and readability.
Tip: Shade joints where limbs bend to mimic depth. - 5
Save variants for testing
Create multiple versions to compare color and shading. Name files clearly (e.g., skin_v1, skin_v2).
Tip: Keep a master file as your reference. - 6
Test in Minecraft launcher
Upload or import the PNG in the launcher and view from multiple angles. Note any misalignments.
Tip: Switch between lighting modes to spot issues. - 7
Refine based on test feedback
Tweak color balance, adjust seams, and fix any clipping. Re-export and re-test until satisfied.
Tip: Aim for clean seams and readable patterns. - 8
Export final and backup
Export the skin as PNG and save a backup on cloud or another device for safekeeping.
Tip: Maintain version control for tweaks.
People Also Ask
What is a Minecraft skin?
A skin is a 2D texture that covers the 3D Minecraft character. It defines color and pattern for visibility in-game.
A skin is the texture of your character in Minecraft, showing its colors and patterns.
Which tools do I need to create a skin?
You need an image editor that can work with PNG files, plus a base skin template and a Minecraft launcher to test the result.
You need a PNG editor, a skin template, and the Minecraft launcher to test.
Can I use skins on Bedrock and Java?
Skins are generally compatible across editions, but some platforms require you to re-upload or convert formats.
Skins usually work across editions, but check your edition's requirements.
How do I back up and share skins?
Save the PNG locally and in cloud storage. You can share files with friends or upload to skin repositories.
Keep a copy of the PNG and share via locations you trust.
What are common mistakes when making skins?
Using wrong dimensions, unclear shading, and missing alignment can ruin the look. Always test with in-game lighting.
Watch for wrong sizes or misaligned seams when testing.
Can I edit an existing skin?
Yes. Open the PNG, adjust colors or patterns, and re-upload as a new version.
You can tweak an existing skin and upload a new version.
Watch Video
The Essentials
- Plan color palettes before painting
- Test frequently in-game to catch seams
- Keep layered files for rapid revisions
- Back up every variant securely
- Share skins to gather feedback