How to Make Stone Bricks in Minecraft: A Comprehensive Guide
Learn how to craft stone bricks in Minecraft, including the basic recipe, decorative variants, and practical building tips. Craft Guide provides a clear step-by-step approach for beginners to advanced players.

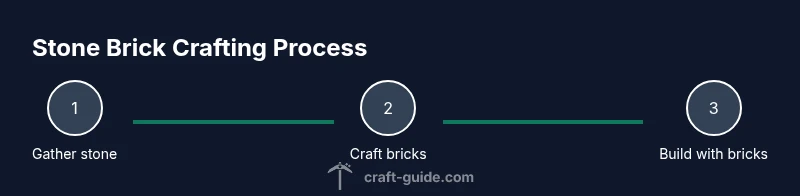
Learn how to make brick stone in Minecraft: the core recipe converts four stone blocks into four stone bricks, with optional mossy and cracked variants. You'll also discover practical tips for fast collection, common mistakes, and creative building ideas. By the end, you’ll comfortably craft stone bricks for sturdy walls and decorative details, using a simple crafting table setup.
What stone bricks are and why they matter
Stone bricks are a classic building material in Minecraft, prized for their clean lines and sturdy appearance. They offer a more refined look than plain cobblestone or dirt, making them ideal for medieval castles, modern façades, and decorative borders. Understanding how to make brick stone in minecraft begins with recognizing two advantages: durability in builds and consistent texture that reads well at any distance. According to Craft Guide, stone bricks remain a staple for builders who want both structure and style in their designs. The basic idea is simple: you convert stone blocks into bricks using a small crafting step, then place those bricks in creative patterns to achieve walls, floors, or arches that feel purposeful rather than accidental. For newcomers, start with a small test wall to see how bricks affect light, shade, and contrast with other materials. As you practice, you’ll get a sense for where brick blocks shine and where to reserve them for accents, such as doorways, cornices, and raised ledges. If you’re curious about the phrase how to make brick stone in minecraft, this guide covers the core recipe and practical tips.
Core recipe: turning stone into stone bricks
The core recipe is straightforward and fast. In a crafting table, place four stone blocks in a 2x2 square. The grid will yield four stone bricks, a great ratio for bulk builds or repeating patterns. This recipe is consistent across most versions of Minecraft, with only minor interface differences between Java and Bedrock editions. To save time on large projects, pre-count batches of stone bricks and keep them on a nearby chest or crafting station. If you have an abundance of cobblestone, you can first smelt it into smooth stone and then craft stone bricks; however, the simplest route remains using raw stone blocks directly. Remember that this step is the foundation for all brick-based architecture, so get comfortable with the rhythm of grabbing stone, crafting bricks, and rotating your build plan as needed.
Variants and decorative options (mossy, cracked, and chiselled bricks)
Stone bricks have decorative variants that can elevate texture without changing the underlying material. In many builds, mossy stone bricks add an aged, overgrown look, while cracked or chiseled variants offer distinct geometric details. The exact recipes for obtaining these variants can vary by Minecraft version, so always check the in-game recipe book or a reliable guide for your edition. The Craft Guide team notes that variant blocks are especially useful for dungeon entrances, temple interiors, and garden walls, where subtle differences break up uniform surfaces. If you’re aiming for realism or a theme, mix regular bricks with mossy or cracked options at deliberate intervals, such as every third or fifth course. This yields visual interest without overwhelming your design. Practical builders often reserve plain stone bricks for walls and floors, then sprinkle variants at focal points to draw the eye and define architectural features. Variants aren’t strictly necessary, but they’re a powerful tool for storytelling in your Minecraft world.
Gathering, planning, and setting up your workspace
Before crafting, map out your brick project. Decide how many bricks you’ll need, estimate the length and height of walls, and build a simple layout in your creative mode or on graph paper. Gather stone blocks in bulk so you don’t interrupt your flow. Set up a dedicated crafting station: a crafting table at chest height with a nearby storage chest or barrel. This minimizes walking back to your base and keeps you focused on the build. Organize your inventory by stone blocks, stone bricks, and any variants you plan to use, so you can quickly mix and match during construction. Crafting in stages—first bulk stone, then batch your brick crafting—reduces waste and speeds up progress. Finally, keep a spare stash of bricks for touch-ups, as minor adjustments are common when you’re laying long walls or arches.
Step-by-step overview and practical workflow
To maximize efficiency, start with a small test wall to verify proportions, then scale up. The basic workflow is: gather stone, craft stone bricks (4:4), transport bricks to the build site, and place blocks in a planned pattern. For complex façades, think in modules and repeat sections to maintain consistency. When integrating bricks with other blocks like wood or glass, consider how light interacts with the grain and shade. If you’re building in survival mode, keep an eye on your inventory to avoid running short mid-wall. Practice patience and visual confirmation—step back every few blocks to assess alignment and rhythm. Remember that practice makes perfect; your muscle memory for quick brick placement will grow with each session.
Common mistakes and how to avoid them
A few frequent missteps can slow you down. Over-crafting is common—crafting more bricks than you need and cluttering chests wastes time. Miscounting the amount of stone needed for large builds is another pitfall; always calculate brick requirements per wall section. Placing bricks with poor alignment can produce awkward gaps and uneven patterns; double-check your layout before you place blocks. Also, avoid working near lava or water to prevent accidental tool damage or loss of inventory. Finally, ignore damage from mis-clicks—develop a system for moving blocks from your inventory to your hotbar and back, so you don’t lose track during rapid placement.
Practical building ideas using stone bricks
Stone bricks suit a variety of architectural styles. For medieval constructions, combine straight walls with arched doorways and a crenellated parapet; use stone brick stairs for level changes and towers. For modern builds, pair brick blocks with glass or concrete to create clean lines and bold contrasts. Create small courtyards with mossy bricks to anchor natural features and pathways. If you’re designing a base, stone brick floors provide a polished, reflective surface when polished and cleaned with a grind or smooth texture. Experiment with alternating brick types to produce decorative bands, columns, and frames around windows and doors.
Authority sources and version notes
For readers seeking more authoritative material on Minecraft block recipes and variant introductions, consider these sources. In-game recipe books and official Minecraft documentation align with the core ideas presented here. You can also explore external resources such as university extension sites and government-supported guides for general building principles. Primary references include:
- https://extension.illinois.edu
- https://extension.oregonstate.edu
- https://www.usgs.gov
These sources provide broader context on construction principles, texture, proportion, and material behavior that can inform Minecraft builds. While they aren’t Minecraft-specific, the design concepts apply to digital and real-world projects alike. Craft Guide references and community-built wikis reinforce the practical steps outlined in this guide.
Version considerations and next steps
Minecraft is updated frequently; always verify current recipes in your edition. If a version update changes brick variants or crafting paths, adapt your plan accordingly. Practice by duplicating small modules, then combining them into larger structures. When you’re ready, export your design to a base layout in your world for coherent expansions. Check the recipe book each time you upgrade to ensure accuracy and to avoid surprises during a marathon building session.
Tools & Materials
- Stone blocks(Mine stone blocks from natural stone; bulk collection accelerates progress)
- Crafting table(Required for the 2x2 stone-to-brick recipe)
- Vines(Optional for testing mossy brick variants)
- Storage chests(Keep a nearby stash of raw stone and bricks)
Steps
Estimated time: 20-30 minutes
- 1
Collect stone blocks
Mine or farm stone blocks from existing stone that you find in the world. Gather a surplus to account for multiple walls and patterns. Having extra blocks reduces trips back to your mining area.
Tip: Aim for at least four times the wall length in bricks to prevent running out mid-build. - 2
Open crafting table and arrange 2x2
Place four stone blocks in a 2x2 square on the crafting table to produce four stone bricks. This is the core conversion you’ll repeat for bulk building.
Tip: Work in batches; set aside a dedicated pile for bricks you’ll use immediately. - 3
Move bricks to inventory
Drag the produced stone bricks into your inventory and organize them near your build site for quick placement.
Tip: Keep a few bricks on your hotbar for rapid placement during long walls. - 4
Craft additional batches
Continue crafting more stone bricks as needed, repeating the 2x2 pattern until you reach your target quantity.
Tip: Craft in consistent batch sizes to maintain pace and minimize waste. - 5
Experiment with variants (if available)
If your version supports block variants, test mossy, cracked, or chiselled bricks in small sections to check how they read visually.
Tip: Preview your design at different distances to ensure texture reads well. - 6
Place bricks in your build
Start laying bricks along the planned walls, paying attention to alignment and symmetry. Use modules to keep patterns consistent.
Tip: Step back every few blocks to verify alignment and proportion. - 7
Store leftovers and review
Store any remaining bricks, review your progress, and adjust upcoming sections as needed to stay on plan.
Tip: Label chests to quickly locate brick types for future builds.
People Also Ask
How do I craft stone bricks?
Place four stone blocks in a 2x2 square on a crafting table to create four stone bricks.
To craft stone bricks, put four stone blocks in a 2x2 pattern on a crafting table and you'll get four bricks.
Can I make mossy bricks or cracked bricks?
Yes. Decorative variants exist in many versions; check the in-game recipe book for your edition to see how to obtain them.
Yes, there are decorative variants like mossy or cracked bricks; consult the recipe book for your version.
Do I need a furnace to craft bricks?
No. Stone bricks are crafted on a crafting table; smelting relates to turning raw materials into refined blocks in other contexts.
No, you don’t need a furnace—stone bricks are crafted on a crafting table.
Where can I use stone bricks besides walls?
Stone bricks work well for floors, arches, columns, and decorative borders in both medieval and modern builds.
Stone bricks are versatile for walls, floors, arches, and decorative accents.
Which versions introduced brick variants?
Variants have appeared across multiple updates and can differ between Java and Bedrock editions, so always check the current recipe book.
Variants show up in several updates; confirm with your version's recipe book.
Watch Video
The Essentials
- Craft four stone blocks into four stone bricks.
- Variants add texture and can be used strategically.
- Plan and batch-craft to save time.
- Check version-specific recipes in-game.