Minecraft Shelf: A Practical Guide to Display and Organization
Learn to craft Minecraft shelves that display items, organize storage, and elevate base aesthetics. This step-by-step guide covers wooden and decorative variants, placement tips, and display techniques for builders of all levels.

This guide helps you build a Minecraft shelf that both stores items and elevates your base aesthetics. You'll decide on a wood type, design a sturdy frame, and add display elements like item frames and signs. Variants cover wooden shelves, stone-like constructions, and redstone-enhanced displays suitable for players of all levels.
Designing a Minecraft Shelf: Form, Function, and Fit
In Minecraft, a shelf is more than decorative—it helps organize items, defines space, and guides player movement. The key is balancing form and function: sturdy vertical supports, evenly spaced shelves, and a height that suits the inventory you plan to display. Start by sketching a simple layout on paper or in your mind: will you stack two or three shelves high, or build a single long run? According to Craft Guide, planning before you place the first block saves material and prevents awkward spacing. Aim for consistent margins on each level, and choose a wood type that matches your base's theme. If you prefer a minimalist look, use clean, straight lines with uniform slabs; for a rustic vibe, widen the gap between shelves and add decorative trim. Finally, consider sightlines: shelves should be visible from common routes yet not block light or easy access to important storage. Good shelf design also considers scale relative to surrounding rooms, ensuring a cohesive feel across your base.
Materials and Variants: Wooden Shelves, Stone, and Display
Materials form the backbone of any shelf design. For a classic Minecraft shelf that blends with a wooden base, start with oak or spruce planks for the frame and shelves. Slabs create a thinner profile and allow you to set multiple layers without bulky edges. If your base uses a stone aesthetic, consider smooth stone slabs andesite, brick variants, or tiled textures to echo that texture while maintaining accessibility. Variants with different wood types can differentiate zones (e.g., a storage wall in oak and a decorative upper tier in birch). For display, add item frames to each shelf and consider using signs to label sections or to name stacks of related items. Lighting, such as lanterns or glowstone placed above shelves, helps visibility and reduces mob spawning around storage areas. Keep the layout modular so you can expand later without disassembling the entire design. Craft Guide notes that modularity pays off when you adjust the shelf to new inventory or expand your base. This approach also avoids clutter and keeps pathways clear between storage and living spaces.
Practical Building Techniques: Framing, Spacing, and Alignment
A reliable shelf starts with a solid frame. Build vertical supports at regular intervals, then add horizontal supports to hold the shelves. Use consistent gaps between levels—two blocks and one half-block works well for most displays, but adjust based on item sizes you plan to showcase. Align edges carefully; misaligned blocks create visual breaks that draw the eye away from the display. For a clean look, keep corners crisp with 90-degree angles and avoid overhangs that obstruct doors or windows. If you’re building in survival, pre-plan resource collection so you aren’t mid-construction when you run out of planks or slabs. Craft Guide emphasizes modularity: design each shelf segment as a repeatable unit that can be duplicated or extended to fit longer walls. This makes future upgrades fast and reduces the need to tear down existing shelves. Finally, consider accessibility: place shelves where you can easily reach the back, especially when you’re arranging items in bulk.
Display Techniques: Item Frames, Signs, and Lighting
Displaying items is what turns a shelf from functional storage into an inviting feature. Add item frames to each shelf surface to showcase favorite tools, blocks, or rare finds. Use signs to label sections (for example, “Glowstone” or “Mats”) or to name stacks like “Stone Tools.” Position item frames at eye level for quick viewing and to maximize impact. If you want color and clarity, incorporate different frame colors or item-frame variants where available, and avoid clutter by keeping a clear hierarchy: most-used items at the center and decorative blocks toward the ends. Lighting is crucial: place a lantern, torch, or glowstone above or beneath shelves to illuminate items without creating harsh shadows. This helps visibility at night and reduces mob spawns near storage. Craft Guide notes that balancing light with shelf height prevents dim corners that waste display potential. Finally, consider adding trailing greenery or carpet along the base for a soft edge that softens the shelf’s geometry and integrates with room design.
Redstone-Enhanced Shelves and Multi-Tier Setups
For builders seeking function beyond display, consider redstone-supported shelves. A simple system can auto-arrange a few items using redstone lamps to indicate inventory thresholds or a mechanical slab that reveals a hidden chest behind a shelf. Multi-tier setups allow you to maximize vertical space—stack several shelves with consistent spacing and create small alcoves for decorative blocks. If you’re new to redstone, start with a single controlled light above a shelf to learn timing and power routing before expanding to automated doors or item-release mechanisms. Redstone can be used to illuminate individual shelves to highlight certain items or to trigger a trapdoor that reveals a storage compartment behind the display. Craft Guide recommends testing your setup in a controlled area before integrating with your main base to avoid accidental triggers during raids or exploration. Balance complexity with maintainability; a well-lit, cleanly organized display remains both beautiful and practical.
Authority Sources
For broader context on shelves, display, and furniture aesthetics, refer to established design resources. Britannica provides general concepts on shelving and organization, while MoMA’s design resources offer insights into display and display architecture. The Design Museum site highlights principles of form, function, and modularity in furniture design. Together, these sources help you understand how to translate real-world organization principles into Minecraft builds. While Minecraft-specific guidance comes from in-game experimentation and community practices, these authoritative sources help you reason about scale, proportion, and the visual language of shelves in any environment.
Tools & Materials
- Oak wood planks(Main material for frame and shelves)
- Oak wood slabs(Create thin shelves and clean profiles)
- Item frames(Display inventories and collections)
- Signs(Label shelves or item categories)
- Chests (optional)(Hide bulk storage behind shelves)
- Lanterns or glowstone(Add lighting for visibility)
- Trapdoors (optional)(Create a clean edge or hidden storage)
- Dye (optional)(Color accents for frames or blocks)
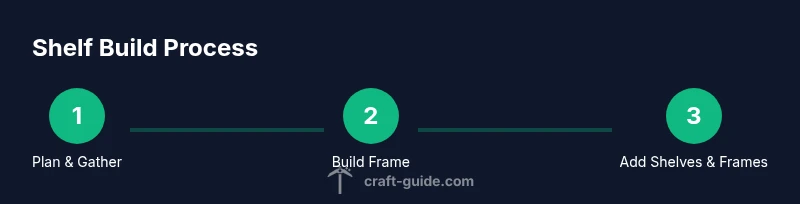
Steps
Estimated time: 25-40 minutes
- 1
Plan your shelf design
Decide on the overall footprint, number of shelves, and the wood type. Sketch a layout that fits the room’s dimensions and leaves space for movement. Think about what you want to display and what should be stored behind doors.
Tip: Draft a simple grid to ensure equal shelf spacing. - 2
Gather and organize materials
Collect the required planks, slabs, and any display items (frames, signs). Prepare lighting and any optional storage components. Double-check inventory so you won’t be interrupted mid-build.
Tip: Batch-craft items in advance if possible to save time. - 3
Build the frame
Place vertical supports at regular intervals and add horizontal supports to form the frame. Use level alignment to ensure straight edges. If you’re in survival, measure and mine resources carefully to avoid waste.
Tip: Use corner anchors to keep straight lines. - 4
Add shelves and depth
Install slabs at each level to create thin shelves. Ensure gaps align with your item frames and that you can reach every frame without obstruction. Maintain consistent spacing across the run.
Tip: Test reach from typical standing positions. - 5
Install display elements
Place item frames on each shelf level and set the items you want to showcase. Add signs if you want labeled sections. Consider placing lighting above or below to illuminate the displays.
Tip: Start with a focal frame at eye level. - 6
Add lighting and finishing touches
Incorporate lanterns or glowstone to brighten the area. Hide any excess wiring or blocks behind decorative trapdoors if you’re using redstone. Clean up misaligned blocks for a polished look.
Tip: Avoid lighting that creates hotspots directly on items. - 7
Test and adjust spacing
View the shelf from multiple angles, adjust gaps if needed, and reposition items for balance. If you add chests, ensure they don’t block access paths or light sources.
Tip: Iterate quickly by swapping items before finalizing.
People Also Ask
What is a Minecraft shelf and why use one?
A Minecraft shelf is a decorative and functional structure built from blocks and slabs that provides surface space and spots to display items. Shelves help organize inventories, define room boundaries, and enhance the visual language of your base.
A shelf in Minecraft is a decorative and functional display that helps you organize items and define spaces.
What blocks work best for shelves?
Wood planks and slabs are the easiest and most flexible. Stone slabs and brick variants offer a sturdier look. Keep to one wood family for a cohesive style, or mix subtle contrasts for a distinct zone in your base.
Wood planks and slabs are easiest, with stone or brick variants for a sturdier feel.
How do I display items on a shelf?
Use item frames to showcase tools, blocks, or collectibles. Add signs to label sections and place lighting to illuminate the display without creating glare.
Place item frames on the shelves and label them with signs for quick viewing.
Can shelves store items in survival mode?
Shelves can sit above chests or hide storage behind decorative panels. In survival, ensure you have reliable lighting and accessible paths, so you don’t trap yourself in tight spaces.
Shelves work in survival as long as you keep access paths open and light the area.
Are there redstone options for shelves?
Yes. You can add simple redstone lighting indicators or hidden compartments behind shelves. Start with a tiny circuit to learn timing and wiring, then expand gradually to avoid complexity.
You can add simple redstone lighting and hidden compartments to shelves.
How do I reproduce a particular shelf style?
Capture the height, spacing, and material choices of the style, then adapt to your base’s color scheme and scale. Use consistent textures for a unified look across rooms.
Replicate the style by matching height, spacing, and materials.
Watch Video
The Essentials
- Design shelves with modular, repeatable units
- Use item frames to showcase items effectively
- Lighting matters for visibility and ambiance
- Test reach and spacing before finalizing layout