Minecraft Blueprint House: A Complete Step-by-Step Tutorial
Learn how to design and construct a scalable Minecraft blueprint house with a grid-based plan, durable materials, and clear room layouts. This educational guide walks beginners to pros through planning, materials, and a detailed build process.

According to Craft Guide, this guide helps you design and build a scalable Minecraft blueprint house from a solid plan. You’ll outline a grid-based layout, select durable blocks, and create rooms with clear function. Expect practical, beginner-friendly steps, including measuring your plot, laying foundations, and step-by-step construction you can adapt to any world.
What is a Minecraft blueprint house?
A Minecraft blueprint house is a planned, grid-based design that you translate into a complete in-game build. It starts with a clear footprint, a palette of materials, and a room layout that serves specific functions—living space, storage, crafting, and sleeping areas. The blueprint acts like a real-world architectural plan, helping you preserve scale, symmetry, and balance as you build. According to Craft Guide, using a grid-based approach keeps proportions consistent and makes future expansions straightforward. This method is especially helpful for players who enjoy modular design, where you can replicate rooms or sections to grow a village or a larger estate without reworking the whole plan.
When you adopt a blueprint mindset, you gain several advantages: faster construction, fewer wasted blocks, easier interior planning, and a coherent exterior aesthetic. You’ll also develop a repeatable process for future projects, which is ideal if you regularly tackle ambitious builds in Creative or Survival modes. The blueprint approach is not about rigid copying; it’s about establishing a scalable framework that you can adapt as you explore new biomes or resource constraints.
Why blueprint-based builds save time and resources
Blueprints are a strategic tool in Minecraft that help you think ahead before you place a single block. A well-thought-out blueprint reduces guesswork, decreases the number of trips to mining sites for materials, and minimizes rework when you decide to adjust room sizes or add new features. Craft Guide Analysis, 2026 notes that grid-based planning improves readability and team coordination in multiplayer builds, but the same principles apply to solo projects as well. By outlining a footprint first, you can visualize the overall massing and silhouette of the house, ensuring the exterior looks balanced from all angles.
A good blueprint also addresses practical concerns early: door and window placement for natural light, corridors that don’t waste space, and a roof that completes the silhouette without overspending on materials. With a strong blueprint, you’ll be able to reproduce the design later or scale it up into a small village without starting from scratch each time.
Planning a scalable blueprint
Planning is the heart of a good blueprint. Start by choosing a plot size that matches your ambitions and a grid that makes sense for your chosen style—cottage, modern, medieval, or a compact starter home. Decide on a color palette and block types (stone, wood, brick, or concrete) that complement the biome and your performance goals. Create a simple floor plan on graph paper or a planning tool, marking rooms with functions and connectors (hallways, stairs, and doors).
A scalable blueprint anticipates expansion: for example, leave space behind the staircase for another floor or plan a modular wing that can be added later. Craft Guide’s team recommends keeping your roof lines consistent with the overall massing to preserve a unified look. In multiplayer, document changes so teammates can follow the same plan and contribute without confusion.
Materials and block palette decisions
Block palette choices impact both aesthetics and performance. Start with a limited but coherent set of materials to maintain a clean, readable design. For instance, pair a primary wall material (like oak planks or brick) with accent blocks (dark oak trim, stone column accents) to create depth without overcomplicating textures. Think about contrast for readability: use lighter walls with darker trims or vice versa to emphasize corners and entryways.
Lighting is another material decision. Torches, lanterns, or glowstone should illuminate key areas without creating glare on screenshots or complicating aesthetics. The blueprint mindset also encourages you to plan for storage and workflow: place crafting stations, furnaces, and chests in logical proximity to minimize travel time and improve gameplay efficiency.
Layouts and room zoning
A clear zoning strategy helps you translate a blueprint into a comfortable living space. Common layouts place a central living area with adjacent kitchen, storage, and workstations. Bedrooms can be tucked into quieter corners, while utility rooms and skylights improve ventilation and ambiance. Use a symmetric or repeating module pattern (e.g., 4x4 or 5x5 grid blocks) to maintain consistency across floors.
Consider accessibility: ensure doors align with corridors, stair placements don’t create bottlenecks, and there’s a natural flow from entry to primary rooms. If you expect to expand, design the core module to be repeatable: you can add more wings or floors while keeping base proportions intact. The planning phase is essential; skipping it often leads to misaligned walls or awkward spaces later.
Common mistakes and how to avoid them
Rushing to the build without a clear blueprint is the quickest way to end up with a mismatched house. Avoid starting with random blocks or chasing trendy textures that clash with your palette. Another common error is overcomplicating the layout with too many rooms of equal size; prioritize essential functions first and scale up gradually. Always test your design in a controlled section of your world, using temporary blocks to test sightlines, door reach, and lighting before finalizing the build. Finally, remember to save frequently—world seeds, resource packs, or mods can alter textures and block behavior, so keep backups of your blueprint and progress.
Putting it all together: a quick workflow
- Define plot and scale on a planning grid.
- Draft a room-by-room footprint, labeling each space.
- Select a cohesive material palette and weaponize contrast.
- Lay a modular foundation and build walls in logical sections.
- Install doors, windows, and lighting with accessibility in mind.
- Add interior details, then step back to evaluate proportions.
- Iterate and refine until the blueprint feels balanced and scalable.
This workflow, inspired by Craft Guide’s principles, helps you stay organized while turning a plan into a polished Minecraft blueprint house.
Tools & Materials
- Planning grid or graph paper (virtual or real)(Use a consistent scale (e.g., 1 block = 1 grid square) to keep layout accurate)
- In-game blocks for palette (wood, stone, brick, concrete)(Choose 2-3 primary materials with 1-2 accent blocks)
- Temporary blocks for scaffolding(Pillars or dirt blocks to visualize footprints)
- Scaffolding or ladders(For building higher floors and roofs)
- Torches or lanterns / glowstone(Plan lighting to avoid dark corners and improve readability)
- Measuring tools in-game (maps, coordinates display)(Use coordinates to verify symmetry and alignment)
- Crafting and storage stations(Furnaces, chests, and crafting tables placed in logical layouts)
Steps
Estimated time: 3-5 hours
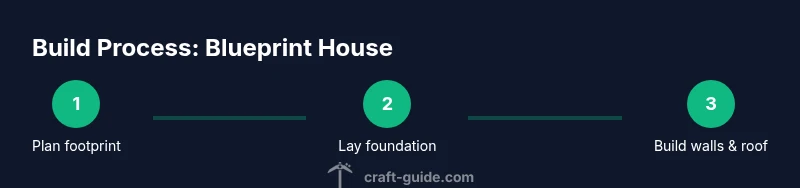
- 1
Measure plot and set scale
Identify the build footprint on your world, decide your scale, and mark the outer boundary with temporary blocks. Ensure there is enough space for future expansion and clear access from the main path. This step establishes the overall room count and massing.
Tip: Use a ruler or map overlay to keep lines straight and avoid drift when you place blocks. - 2
Create grid footprint
Draw a simple grid on the footprint to map room locations. Assign each cell to a function (living, kitchen, bedroom, storage). This helps you maintain proportional room sizes and align doors.
Tip: Keep corridors narrow in compact plots to save space without feeling cramped. - 3
Choose material palette
Pick 2-3 primary materials and 1-2 accents. Record their color and texture in your blueprint notes so you can reproduce the look consistently across floors.
Tip: Limit texturing to two main materials to preserve readability from distance. - 4
Draft room layout on grid
Place room boundaries on the grid, marking door locations and flow between spaces. Include stairs or a ladder if you’ll add multiple floors.
Tip: Mock up furniture zones (workstations, bed, chest arrays) to verify space utility. - 5
Lay foundation
Set the foundation outline with the chosen material. Double-check wall thickness and footprint to avoid later adjustments.
Tip: Use double-layer foundation for sturdier appearance and better lighting below floors. - 6
Build exterior walls
Raise walls section by section, following your grid. Maintain consistent heights and keep openings aligned with planned doors and windows.
Tip: Finish corners first to ensure symmetry and help guide the rest of the wall layout. - 7
Install doors and windows
Place entries and openings per your layout. Consider sightlines from main rooms and ensure natural light reaches interior corners.
Tip: Use glass panes or glowstone lights near entryways to brighten entrances without glare. - 8
Add floors and roofing
Install interior floors and a roof that matches the massing of the exterior. Roof style should reflect the overall aesthetic and be practical for your chosen biome.
Tip: Start with a simple gable or flat roof before attempting complex shapes. - 9
Interior partitions and features
Add internal walls, build-ins, and furniture zones. Include storage nooks and dedicated crafting areas for efficiency.
Tip: Place light sources behind furniture to avoid shadowy pockets. - 10
Exterior finishing touches
Apply final textures, trim, and landscaping to enhance curb appeal. Consider color rhythm around entryways and corners.
Tip: Test a few viewpoints from different sides to ensure consistency. - 11
Lighting and safety optimization
Ensure thorough lighting to prevent mobs from spawning inside and around the base. Add subtle ambient lighting to highlight architecture.
Tip: Balance brightness to avoid washed-out visuals in screenshots. - 12
Review and adjust for scale
Walk through the completed build, compare with the blueprint, and adjust any misalignments. Validate that doors align with hallways and that each room retains its intended function.
Tip: If space feels off, adjust wall positions in a single module to preserve overall scale.
People Also Ask
What is a blueprint house in Minecraft?
A blueprint house is a planned, grid-based design used to translate a concept into a finished build. It outlines footprint, room layout, material palette, and lighting to ensure consistency and scalability throughout the project.
A blueprint house is a planned layout you follow block by block to ensure consistency and easy expansion.
How do I choose the right grid size?
Start with a modest footprint that fits your plot, then scale up by repeating modules. A 4x4 or 5x5 grid is a common starting point for beginner blueprint houses.
Begin with a small grid, then repeat modules to scale up as needed.
What materials are best for beginner blueprint houses?
Choose 2-3 primary blocks with 1-2 accent blocks to keep the design cohesive. For example, stone or brick walls with wood trims provide contrast and readability.
Start with a simple palette of two or three materials with a couple of accents.
How long does it take to complete a blueprint house?
Time varies with plot size and complexity. A compact starter blueprint typically takes a few hours, while larger, multi-floor designs can take longer depending on planning detail.
Time varies; expect a few hours for a starter design and longer for bigger builds.
How can I adapt a blueprint to a small plot?
Reduce footprint in stages, prioritize essential rooms, and use vertical space to add floors. Maintain a consistent module size to preserve the overall look.
Adapt by shrinking footprints and adding floors while keeping module size consistent.
Watch Video
The Essentials
- Plan before placing blocks
- Use a grid to maintain scale and flow
- Limit materials for readability
- Test and iterate for balance