House Blueprints in Minecraft: A Practical Build Guide
Learn how to design and translate Minecraft house blueprints into solid in-game builds with scalable layouts, grid planning, and stylish styles.

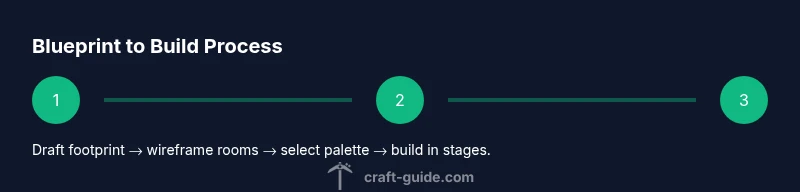
In this guide you’ll learn how to plan, draft, and translate house blueprints minecraft into cohesive in-game builds. You’ll define footprint, room layout, and exterior style before touching a single block. Before you start, have a rough sketch, a chosen palette, a simple grid, and access to Creative or a safe survival area to test plans.
What are house blueprints minecraft and why they matter
House blueprints minecraft are practical, scalable plans that translate a design idea into a step-by-step build in the game. They help you define footprint, room layout, and exterior style before placing a single block. In practice, a good blueprint acts as a map you can follow from sketch to finished build, reducing trial-and-error and ensuring consistency across floors and rooms. According to Craft Guide, thoughtful blueprints save time, especially when building larger homes or multiple properties within a single world. By starting with a blueprint, you can test proportions, iterate on styles, and document changes so future projects stay cohesive.
Planning fundamentals: grid, scale, and layout
Effective blueprints start with a grid-based approach. Think in terms of zones: exterior shell, primary rooms, circulation paths, and exterior features like porches or balconies. Keep the footprint proportional to the chosen style, and plan for doors and windows to align with sightlines from common rooms. A clear layout helps you anticipate block choices, lighting needs, and interior spacing long before you place the first block. Craft Guide emphasizes keeping things modular: design small, repeatable units that can be mirrored or expanded without reworking the entire plan.
Translating a blueprint to an in-game build: block palettes and space
Turning a flat plan into a Minecraft build means selecting a consistent block palette and mapping it to surfaces—walls, floors, roof, and accents. Start with a primary material for walls, a secondary for trims, and a contrasting roof or floor material to create depth. Pay attention to translucence: glass or stained glass can brighten spaces, while darker blocks create cozy nooks. Interior layout should reflect everyday use: consider door locations for flow between living areas, kitchen-ish spaces, and bedrooms. The palette should support both aesthetic intent and game performance, avoiding overly complex roofs or texture-heavy walls in large builds.
Tools and resources to create blueprints: from drafting to digital planning
A reliable blueprint benefits from both traditional and digital tools. Use graph paper or a digital drawing app with grid overlays to sketch layouts quickly. Keep a running material list, noting how many blocks of each type you’ll need for walls, floors, and roofs. If you’re working in Creative, you can draft in a separate world or layer blueprints over your build. Reference images, texture packs, and color palettes help maintain consistency across projects, while a simple legend makes it easy to translate the plan into Minecraft blocks when you start building. Craft Guide also recommends saving templates for common room layouts to speed up future projects.
Design styles and templates: modern, rustic, medieval, and more
Minecraft supports a surprising range of architectural vibes. Modern houses emphasize clean lines, large glass surfaces, and minimal framing, while rustic designs use wood and stone textures, exposed beams, and cozy interiors. Medieval styles favor steep roofs, arched windows, and stone accents. When drafting a blueprint, pick a style and then tailor the layout to fit the terrain and resources you have. Templates can be your starting point; you can adapt them to your world’s biomes, lighting constraints, and the level of interior detail you want. Remember to document stylistic choices in the blueprint for easy replication later.
Workflow: from sketch to blueprint to build—in practice
A practical workflow starts with a rough sketch, then moves to a grid-based plan, followed by a materials list and a final, detailed blueprint. Translate each room’s function into spatial requirements and place doors and pathways accordingly. A good blueprint includes exterior elevations and a rooftop plan so you don’t run into surprises during construction. After drafting, test the blueprint in practice by building a small, representative section to validate scale and proportion before committing to the full house. Craft Guide suggests storing iterations digitally so you can compare variants and apply improvements across future projects.
Common mistakes and how to avoid them
Common errors include overcomplicating the roof, misjudging room proportions, and ignoring lighting or drainage of interior spaces. Another pitfall is failing to align exterior features with interior walls, which makes the build feel disjointed. To avoid these, always mark the grid coordinates you plan to build within, verify door and window lines on both elevations and floor plans, and do a quick mock-up of lighting in a test build. Regularly review your palette to ensure textures remain cohesive as you expand the project.
Interior detailing: making spaces feel alive without overdoing it
Details matter for immersion but can bog down progress if overdone too early. Start with essential furniture placements, then layer in decorative blocks like plants, shelves, and rugs that complement the pallet. Use lighting strategically: place torches or lanterns in a way that avoids shadows in living spaces while preserving mood. Document interior features on the blueprint so you can reproduce or reconfigure spaces later, especially for multi-floor homes and basements.
Tools & Materials
- Graph paper or digital drawing app with grid(Capture footprints and room proportions; align walls and openings.)
- Pencil, pen, or stylus(For sketching initial layouts and annotations.)
- Minecraft Creative mode or a test world(Test builds without resource constraints.)
- Block palette reference (stone, wood, glass, etc.)(Maintain consistent materials and color scheme.)
- Measurement/legend notes(Optional: keep a legend for block types and wall thickness.)
- Seed or schematic viewer (optional)(Helpful for planning around terrain and pre-built features.)
Steps
Estimated time: Varies by complexity; several hours recommended.
- 1
Define footprint and outline
Sketch the outer boundary of the house on grid paper or in a drawing app. Establish the overall footprint, then mark major zones like living, sleeping, and service areas. Avoid placing interior walls yet; focus on exterior shape and flow.
Tip: Keep the footprint modular so you can expand later without reworking doors. - 2
Outline core rooms and circulation
Place essential rooms in a practical sequence (entry, living, kitchen, bedrooms) and sketch corridors or stairs. Ensure each room has logical access from common areas and consider daylight from windows.
Tip: Test sightlines by tracing lines of sight from the main entry to windows and open spaces. - 3
Shape exterior and roof plan
Draft the exterior elevations and roof silhouette. Decide roof type (flat, gable, or hip) and ensure eaves align with interior walls. A balanced roof improves aesthetics and reduces internal dead space.
Tip: Avoid overly long roof spans; break up mass with dormers or split levels where possible. - 4
Choose materials and color palette
Select a cohesive palette for walls, trim, and roof. Limit to 2-3 primary blocks with a couple of accent blocks to create contrast without visual clutter.
Tip: Test textures in a small mock section to ensure color harmony. - 5
Plan interior layout and doors
Place interior walls, doors, and major furniture footprints. Consider walkable paths and natural lighting; ensure doors align with natural traffic flow.
Tip: Keep doorways wide enough for comfortable movement and accessibility. - 6
Add details and a blueprint legend
Annotate the blueprint with room names, dimensions (non-physics, just for planning), and a material legend. This makes it easier if you rebuild in stages.
Tip: A legend speeds up future projects and ensures consistency across builds. - 7
Review and refine
Cross-check the blueprint against the terrain, resource availability, and future expansion plans. Update sections that feel crowded or awkward and save iterations for reference.
Tip: Always document changes and keep a versioned archive.
People Also Ask
What is the main purpose of a Minecraft house blueprint?
A blueprint communicates size, room placement, and aesthetics before building, reducing trial-and-error and keeping projects cohesive across floors and styles.
A blueprint shows you where rooms go and how the house should look before you place blocks.
Do I need fancy tools to start blueprints?
No. Start with graph paper or a simple drawing app, then move to digital versions as you gain experience. The key is consistency and planning.
You can begin with basic tools like paper and pencil, then upgrade as you get more comfortable.
Can blueprints help in survival mode?
Yes. A blueprint guides resource gathering, space planning, and mob protection, helping you build more efficiently in survival.
Blueprints help you plan ahead so you don’t waste precious resources.
How detailed should interior plans be?
Start with essential layouts—living areas, kitchens, bedrooms—and add decorative elements as you build. Too much detail early can slow progress.
Focus on the layout first; you can add interior details later.
What if I want to scale the house later?
Design a modular blueprint that can be expanded by adding blocks to designated wings or floors without disrupting existing rooms.
Make the design modular so you can grow your house later.
Watch Video
The Essentials
- Plan with a grid to ensure clean proportions
- Choose a cohesive block palette
- Document changes to enable easy replication
- Test ideas in a small mock build before scaling up