How to Create a Skin in Minecraft: A Practical Guide
Learn how to create a skin in Minecraft from scratch with beginner-friendly steps, tools, and testing tips. Design, export, and apply your custom look across Java and Bedrock editions with confidence.

By the end of this guide, you will know how to create a skin in Minecraft from scratch, adapt it for Java and Bedrock editions, and test it in-game. You’ll start with a base or template, pick a color palette, and save your skin as a PNG compatible with Minecraft’s skin format. No coding is required—design, export, and apply.
What a Minecraft skin is and why players use them
A Minecraft skin is the texture that wraps around your in-game character, giving it a unique appearance. Creating a skin is a creative way to express personality, role, or a community identity—whether you’re roaming a forest village, building grand structures, or streaming your adventures. When you say you want to "create skin in minecraft," you are choosing a look for your avatar that others will see in every world you enter. The Craft Guide team has found that players who invest a little time learning the basics often enjoy more engaging, personalized play sessions. A well-made skin can also help you stand out in multiplayer servers or minigames, where visual cues matter just as much as gear or stats.
In Minecraft, you’ll typically work with a 64x64 (or 64x32 in older versions) texture map that colors the seven body parts plus the head and accessory areas. Designing a skin is not about changing game physics—it’s about creating an identity you carry across sessions. As you practice, you’ll learn how light, shading, and seams affect the final look, and you’ll gain confidence applying your skin to both Java Edition and Bedrock Edition.
Edition differences: Java vs Bedrock
Minecraft skins exist in closely related formats for Java Edition and Bedrock Edition. Java skins are applied via the launcher or profile, using PNG texture maps that map to the player model. Bedrock uses a similar PNG approach but with subtle differences in how body parts map to surfaces and how transparency is rendered. If you want to create a skin that works across both editions, start with a standard template and test in both environments. Craft Guide analysis shows that most players who design cross-edition skins keep a duplicate PNG for each edition, ensuring compatibility and avoiding seams or misalignment in the model.
Key considerations include pixel dimensions (usually 64x64 or 64x32), transparency handling, and how the alpha channel behaves under different lighting conditions. Always reference the latest skin format guidelines from official Minecraft resources to avoid export issues or import errors. This cross-edition awareness helps you prevent frustration and makes sharing your creations a smoother experience.
Tools for skin design
A wide range of tools can help you craft a polished Minecraft skin. Free options like GIMP or Paint.NET are popular for their layer support and pixel-precise tools, while paid programs such as Photoshop offer advanced features for shading and color management. Online editors can be convenient for quick edits on a tablet or laptop. The important thing is to choose a tool that lets you work at the pixel level (1x1 pixel editing) and exports PNGs without compression artifacts.
Here’s a practical toolkit:
- A stable image editor (GIMP, Paint.NET, Krita, Photoshop).
- A blank or base skin PNG to act as your starting point.
- A color palette or reference image to guide shading and highlights.
- A test profile or Minecraft account for in-game validation.
According to Craft Guide, using a clean base and a dedicated skin template reduces seam issues and speeds up iteration. Keep your color palette simple at first, then layer details as you gain confidence.
Finding a starting template or base skin
Starting with a base skin can save you time and reduce errors. You can download a neutral base (head, torso, arms, legs) and modify the visible areas, or you can start from a blank canvas and color-block the shapes first. When choosing a base, ensure it matches your preferred edition and skin format (64x64 or 64x32). Building on a proven template helps you maintain correct proportions and avoid misaligned seams. Once you’ve got a base, you’ll tweak the color palette to suit your design goals, whether that’s a heroic armor look or a cute, cartoonish vibe.
If you like a particular character or theme, study their silhouette and plan which body parts will carry the defining features. A good base skin lets you swap out facial details or clothing elements without modifying underlying geometry, making experimentation easier.
Step-by-step design workflow (overview)
A solid design workflow keeps you organized and minimizes backtracking. Start with a rough layout: map out major color blocks for the head, torso, arms, and legs. Then refine by adding shading, highlights, and accessories. Keep an eye on how elements wrap around the model so seams don’t interrupt important features. Periodically compare your design against a 3D preview (if your editor supports it) to catch distortion early.
A practical approach is to work in layers: base color first, then shading, then highlights, and finally accessories. This separation helps you adjust values without repainting large areas. If you’re new to pixel art, practice with a small section (like the head) before expanding to limbs. Craft Guide notes that iterative testing—exporting, loading into Minecraft, and re-editing—is the fastest path to a polished skin.
Exporting, saving, and file integrity
When you finish a design, export your work as a PNG with no compression that preserves transparency where needed. Name your file clearly, such as your username_skin_v1, to keep versions organized. Keep a copy of the base skin so you can revert to an earlier state if necessary. If you’re editing on multiple devices, ensure the PNG export settings remain consistent across platforms to avoid color shifts or aliasing.
Before you upload, confirm the image size is exactly 64x64 or 64x32 according to your edition’s requirements. Any deviation can cause import failures or unexpected seams in-game. It’s a good habit to keep a backup of every major revision in a dedicated folder.
Testing your skin in-game and troubleshooting
Testing is essential to verify that your design reads well on the live model. In Java Edition, load the PNG in the Minecraft launcher, equip the skin, and launch a test world. In Bedrock, use the profile editor to apply the skin and check cross-angled views. Look for seam visibility on shoulders, arms, and legs, and note any color bleeding on edges. If you spot issues, return to your editor, adjust the affected pixels, and re-export.
Tip: test in multiple lighting conditions (day, night, shade) to see how shading holds up. If you encounter transparent areas appearing as black, check the alpha channel and ensure your export did not compress the transparent regions.
Common mistakes and how to fix them
New designers often struggle with seam alignment, wrong skin dimensions, and inconsistent shading. Common fixes include rechecking the 64x64 canvas size, ensuring border seams align with model edges, and using a limited color palette to avoid color fringing. Semicolon-like seams across joints often indicate that the texture wrap around the model is not aligned; adjust pixel placement on adjacent body parts and re-test. Avoid reusing base textures without proper modification to prevent clashes with your unique design.
Another frequent error is using a texture with transparent pixels in areas that should be opaque; this creates glow or ghosting in-game. Keep essential features like eyes and mouth clearly defined on the head, and keep shading consistent across all limbs to maintain a cohesive look.
Advanced shading, seams, and alpha considerations
If you’re ready for a more sophisticated skin, experiment with subtle shading to simulate light source direction. Use darker tones along the edges of each surface and lighter highlights where light would naturally hit. Pay attention to seams where the front and back textures meet and adjust pixel placement to reduce visible tearing. Handling alpha channels properly is crucial when you want translucent accessories or partially transparent elements; ensure your editor preserves alpha data during export.
When sharing advanced skins, include notes about any nonstandard edits or edition-specific adjustments so others can appreciate the design and reproduce it if needed. Craft Guide recommends maintaining a small palette of core colors and creating a style guide for future skins to accelerate the design process while preserving visual quality.
Sharing skins and respecting community guidelines
Sharing your skins is a great way to contribute to the Minecraft community. Publish your PNGs to personal galleries or skin-sharing sites, and include a short description of your design concept, edition compatibility, and any licenses or permissions you’ve granted. Always respect other creators’ rights: remixing is fine with permission or under licenses that allow derivative works. When in doubt, credit the original base skin and offer a link to the source template. Keeping your files organized and naming them clearly helps others discover and use your work more easily.
Tools & Materials
- Computer, tablet, or smartphone(For editing your skin and exporting PNGs)
- Image editor (GIMP, Krita, Paint.NET, Photoshop)(Pixel-perfect editing at 1x1 scale)
- Base skin template (PNG)(Starting point for design)
- Color palette reference(Keep shading consistent)
- Minecraft account or launcher(Test skin in-game)
- External storage (optional)(Backups of versions)
- Backup skin versions(Version control for iterations)
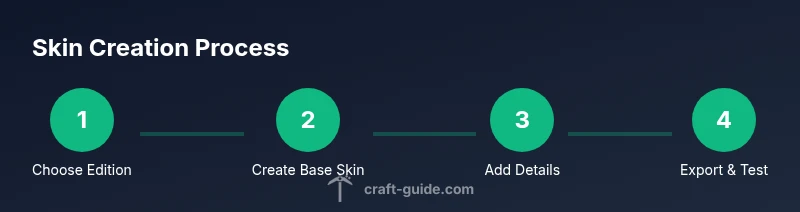
Steps
Estimated time: 45-90 minutes
- 1
Choose edition and base
Decide whether your skin will target Java, Bedrock, or both. Open a base PNG that matches the required canvas size (64x64 or 64x32) to map the head, torso, arms, and legs. This initial step sets the framework for all following design decisions.
Tip: Keep a separate layer for base colors to simplify later edits. - 2
Outline major color blocks
Block in the main colors for each body area—head, torso, arms, legs—using flat tones before shading. This helps you visualize proportions and ensures the skin reads clearly at small sizes.
Tip: Avoid cluttering with tiny details at this stage. - 3
Add shading and highlights
Introduce light and shadow to simulate depth. Apply darker tones along edges and lighter tones on surfaces facing the light source. Keep shading consistent across body parts for a cohesive look.
Tip: Test with a simple light source before adding complex details. - 4
Create features and accessories
Add features like eyes, mouth, clothing patterns, or armor. Ensure details align with the model’s geometry and won’t distort when wrapped around the torso.
Tip: Prefer bold, readable details that read well at a distance. - 5
Check seams and alignment
Save a preview and inspect seams where front, back, and sides meet. Adjust pixels along edges to minimize seams that break the design.
Tip: Seam issues are often caused by shifting pixels at the join lines. - 6
Export PNG with correct canvas
Export as PNG with no compression and correct transparency. Name the file clearly to track versions and edition compatibility.
Tip: Keep a backup of the base skin for quick reverts. - 7
Test in-game on both editions
Load the PNG into the Minecraft launcher (Java) or profile editor (Bedrock) and view from multiple angles. Look for color shifts, seams, or misalignment.
Tip: If you see any issue, go back to your editor and adjust the affected area. - 8
Publish and document licenses
Share your skin with notes about edition compatibility, usage rights, and any sources for base templates. Include credits and links where appropriate.
Tip: Clear documentation helps others reuse or remix your work respectfully.
People Also Ask
Do I need a special program to create skins?
No. Many designers start with free editors like GIMP or Paint.NET and use base templates. More advanced users may prefer Krita or Photoshop for extra control over shading.
You don’t need anything fancy—start with a free editor and a base template, then progress if you want more features.
Can I reuse someone else’s skin?
You can reuse or remix skins only with permission or under licenses that allow derivatives. Always credit the original creator if required and avoid copying distinctive designs without consent.
Remix with permission and credit the creator when required.
Which edition supports skins?
Both Java Edition and Bedrock Edition support custom skins. The process and file path vary slightly, but PNG textures are the common medium.
Skins work on both Java and Bedrock; you’ll export PNGs and apply them through the launcher or profile editor.
Where do I upload or apply skins?
In Java, apply skins via the Minecraft Launcher’s profile editor. In Bedrock, use the in-game profile editor or the Minecraft Launcher to set a skin file for your account.
Use the launcher or in-game profile editor to apply your skin.
How can I fix visible seams quickly?
Revisit the seam lines in your editor and align adjacent pixels so the wrap looks continuous. Small pixel shifts can reduce or eliminate seam visibility.
Adjust the seam lines by aligning adjacent pixels and re-export.
Are skins case-sensitive or version-dependent?
Skins are primarily version- and platform-adapted. Ensure you export the correct canvas size and test on the intended edition to avoid mismatches.
Check the edition and export the proper canvas size for best results.
Watch Video
The Essentials
- Design a skin with a clear base, then layer shading
- Test in-game on both editions to ensure compatibility
- Export clean PNGs and keep versioned backups
- Respect community licenses when sharing skins
- Seam alignment is the most common aesthetic issue