Cool Banner Design Minecraft: Step-by-Step Guide for Builds
Learn to create cool banner design minecraft using dyes, loom patterns, and smart placement. This guide covers color choices, pattern combos, and practical tips for standout builds across medieval, fantasy, and pixel-art styles.

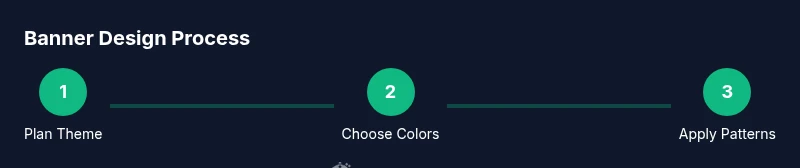
In this guide, you’ll learn how to design a cool banner in Minecraft that stands out in any build. You’ll cover color theory with dyes, banner patterns, and practical placement techniques, plus a quick recipe checklist and safety tips for smooth crafting sessions. You’ll also see examples for medieval, fantasy, and pixel-art themes and how to adapt banners to different biomes.
Banner design fundamentals
Designing a cool banner design minecraft starts with a clear concept and a cohesive color plan. Banners act as a visual signature for your builds, from a grand castle motif to a subtle faction emblem. The Craft Guide team advocates starting with a theme—medieval, fantasy, or pixel-art—and then selecting a palette that complements surrounding blocks. By thinking about contrast, symmetry, and repetition, you can create banners that feel intentional rather than decorative afterthoughts. For builders of all levels, banners are a powerful, scalable way to inject personality into a base, village, or landmark. According to Craft Guide, a well-planned banner can unify color schemes across rooms and exteriors, making your world feel more cohesive and immersive.
Color theory and dye selection
Color theory matters greatly when crafting banner designs minecraft. Start with a dominant hue and two accent colors for balance. In practice, choose dyes that contrast against your base wool or terracotta to ensure patterns pop. Light colors work well for high-contrast patterns on dark banners, while complementary hues create vibrant, eye-catching results. If you’re unsure, test combinations on a spare banner using a loom before applying them to your main build. Craft Guide analysis shows that consistent color relationships across multiple banners improve readability from a distance and help identify your style across different builds.
Patterns and combinations for wow factors
Patterns are the backbone of cool banner design minecraft. Borders, stripes, crosses, and charges can be layered to tell a story or echo a faction symbol. A common strategy is to lock in a strong border, add a central motif, and finish with a subtle secondary pattern. The order matters: some layers obscure others, while certain combinations create a bold focal point. If you’re aiming for pixel-art vibes, use simple, repeating charges to evoke characters or logos without clutter. Our tips emphasize testing one pattern at a time and then iterating toward a balanced set that reads clearly at different distances.
Theming banners for different builds
A banner’s theme should reflect its surroundings. On a medieval keep, banners might use deep reds and golds with geometric borders. In a fantasy forest, consider emerald greens, sky blues, and leaf-like motifs. For pixel-art builds, opt for bold, blocky shapes with high contrast. The key is consistency: reuse a core color pair across all banners on the project so viewers instinctively recognize the style. Craft Guide advises creating a small set of templates you can adapt to various rooms and entrances, ensuring coherence without stifling creativity.
Practical placement techniques
Placement is just as important as the banner itself. Hang banners at eye level near entranceways, hallways, or above key blocks to guide the eye along a path. In corridors, align banners with doorways for rhythm and symmetry. If you're placing banners outdoors, consider wind direction and lighting; banners look best when they catch light and stand out against the environment. Keep banners away from busy background textures that can wash out their colors. By planning placement early, you’ll maximize visibility and impact across your build.
Troubleshooting common banner design mistakes
Common pitfalls include overcrowding patterns, poor color contrast, and inconsistent theme usage. If a banner reads too busy, remove a layer or switch to a simpler motif. If contrast feels weak, swap a light dye for a darker one or adjust the background color. Always preview designs from multiple angles and distances to ensure readability. Remember, a banner should enhance your build, not overwhelm it. Craft Guide notes that iterative testing yields the most cohesive results.
Inspiration and templates
Gather ideas from in-game builds, community showcases, and real-world flag design. Start with a small set of templates: a border-focused banner, a central emblem, and a pattern-based banner that echoes your theme. Save practice banners you love to reuse as references for future projects. By maintaining a library of templates, you’ll be able to rapidly design banners that fit new rooms or landscapes. For Minecraft players, consistency in templates is a powerful shortcut to a polished, professional look. The Craft Guide team recommends curating 5–7 core templates to scale with your projects.
Authority references and continuing learning
If you’re interested in broader design concepts to elevate your Minecraft banners, explore color theory and composition through trusted educational sources. For color theory basics, reputable university resources and design publications provide deep dives into hue relationships, saturation, and contrast. This educational approach helps you translate real-world design principles into your Minecraft banners, ensuring both beauty and readability. The Craft Guide team encourages readers to build a personal reference library to continually refine their banner design skills.
Tools & Materials
- Banner(Base banner in any color as the canvas)
- Loom(Used to apply patterns with dyes)
- Dye(Multiple colors as needed for your design)
- Banner Pattern (pattern cards)(Optional for specific motif charges)
- Crafting area or loom station(Organized space to prevent mistakes)
Steps
Estimated time: 60-90 minutes
- 1
Define your banner concept
Choose a clear theme (medieval, fantasy, pixel-art) and select a primary color plus two accents. This sets the direction for all patterns and placements.
Tip: Write down your theme and color trio before collecting dyes; consistency saves time. - 2
Prepare materials and loom setup
Gather a banner, dyes, and a loom. Open the loom interface and organize dyes in the order you plan to use them to minimize rearrangements during crafting.
Tip: Keep a practice banner nearby to test color balance before committing. - 3
Create the base color and border
Apply the base dye to the banner and add a bold border if your theme benefits from strong edges. Borders help define the silhouette from a distance.
Tip: A high-contrast border significantly improves readability on large builds. - 4
Add a central motif or emblem
Select a motif that communicates your theme and place it at the center. Layer additional patterns sparingly to avoid clutter.
Tip: Center motifs are most impactful when surrounded by negative space. - 5
Layer patterns for depth
Add secondary patterns to create depth, ensuring they don’t overpower the core motif. Test different orders to find the most legible arrangement.
Tip: Document the exact dye order you used for future banners. - 6
Place banners within your build
Hang banners at eye level near entrances or corridors to guide the viewer. Align spacing with other decorative blocks for rhythm.
Tip: Consider lighting to ensure colors remain vibrant under different biome lighting.
People Also Ask
What do I need to start a cool banner design Minecraft project?
You’ll need a base banner, dyes in multiple colors, and a loom. Optional banner patterns can help you create more complex motifs.
To start, grab a banner, choose dyes, and use a loom. Optional pattern cards can extend your design.
How many patterns can I layer on a single banner?
You can layer multiple patterns, but readability drops if you overdo it. Start with a base and one or two accents, then adjust.
You can layer several patterns, but keep it readable by avoiding too many layers.
Which color combinations read best on banners from a distance?
High-contrast pairs (dark base with bright accents or vice versa) read best from afar.
Use high contrast, like dark bases with bright accents, so banners stand out at distance.
Can I reuse templates for different builds?
Yes. Create 5–7 core templates and adapt colors to fit each new build while keeping the overall style.
Yes. Use a small set of templates and adjust colors for each new build.
What common mistakes should I avoid with banner design?
Avoid clutter, poor contrast, and misaligned motifs. Test at multiple distances and refine before finalizing.
Avoid clutter and low contrast, test from different angles, and adjust as needed.
Are there safety considerations when crafting in creative mode?
There are no real-world safety risks in Minecraft, but organize your inventory to prevent misclicks and wasted dyes.
No real-world hazards here; stay organized to prevent mistakes.
Watch Video
The Essentials
- Define a clear banner theme before crafting.
- Use a strong border to improve readability.
- Test patterns on a practice banner first.
- Maintain color harmony across banners for unity.
- Place banners thoughtfully to guide attention in builds.