Make a Banner Minecraft: A Practical Tutorial
Master banner creation in Minecraft with dyes, patterns, and a loom. This Craft Guide tutorial covers materials, step-by-step actions, tips, and creative ideas for standout builds in 2026.

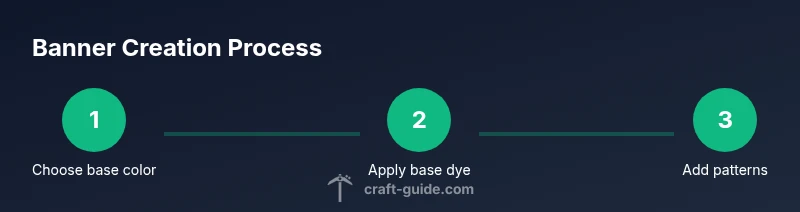
In Minecraft, you make banners by crafting a plain banner and applying color patterns with dyes using a loom or crafting table. Start with a base banner, choose a dye color, and then add patterns one by one to achieve your design. This guide walks you through materials, basic coloring, and pattern layering for custom banners.
Understanding banners in Minecraft
Banners are decorative items that let you personalize builds, label chests, mark routes, and add thematic flair to bases. According to Craft Guide, banners offer a versatile way to convey faction signs, color schemes, and your world’s story without changing the world’s structure. The Craft Guide team found that banners are especially useful for signaling base entrances and creating color-coordinated aesthetics across a village or castle build. In practice, banners are built from a base banner and then embellished with colors and shapes using dyes and patterns. This combination of color theory and pattern layering makes banners a surprisingly powerful visual tool for builders of all skill levels.
In this section we’ll cover the core idea: a plain banner is your canvas, dyes provide color, and patterns deliver shape. The goal is to craft something legible from a distance and harmonious when viewed up close. You’ll learn to plan a design, gather materials, and execute the look with a repeatable workflow.
0
Tools & Materials
- Plain banner(Crafted from 6 white wool and 1 stick (base color depends on wool choice).)
- Dye(s)(Choose one or more colors for base and patterns (e.g., red, blue, black).)
- L loom(Optional tool that makes pattern application simpler and faster.)
- Banner Pattern items(Obtained through various in-game methods; used to create specific shapes.)
- Crafting table(Used to craft the plain banner and to assemble base color setups.)
Steps
Estimated time: 20-30 minutes
- 1
Gather base banner and dyes
Collect a plain banner and a selection of dyes. Decide on a base color and 1–3 accent colors to guide your design. This foundational step sets the color language for the entire banner.
Tip: Pro tip: choose high-contrast colors so patterns read clearly from a distance. - 2
Craft the plain banner
If you’re in survival, craft a plain banner from 6 white wool and 1 stick on a crafting table. This banner is your blank canvas, ready to receive color and patterns.
Tip: Note: In creative mode you can skip crafting and grab a ready-made banner from your inventory. - 3
Apply base color
Use a dye to apply the base color to the banner. You can do this on a loom for consistent results or directly with a pattern on the crafting table to change the base color.
Tip: Tip: start with a bold base color to maximize contrast with subsequent patterns. - 4
Add your first pattern
Place the banner on the loom (or open the crafting interface) and select a pattern item to apply. Each pattern adds a distinct shape, such as stripes, borders, or diamonds.
Tip: Pro tip: pattern order matters—plan a sequence to ensure readability and balance. - 5
Layer additional patterns
Continue layering patterns one at a time, using dyes for color control and pattern items to shape the design. Review the result after each addition to maintain cohesion.
Tip: Warning: too many patterns can clash; occasional pauses to reassess color balance helps keep the banner legible. - 6
Finalize and display
Once satisfied, remove the banner from the loom and place or hang it on a wall, fence, or gate. Consider creating a small set of banners for borders or signage within a single build.
Tip: Pro tip: take screenshots from multiple angles to ensure the design looks good from afar and up close.
People Also Ask
Can I remove a pattern from a banner once it's applied?
You generally overwrite or replace patterns rather than remove individual ones. To reset, craft a new banner or overwrite patterns with a fresh sequence.
Patterns aren’t easily removed; you typically overwrite them by applying new ones or crafting a new banner.
Is it easier to create banners in Creative mode?
Yes. Creative mode gives you unlimited materials and easy access to looms or crafting interfaces, speeding up experimentation and design iterations.
Creative mode makes it faster to test designs without worrying about resource gathering.
How many colors or patterns can a banner hold?
A banner supports multiple patterns layered in sequence. Color variety is only limited by available dyes and pattern items you can acquire.
Multiple patterns can be layered, with color choices limited by dye availability.
Where should I place banners for best visibility?
Place banners near entrances, on walls of main rooms, or along paths to guide players. Height and lighting affect readability.
Position banners at eye level near entryways for quick recognition.
Watch Video
The Essentials
- Plan color palettes first to guide pattern choices.
- Use a loom for consistent pattern layering.
- Test banners from distance to ensure readability.
- Create a small library of templates for future builds.