Churches in Minecraft: A Practical Build Guide for Beginners
Learn how to design and build churches in Minecraft with practical layouts, material palettes, and interior details. This Craft Guide tutorial offers beginner-friendly, step-by-step instructions to create believable, beautiful Minecraft churches.

This guide will help you design and build churches in Minecraft, covering architectural styles, layouts, materials, and interior details. You'll get a concise, step-by-step overview, plus tips for lighting and exterior decoration. By the end, you'll be able to craft a believable Minecraft church that fits your world. This quick answer draws on Craft Guide's practical approaches.
Design Principles for Minecraft Churches
Designing churches in Minecraft is about more than stacking blocks; it's about conveying space, light, and reverence within the constraints of a voxel world. Start with a clear sense of scale: a nave that feels expansive but not cavernous, tall arches that draw the eye upward, and a roofline that reads well from all angles. Proportions matter: a slightly taller central nave relative to side aisles, paired with generous window openings, creates a sense of verticality without compromising walkable interiors. Symmetry helps players read the space quickly, but small asymmetries—like a minor chamfer on a buttress or an off-center bell tower—can add character. According to Craft Guide, framing your church around a simple grid makes later detailing easier and more consistent across the build.
Choosing Styles: Gothic, Romanesque, and Modern
Minecraft churches lend themselves to several distinct styles. Gothic-inspired builds emphasize pointed arches, ribbed vaults, and large stained-glass panes that glow at night. Romanesque designs favor rounded arches, thick walls, and sturdy pillars, which read well with stone blocks and provide a compact, solid feel. Modern churches lean into minimalist forms, flat roofs, and open interiors with glass walls that blur the line between interior and exterior. When choosing a style, consider your world’s theme and the surrounding landscape. A medieval village will pair best with Gothic or Romanesque cues, while a contemporary city district might suit a glass-and-steel modern approach.
Layout Fundamentals: Nave, Aisles, and Altar
A clear floor plan helps players navigate your church and understand its function. A traditional layout places a long central nave flanked by side aisles, with the altar at the far end and pews facing forward. Consider a transept to create a cross-shaped plan, which reads strongly in the game’s three-dimensional space. Add a chancel or choir area behind the altar if you want a more formal liturgical feel. For smaller projects, a compact nave with a simple altar and a single entry can be equally striking when proportions are well balanced. Lighting from stained-glass windows or colored panes adds focal points and atmosphere during different times of day.
Exterior Architecture: Towers, Entrances, and Stonework
The exterior is your first impression. A bell tower or steeple gives vertical emphasis and a recognizable silhouette, while a grand entrance with double doors and an arcaded doorway invites visitors. Exterior stonework—including buttresses, corbels, and decorative friezes—adds texture and depth. In Gothic designs, tall, lancet windows framed by dark stone create dramatic contrasts; in Romanesque builds, thick walls and rounded arches communicate solidity. Materials should contrast with the landscape: light-colored limestone in desert biomes, darker granite in mountainous areas, or a mix for a more varied texture. Crafting a consistent masonry pattern with occasional accents (slabs, stairs, or fences) helps your church feel real without overcomplication.
Materials and Palettes: Stone, Wood, Glass
Material choice sets the tone. Stone bricks, Andesite, and Quartz blocks can emulate stonework with warm variation when combined with wood for pews and interior details. Glass panes or stained glass provide luminous windows that glow at night. A restrained palette—two to three stone tones plus wood and glass—helps maintain clarity, especially for larger builds. Use contrast deliberately: a lighter interior against a darker exterior can make spaces feel inviting, while subtle color accents guide the eye to focal points like the altar or stained-glass windows. Remember that lighting changes the perception of textures; plan for both daytime and nighttime visibility.
Interior Details: Pews, Altars, Stained Glass, and Lighting
Interior elements bring the space to life. Pews arranged in rows facing a central altar create a familiar worship setting. Altars can be elevated on a dais with candles (torches or lanterns) and cloth-like banners to suggest reverence. Stained-glass windows are not only decorative but can cast colored light onto pews and floors, enhancing mood. Lighting should be layered: ambient ceiling lighting for general visibility, spotlights to highlight the altar, and warmer hues near seating to foster a contemplative atmosphere. Consider adding a choir area or organ pipes using accessible blocks to convey musical function without clutter.
Landscaping and Surroundings: Courtyards, Pathways, and Bell Towers
A church rarely stands in isolation. Create a respectful approach with gravel or cobblestone paths, a small courtyard, and well-placed trees. Surroundings can include a low stone wall, a mining- or era-appropriate garden, and a cemetery block section to tell a broader story. A bell tower not only serves as a visual anchor but provides an auditory cue when timed with daylight or friendly interactions. Pathways leading to multiple entrances promote accessibility and encourage exploration, while a well-placed fountain or statue adds a focal point for photos and storytelling within your world.
Accessibility and Functionality: Doors, Lighting, and Paths
A Minecraft church should be accessible and navigable. Place doors at convenient angles for easy entry, and ensure stairways or ramps connect different levels without forcing players into awkward routes. Lighting should be even enough to prevent mob spawns inside during multiplayer games, yet atmospheric enough to avoid flat lighting. Create clearly defined aisles with subtle color cues or carpet-like blocks to guide movement and attention toward the altar. Accessibility also includes readable exterior signage and a straightforward route from parking areas or village entrances.
Common Mistakes and How to Avoid Them
Common errors include overcomplicating the plan with excessive towers or highly intricate interior details that obscure function. Another pitfall is inconsistent scale between the exterior and interior; keep the height and width proportionate to maintain believability. Too many different block types can create a noisy appearance; stick to a cohesive palette and limit texture variation. Finally, neglecting lighting or ignoring mob-proofing can ruin the experience at night or in multiplayer sessions. Plan a modular workflow so you can refine details without rebuilding major sections.
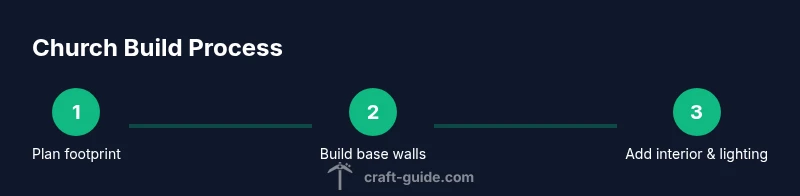
Practical Building Process: Plan, Build, Refine
A practical approach is to break the project into manageable phases: planning the footprint, constructing the main nave, adding side aisles and the altar, detailing the interior, and finishing with exterior features. Group related actions to minimize backtracking. Use guides or reference images to stay consistent with your chosen style. While building, pause to evaluate scale, sightlines, and lighting from multiple angles—especially at eye level. Finally, walk through the completed space as a player would; adjust any awkward spots, test entrances, and ensure the design communicates the intended mood.
Quick Tips and Cautions for Builders
- Pro tip: Start with a simple footprint (e.g., 15x25 blocks) and scale up as needed.
- Note: Consistent use of 1-2 stone textures plus wood and glass keeps the look cohesive.
- Warning: Large towers can cause performance issues on lower-end devices; build in stages and test frame rates.
- Pro tip: Use scaffolding or temporary blocks to reach high areas safely during construction.
- Note: Lighting changes dramatically at night; plan window placements to maximize color from stained glass.
The Craft Guide Approach to Sacred Spaces
Craft Guide emphasizes practical, human-centered design—prioritizing legibility of space, comfort of movement, and aesthetic cohesion. By starting with a clear footprint and a limited palette, you can craft a Minecraft church that feels authentic without getting lost in decorative complexity. The approach is iterative: build a core frame, test it in-game, and refine proportions and textures with small adjustments. This method ensures that beginners can achieve professional-looking results while still enjoying the creative process.
Tools & Materials
- Grid map or planning grid(Use a grid to plan the footprint and align walls)
- Stone bricks(Main exterior and interior walls)
- Andesite or dark stone variants(Texture variation for depth)
- Wood planks (oak or spruce)(Pews, furniture, and accents)
- Glass panes / stained glass(Windows to create color and light)
- Slabs and stairs(Rails, arches, and stepped details)
- Torches/lanterns(Interior lighting and ambiance)
- Carpet or dyed blocks(Aisle and decor accents)
- Scaffolding or temporary blocks(Safe access for tall features)
- Light sources for exterior silhouettes(Glowstone or sea lanterns used sparingly)
Steps
Estimated time: 3-6 hours
- 1
Plan your footprint
Decide the overall size, shape, and layout of the church. Sketch a rough rectangle or cross plan on the ground using light blocks to visualize walls and interior spaces. Define major zones (nave, altar, side aisles) and set alignment with the world grid for easier building.
Tip: Use a 7x9 or 9x11 grid for traditional proportions; adjust if you want a larger sanctuary. - 2
Lay the foundation
Build the exterior walls first, establishing the footprint and doorways. Create the nave walls taller than the side aisles to hint at vertical emphasis. Double-check alignment with reference images before proceeding.
Tip: Place corner posts and corner stone offsets to guide the roof line. - 3
Raise the walls
Construct the main walls up to the desired height. Add buttresses or arches at regular intervals to suggest structural integrity and style. Leave space for windows and doorways, then okay interior column placement if you plan a vaulted ceiling.
Tip: Use a consistent block palette to keep textures uniform across large facades. - 4
Add the roof
Choose a roof style (gabled, vaulted, or flat) and frame it with stairs and slabs for a natural slope. For Gothic looks, incorporate ribbed vault hints with shallow arches. Ensure roof overhangs align with exterior walls for a balanced silhouette.
Tip: Test lighting beneath arches to ensure skylight effects with stained glass. - 5
Install interior details
Place pew rows, an elevated altar, and a chancel area if desired. Add stained glass windows and colorful lighting to simulate mood lighting. Keep spacing comfortable for movement and viewing from the pews.
Tip: Lay floor tiles that define the aisle and seating areas; use color to guide flow. - 6
Finish exterior and surroundings
Complete exterior textures with decorative stone, arches, and a tower as a focal point. Create a pathway, a small courtyard, and a boundary wall to set the church in its environment. Add a bell or clock feature if you want a telling landmark.
Tip: Keep exterior lighting subtle to avoid harsh shadows that hide architectural details.
People Also Ask
What is the best architectural style for a Minecraft church?
The best style depends on the world’s theme. Gothic emphasizes height and light, Romanesque focuses on mass and solidity, while modern designs lean toward minimalism and glass. Pick one and apply consistent shapes, proportion, and color to maintain cohesion.
The best style depends on your world. Gothic, Romanesque, and Modern all work well if you keep proportions and color consistent.
How large should a Minecraft church be for a small village?
For a village setting, a footprint around 15 by 25 blocks is a good starting point for a modest church. Scale up to 25 by 40 or more blocks for a grander sanctuary. Always plan interior flow first so the space feels usable.
A small village church is often about 15 by 25 blocks; larger sanctuaries can go to 25 by 40 depending on space.
What are common pitfalls to avoid in Minecraft church builds?
Common mistakes include overcomplicating design, inconsistent scale, and cluttered interiors. Resist too many block types; prioritize readable sightlines, clean symmetry, and practical lighting to avoid mob spawns and confusion.
Avoid overcomplicating the design and keep the space readable with good lighting and clear sightlines.
Which lighting helps the church feel warm at night?
Use warm-toned lighting such as lanterns or glowstone behind stained glass and along the aisle edges. Layer lighting with ambient ceiling lights and focused altar lighting to create depth and mood.
Warm lighting comes from lanterns or glowstone behind colored glass and along aisles for depth.
Can I adapt existing builds into a church?
Yes. Start by identifying a suitable space within the structure, then retrofit a nave and altar while preserving the exterior silhouette. Use compatible materials to blend new elements with the old layout.
You can convert an existing building by creating a nave and altar and keeping the exterior shape.
What is a quick starter plan for beginners?
Begin with a simple rectangular footprint, a central nave, side aisles, and a single altar. Add windows with colored glass, then refine with minor arches and a small bell tower. Build in stages and test from multiple angles.
Start small with a rectangular footprint, add a nave, aisles, altar, and a bell tower later.
Watch Video
The Essentials
- Plan footprint before placement.
- Choose a style and stay consistent.
- Use a restrained material palette for clarity.
- Lighting shapes mood and readability.
- Details like arches and windows elevate realism.