Church in Minecraft: A Complete Build Guide
Learn to design and build a church in Minecraft with practical steps, style choices, and interior details. This beginner-friendly guide from Craft Guide shows layout, materials, and finishing touches.

Goal: Build a church in Minecraft with a clear layout, authentic interior, and decorative exterior. Step 1: Define the style (medieval, gothic, or modern). Step 2: Prepare a plot that fits your terrain. Step 3: Gather core materials (stone, brick, wood, glass). Step 4: Build nave with aisles and a chancel. Step 5: Add a tower, roof, stained glass, and interior details. This plan reflects Craft Guide's practical approach.
Planning Your Minecraft Church
A church in minecraft should serve as both a quiet gathering space and a village landmark. Before you place a block, sketch a rough plan on paper or in your mind: where the nave will sit, how aisles will frame the central aisle, where the altar or chancel will reside, and how the tower or spire will balance the silhouette. According to Craft Guide, a thoughtful plan reduces wasted blocks and makes interior decoration easier. Start with a simple rectangle as the footprint, then expand details as your plot allows. Consider accessibility: door placements, interior pathways, and clear sightlines from entry to altar. In a church in minecraft, light and rhythm matter as much as scale, so plan windows and rooflines to guide the eye upward and inward.
Choosing a Style: Medieval, Gothic, or Modern
Style defines materials, shapes, and mood. Medieval churches lean on sturdy stone, rounded arches, and simple timber beams. Gothic designs introduce pointed arches, tall windows, and flying buttresses for dramatic height. Modern churches emphasize clean lines, glass, and minimal ornament. For a beginner, pick one style and carry its rules through the whole build to maintain coherence. Remember to balance exterior grandeur with interior clarity; a big exterior can feel empty if the interior is cramped. The Craft Guide team notes that consistency in proportion and detailing keeps the build believable, whether you prefer cobblestone texture or smooth quartz accents. Gather references from real-world churches or Minecraft builds to guide your textures and shapes.
Base Layout and Plot Size
Layout decisions drive the entire project. Start with the main hall (nave) as a long central chamber, add side aisles if space allows, and reserve a distinct chancel near the altar. Consider symmetry for a classical look or intentional asymmetry for a modern twist. Place entry doors at a welcoming point, with clear sightlines to the altar and stained-glass focal points. Rooflines should cascade from the nave toward the transepts or tower. Use wide exterior pillars to support arched windows and create shade along walkways. In survival, keep access doors simple and use neutral materials to avoid overloading your frame. This stage sets the rhythm of your church, emphasizing repetition, proportion, and purposeful gaps.
Building Techniques: Walls, Roofs, and Windows
The walls define the space; choose a primary material and a contrasting trim to emphasize edges. Arches succeed with rounded or semicircular shapes using stairs and slabs. Roofs are the crown: a gabled roof is easiest for beginners, while a steep roof with multiple pitches adds drama. Windows should let in light without creating glare; stained glass or colored panes create focal points and color. For durability, use durable blocks for the exterior and lighter blocks for interior surfaces to keep rooms readable. Craft a consistent window grid across the façade to reinforce harmony. The goal is clear lines, readable volumes, and comfortable, navigable interiors that feel welcoming to visitors.
Interior Design: Pews, Altar, and Lighting
Interior design sets the atmosphere. Place pews or benches along aisles facing the altar; align them to the central axis to guide visitors forward. The altar can be simple or ornate, depending on your style; include an elevated platform and discreet lighting. Lighting matters: chain lanterns, torches hidden behind trim, or glowstone behind panels provide warm, even brightness without glare. Add minor details like banners, rugs, or candles to evoke sanctity; keep clutter to a minimum so worshippers can focus. Lighting should be adjustable for day/night cycles in your world. The Craft Guide team emphasizes clarity, readability, and comfort as you bring the church in minecraft to life.
Exterior Details: Towers, Spires, and Ornamentation
Exterior silhouette defines a landmark. Towers at the corners or a central steeple draw the eye upward and signal purpose from afar. Use contrasting materials for trim and decorative elements—stone with wood, or brick with glass accents. Add buttresses, cornices, and edge lighting to highlight shape after sunset. Landscaping—shrubs, trees, and a gravel path—accentuates the building and guides visitors. Exterior doors should be weathered visually but still inviting. Remember to keep the scale appropriate for your world; a tower that dominates the horizon can feel out of place on a small village map.
Redstone and Functionality: Doors, Lighting, and Secret Features
Practical features improve realism. Add automatic doors or pressure plates at the church entrance, with interior lanterns activated by daylight sensors to save resources. Use hidden lighting for the chancel and nave to avoid glare while maintaining visibility. You can incorporate decorative secret features, such as a hidden vestry behind an altar or a trapdoor floor to reveal storage or an upper balcony. Think about safety: place trapdoors and stairs with clear railings to prevent accidental falls. Redstone can be used to create subtle sounds or chimes to mark the hour or service times, adding life to your build.
Landscaping and Surroundings: Pathways, Graveyard, and Grounds
Place a winding path from the main road to the church doors, using contrasting block textures to guide foot traffic. A graveyard with simple headstones and low hedges creates a solemn approach. Plant trees near corners to frame the building and soften hard lines. Lighting along paths improves night-time visibility and safety. If you want to teach architecture, consider adding a small cloister or a courtyard garden to extend the space. The surrounding environment should feel calm and contemplative, inviting players to linger and explore.
Common Mistakes and How to Avoid Them
Avoid inconsistent scales; match door widths, window sizes, and roof slopes across facades. Overly dark interiors reduce readability—balance light and shadow to keep spaces welcoming. Resist clutter around the altar and avoid too many different materials on a single wall; select a palette and stay with it. Don’t rush the roof or the tower; take time to test proportions from multiple angles and adjust as needed. Finally, save frequently and consider building a smaller, test version first before committing to a full-size church in minecraft. Craft Guide encourages iterative design and refinement.
Authoritative Sources and Inspiration
From education resources to community guides, reputable references help you learn design principles and share techniques with clarity. Build from canonical Minecraft-building guides and architectural references to ensure your church in minecraft feels authentic. For further reading, check general craft and architecture resources from reliable domains. Craft Guide’s recommended sources include architectural glossaries and Minecraft-building case studies, which you can use to improve details, proportion, and composition. Useful sources include:
- https://www.nps.gov/subjects/architecture/index.htm
- https://www.britannica.com/topic/Church-building
- https://www.loc.gov
Tools & Materials
- Plot space (flexible footprint to fit terrain)(Choose a clear, flat area with room for entrances and a surrounding path)
- Stone bricks or stone(Primary wall material for a sturdy, traditional look)
- Brick or sandstone(Alternative textures for variety and trim)
- Wood planks (oak or spruce)(Used for interior beams, pews, and accents)
- Glass panes(For windows; consider stained glass for color accents)
- Stairs and slabs(Create arches and stepped rooflines)
- Doors (oak or dark oak)(Entrance access; consider auto doors or pressure plates)
- Lighting (lanterns, torches, glowstone)(Position to avoid glare and dark corners)
- Decoration blocks (carpets, banners, plants)(To enhance interior and exterior visual interest)
- Scaffolding or ladders(Helpful for higher builds and tower work)
Steps
Estimated time: 3-6 hours
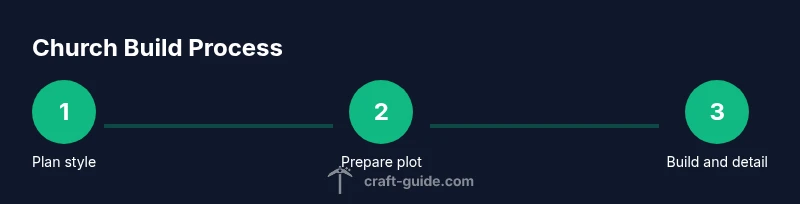
- 1
Plan the style
Decide whether the church will be medieval, gothic, or modern. Define a central axis and key spaces (nave, chancel, tower) before placing any block. This keeps proportions consistent as you build.
Tip: Sketch on paper or in a world-edit sheet to avoid backtracking. - 2
Prepare the plot
Choose a flat, accessible plot with space for a path and surrounding landscaping. Establish entry points from multiple angles if your world requires it.
Tip: Keep a small buffer zone around the footprint for later landscaping. - 3
Lay the base footprint
Create a simple rectangular footprint for the nave, with optional sides for aisles. Mark the chancel area near the altar and position the tower so it reads from a distance.
Tip: Use contrasting blocks for the exterior edges to read from afar. - 4
Build the nave and aisles
Raise the main hall with evenly spaced supports. Add shallow arches via stairs and slabs to achieve a classic look. Ensure interior sightlines toward the altar.
Tip: Keep doorways wide enough for comfortable movement. - 5
Add the chancel and altar
Elevate the chancel area; place an altar block or carpeted platform. Include modest seating and a focal lighting arrangement above or behind the altar.
Tip: Test lighting during different times of day to avoid glare. - 6
Construct towers and roof
Erect a tower or spire if desired. Build a gabled or multi-pitched roof that complements the nave height. Install windows on higher levels for dramatic light.
Tip: Build supports or trusses visibly to add realism. - 7
Install windows and interior details
Fit stained glass or colored panes as focal points. Add pews, railings, banners, and rugs to guide flow and comfort.
Tip: Keep a consistent color palette across interior elements. - 8
Finalize surroundings and lighting
Create a pathway, small graveyard, and landscaping to frame the church. Place exterior lights for safety and ambiance at night.
Tip: Test the build under night-time lighting to ensure readability.
People Also Ask
What is the best style for a Minecraft church for beginners?
Medieval and Gothic are good starting points for beginners due to their clear shapes and arches. Choose one and apply it consistently to both exterior and interior details.
Medieval or Gothic styles work well for beginners because of clear shapes and arches.
How large should a Minecraft church be on a standard map?
Aim for a footprint that fits your terrain and allows a surrounding approach path. Start small and scale up if you want a larger building later.
Start small and scale up if you want a bigger church later.
What materials are most practical for a survival world build?
Stone bricks or cobblestone provide durability and a traditional look. Use wood for interior elements and glass panes for windows to balance look and resources.
Stone bricks for durability, wood for interiors, glass panes for windows.
How can I add stained glass without heavy resource use?
Use colored glass panes strategically at focal windows and mix with clear panes elsewhere to reduce material needs while keeping color accents.
Place colored panes at key windows to add color without overusing resources.
Are there design tricks to make small chapels feel bigger?
Use light colors, reflective surfaces, and tall, narrow windows to draw the eye upward. Keep aisles clear and avoid clutter near the altar.
Light colors and tall windows help small chapels feel more spacious.
What game features can help me test the build before finishing?
Build a small mock-up of a single facade or interior space to check proportions and flow before committing to the full project.
Try a small mock-up to test proportions before the full build.
Watch Video
The Essentials
- Start with a clear style and footprint
- Maintain consistent proportions across facades
- Use lighting to enhance readability and mood
- Iterate on a smaller version before the full build
- The Craft Guide team recommends a deliberate, phased approach