Minecraft to Real-Life Scale: A Practical Guide
Learn how to translate Minecraft builds into real world dimensions with a consistent scale. This guide covers baselines, common mappings, conversion methods, and real-world verification to help you create accurate, shareable projects at any size.

According to Craft Guide, by the end you will translate Minecraft blocks into real-life measurements and plan builds at human scale. You’ll learn a reliable baseline (1 block = 1 meter), how to pick a scale that fits your project, and how to verify dimensions in both-game and real-world terms. This guide emphasizes consistency and practical verification to avoid mis-sizing.
Understanding scale in Minecraft
Scale is the bridge between the cubic grid of Minecraft and the real world. In most projects, builders start with a baseline that 1 block roughly equals 1 meter in real life. This simple rule lets you translate lengths, widths, and heights into familiar units like meters or feet. According to Craft Guide, staying consistent with that baseline is essential; it makes cross-referencing plans, blueprints, and photos much easier. Remember that Minecraft blocks are nominally cubic, but real-world proportions can vary with blocks like slabs (half-height) and stairs (angled profiles). This means your initial planning should note which elements will use full blocks and which will rely on finer geometry. And for to-scale projects, think in ranges rather than single numbers: a room might be 6–8 blocks wide, a door 1–1.5 blocks tall, etc. The goal is to preserve feel and function while keeping the math manageable for real-life interpretation.
- When you translate scale, always anchor to a grid you can measure in the real world.
- Use 1 block = 1 meter as your default baseline, then adjust for design goals.
- Slabs, stairs, and decorative elements require slightly different height or length rules, so plan ahead.
noteItemCount":null},
Tools & Materials
- Measuring tape or ruler(For real-world measurements and verifying dimensions against your Minecraft calculations)
- Calculator or unit converter(Convert meters to feet and inches; round to practical values for builds)
- Graph paper or grid planning software(Sketch scale layouts before building to minimize in-game edits)
- Minecraft reference data (block dimensions guide)(Note full blocks vs half-height blocks (slabs) and angled pieces (stairs))
- Optional: World editor or planning tool(Optional for visualizing scale in-game before construction)
Steps
Estimated time: 60-120 minutes
- 1
Decide baseline and target scale
Choose your baseline (usually 1 block = 1 meter). Document the exact meters per block you will use and write down the real-life size goals for your project. This decision anchors every subsequent calculation.
Tip: Write the baseline as a simple formula, e.g., 1 block = 1 meter, and reference it whenever you model or measure. - 2
Measure the footprint in blocks
Measure the dimensions of your intended build area in Minecraft blocks (length x width). Note any irregular shapes and plan how to approximate them with rectangular sections for easier conversion.
Tip: If you’re working with curved terrain, sketch a polygon and approximate with straight segments for the grid. - 3
Convert dimensions to meters
Multiply each block dimension by meters-per-block (your baseline). E.g., 10 blocks long at 1 meter per block becomes 10 meters long.
Tip: Keep a small conversion table handy to speed up math during planning. - 4
Convert to real-world units
Translate meters to feet or other units you’ll display in your plan. Round to practical increments to avoid awkward proportions.
Tip: Use standard rounding (nearest 0.5 m or 1 ft) to keep scale consistent across features. - 5
Sketch a scale blueprint
Draw a scaled diagram on graph paper showing room sizes, wall heights, and key elements. Use lighter lines for areas that will rely on half-blocks or stairs.
Tip: Label every dimension with both block counts and real-world meters to prevent mix-ups. - 6
Build a small test section
In a safe area, construct a 2–3 block test module to verify height and width relationships. This helps catch scale issues before committing to a full project.
Tip: Check door heights, ceiling clearance, and eye-level vantage points for realism. - 7
Apply scale to the full project
Expand the scale from the test module to the entire build. Maintain the same baseline for all components, even decorative details.
Tip: Keep a running log of dimension changes to ensure future revisions stay on scale. - 8
Verify accuracy and document the scale
Re-measure the completed sections and compare against your original real-world targets. Create a simple scale guide for future builds so you stay consistent.
Tip: Include the baseline 1 block = 1 meter in your project notes for future reference.
People Also Ask
What is the standard Minecraft block size in meters?
In Minecraft, a gameplay block is commonly treated as 1 meter in real-life terms for scale planning. This convention helps builders translate in-game measurements into real-world dimensions.
Most builders treat a block as one meter, which makes translating dimensions straightforward; you can adjust later if you’re aiming for a different scale.
Can I use a different scale than 1 block = 1 meter?
Yes, you can choose a different scale, such as 0.5 meters per block or 2 meters per block, to fit larger terrains or more detailed interiors. The key is consistency across the entire build.
You can pick any scale you want, as long as you apply it evenly to length, width, and height.
How do I map real-life dimensions to blocks for large structures?
Start with a rough footprint in meters, convert to blocks using your baseline, then round to practical block counts. For large structures, plan sections and iterate using a test module to verify proportions.
Break the project into sections and test a few meters at a time to keep the proportions accurate.
What tools help verify scale in-game?
In-game tools like WorldEdit or minimap overlays, plus external planning sheets, help verify scale. Always cross-check dimensions by counting blocks and converting to meters.
Use planning tools to test dimensions before you start building in earnest.
Is this approach suitable for survival mode builds?
Yes, with patience. Plan your scale in Creative to ensure accuracy, then recreate or adjust pieces in Survival mode as you expand. Keep safety and resource limits in mind.
You can apply the same scale method in Survival, just build gradually and verify dimensions often.
How do slabs and stairs affect scaling?
Slabs are half the height of a full block and stairs add angled profiles. When scaling, account for these half-heights by adjusting ceilings and door openings, or by using full blocks strategically.
Remember that half-height pieces change the effective height you measure in real life.
Watch Video
The Essentials
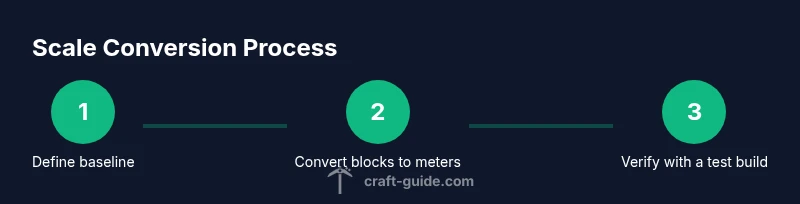
- Define a fixed baseline and stick to it
- Convert blocks to meters before moving to feet or inches
- Test with a small module to catch scale mistakes early
- Document your scale rules for future projects