Medieval Town Minecraft: Practical Build Guide for Beginners
Learn to design and build a believable medieval town in Minecraft with district planning, authentic architecture, roads, and defense features in a practical, step-by-step format.

You’ll learn how to design and build a functional medieval town in Minecraft, including planning layouts, key districts (market, walls, gates), building styles, and resource management. You’ll need basic survival or creative mode, timber and stone blocks, and a clear plan. This guide covers step-by-step planning, realistic lighting, and defense considerations.
Planning the town: a blueprint before brickwork
A successful medieval town minecraft project starts long before you place a single block. A clear plan saves time, keeps architectural style consistent, and makes future expansion painless. According to Craft Guide, breaking the project into districts not only helps with aesthetics but also with resource management and gameplay pacing. Start by sketching a rough map that defines the town core (market, gatehouse, town square) and the surrounding neighborhoods. Use paper maps or in-game schematics to experiment with block choices, street widths, and defensive positions. In this planning phase, keep the concept of medieval town minecraft as your guiding theme while ensuring the design remains playable within Minecraft’s block-based world.
- Map the center: Identify a central anchor such as a market square or chapel. The center guides road placement and district orientation.
- Plan districts: Market, residential blocks, crafts area, and a defensive perimeter near the walls.
- Determine scale: A compact town might be 60x60 blocks; a sprawling one 200x200 blocks. Small towns favor denser layouts; large towns allow more distinct zones.
- Materials and style: Pick a consistent palette—timber-framed houses, cobblestone bases, brick accents. Decide on roof shapes and window styles for cohesion.
- Start with a map: Draft a simple block grid on paper or a quick in-game map to visualize density and spacing.
This planning stage anchors the entire build and keeps your medieval town minecraft cohesive across districts.
note?:null
Tools & Materials
- Creative or Survival mode access(Time-saving prototype phase; survival mode helps test resource limits later.)
- Block palette set (timber, cobblestone, brick)(Choose a cohesive color palette for roofs, walls, and accents.)
- Wood planks and logs(Primary materials for timber-framed structures.)
- Cobblestone and bricks(Materials for foundations, walkways, and accents.)
- Doors and windows (glass panes or stained glass)(Creates realism and visual rhythm.)
- Torches, lanterns, and lighting(Even spacing helps safety and mood at night.)
- Scaffolding and ladders(For multi-story details and overhangs.)
- In-game maps/paper maps (or sketch grid)(Plan density and district relationships before placement.)
- Optional: texture packs or shaders(Enhance atmosphere but ensure performance.)
- Measuring tools (map, grid lines)(Maintain consistent block counts across districts.)
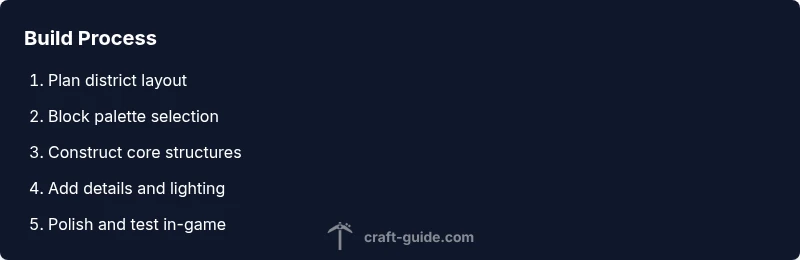
Steps
Estimated time: Total time: 6-12 hours
- 1
Define core district plan
Establish the town center with a market square and a defensive gate. Draw a rough grid that places the market at the heart, residences around it, and workshops toward the edges. This creates natural traffic flow and a clear progression from public to private spaces.
Tip: Use a simple 9x9 or 11x11 grid to start; you can scale up later. - 2
Choose architectural language
Pick a primary style (timber-framed with cobblestone bases) and stick to it across all buildings. Decide roof pitch, window size, and color accents to ensure cohesion. Sketch a few block-based silhouettes to guide construction.
Tip: Limit roof shapes to two main types to avoid visual chaos. - 3
Lay a street grid
Plan main avenues that radiate from the market, with perpendicular side streets forming blocks. Use cobblestone for roads and add shoulder sidewalks with wood planks.
Tip: Keep roads slightly wider near the market to imply busier spaces. - 4
Build the central market square
Create a paved plaza with stalls, a central fountain or well, and shaded seating. Place planters and benches to bring life to the square.
Tip: Add variety with awnings, banners, and small vendor carts. - 5
Erect walls and gates
Outline a defensive perimeter and install a gatehouse at the main entrance. Integrate watchtowers if space allows and ensure the wall height visually matches nearby buildings.
Tip: Vary wall texture to avoid monotony and use battlements sparingly. - 6
Develop districts around the core
Add a residential block with varied house heights, a crafts area for blacksmiths and carpenters, and an inn or tavern to imply social life. Keep color palettes consistent across blocks.
Tip: Use staggered rooflines to create a layered skyline. - 7
Detail interiors and facades
Fill ground floors with shops and interiors visible through windows. Add signs, balconies, and small courtyards to give each building character.
Tip: Small, curated details beat large numbers of generic structures. - 8
Review, iterate, and test
Walk the town layout in creative or survival to test pacing, accessibility, and flow. Watch for dead ends or overly long sightlines and adjust accordingly.
Tip: Document changes on a master map for easy revision.
People Also Ask
What is the first step to plan a medieval town in Minecraft?
Start by mapping core districts and the market area. Define the town center to anchor roads and progression, then outline surrounding blocks before placing anything.
Begin with a core district map and center, then plan surrounding blocks to guide your build.
Which materials best convey a medieval look?
Timber, cobblestone, plaster, and brick accents convey a classic medieval feel. Use consistent palettes and limit flashy textures to maintain authenticity.
Stick to timber, stone, and brick textures with small accent details.
What is a good town size for Minecraft beginners?
Start with a compact, walkable layout that supports a few neighborhoods and a central market; expand gradually as you gain confidence.
Begin small and grow as you refine layouts and proportions.
Should I use survival mode or creative mode for this project?
Creative mode is great for rapid prototyping and testing ideas; survival mode helps simulate resource constraints and realism.
Use creative to plan first, then test ideas in survival if you want a challenge.
How can I ensure architectural consistency across districts?
Define a core architectural language (colors, roof shapes, materials) and apply it to all buildings, adjusting only for local variation.
Set a consistent style and apply it evenly across districts.
How do I add realistic lighting without destroying mood?
Place lighting at walkable levels along streets and inside buildings, using lanterns or glowstone to create warm, consistent glow.
Light streets in layers for warmth and safety.
Watch Video
The Essentials
- Plan districts before building to keep cohesion
- Maintain a consistent architectural language
- Use lighting and details to boost realism
- Iterate with tests in creative and survival modes