How to Get Rid of Water in Minecraft: A Practical Guide
Learn practical, tested methods to remove water from any area in Minecraft. This guide covers sponge drying, block-by-block drainage, and finishing touches, with tips for both Java and Bedrock editions.

How to get rid of water in minecraft can be done in a few reliable ways: use sponges to absorb water, drain with blocks to seal openings, and finish with solid blocks to prevent future leaks. This step-by-step approach helps you dry rooms, tunnels, and ponds efficiently. According to Craft Guide, mastering water removal saves time and protects builds.
Why Water Removal Matters in Minecraft
Learning how to get rid of water in minecraft is essential for building, mining, and redstone projects. Water slows progress, floods trenches, and can ruin farms or redstone contraptions. It creates mobs in undesirable places and makes lighting and visibility awkward. By efficiently removing water, you keep your build area safe, protect valuable blocks, and ensure farms operate at full capacity. According to Craft Guide, effective water management saves time and reduces the risk of accidental flooding during big builds. This section lays the groundwork for choosing the right approach based on area size and water behavior.
In practice, you’ll often face two scenarios: small, irregular pockets and large, open bodies. Small pockets are ideal for sponge-based absorption, while larger volumes benefit from strategic block placement to halt flow and a staged drying process. Regardless of size, a clear plan reduces backtracking and makes water removal predictable rather than chaotic. Keep safety in mind when working near lava or elevated ledges; one misstep can flood adjoining rooms and complicate cleanup.
Quick Overview of Methods
There isn’t a single best method for every situation. The main approaches are: (1) sponge-based absorption for compact, enclosed spaces; (2) block-by-block drainage for larger volumes where water can be staged and released; and (3) finishing touches that replace water with solid blocks and restore safe, walkable terrain. For most projects, a combination of methods yields the fastest result.
Sponges are the star tool for interior rooms and tunnels. Dry sponges remove remaining moisture, while wet sponges absorb more water and can be dried back into dry sponges for reuse. When you can’t use sponges, strategically placed blocks to block flow and block-source harvesting often works well, particularly in open caverns or along conduits. Finally, sealing with solid blocks completes the process and prevents future leaks. Craft Guide’s approach combines these methods to optimize time and effort.
Method A: Sponge Drying for Small Areas
Sponge-based drying is the most efficient way to remove water from small, confined spaces such as rooms, hallways, and compact tunnels. Start by identifying water sources and placing a row of blocks to limit spread. Then, place Wet Sponges on the water-filled blocks; they absorb water quickly, turning into Wet Sponges that you can carry to the surface. Continue this cycle until the area is dry. As you work, swap Wet Sponges for Dry Sponges (which you can obtain by using a furnace to dry Wet Sponges) to maximize absorption.
Tip: Don’t overfill a single sponge; rotate sponges to maximize absorption areas. Detailed planning reduces backtracking and keeps you focused on the final dry state. If you encounter tight corners, place a solid block behind the sponge to reach awkward seams without stepping into water. Craft Guide notes that sponge-based drying scales well for most interior rooms and small tunnels, making it the default first method for beginners and intermediate players.
Method B: Block-by-Block Drainage for Large Areas
For larger volumes, a block-by-block drainage approach slows the flood but gives you more control and reduces sponge usage. Begin by placing solid blocks to create barriers that stop water from spreading further. Work from the edge of the affected area toward the center, removing water blocks as you go and using the water's natural flow to drain into a contained space.
Once a section is cleared, remove the temporary barriers gradually and replace water with solid blocks where appropriate. This method is slower per block but scales well for big builds, such as flooded caverns or large underwater rooms. Use the water-inventory technique—scoop water into barrels or place it in a controlled sink—to prevent uncontrolled leaks while you work across the space.
Pro tip: Record your plan on paper or in a map so you don’t lose track of where you have already drained. The strategy shines in large projects because it avoids relying entirely on sponge stockpiles, which can be costly to acquire in bulk.
Finishing Touches: Replacing Water with Safe Blocks
After most water is removed, the final step is to replace water with solid, walkable blocks to prevent future leaks. Start by filling any remaining pools with blocks that align with your build’s aesthetic, such as stone, bricks, or concrete. Ensure that all potential outlets are sealed—check ceilings, walls, and floor intersections where water can re-enter. If you used water channels for drainage, consider enclosing them with glass or slabs to keep the space stable and visually tidy.
A quick check with a light source helps reveal damp pockets and ensure there are no hidden pockets. If you rely on water for decoration elsewhere in your build, separate the decorative water from the working area to avoid accidental floods during maintenance. Craft Guide emphasizes finishing touches as the difference between a functional space and a flawless one, especially for builds that prioritize aesthetics along with practicality.
Practical Scenarios: Drying a Room, a Tunnel, and a Pond
Drying a small room is a straightforward project: isolate the area, apply wet sponges to the water, and replace sponges as they dry. For a long tunnel, use a combination of block barriers and sponge absorption to progress along the length. A flooded pond or pool requires a plan that balances sponge use with block-based drainage to minimize time spent on repetitive absorption.
In all cases, work from the edge inward and continuously test for damp spots. If you’re in a multiplayer world, coordinate with teammates to divide sections and avoid stepping on damp surfaces. The end goal is to create a dry, safe, and accessible space that fits your build’s design language.
To streamline large projects, segment the area into grids and tackle one grid at a time, marking completed zones to keep momentum. This approach reduces fatigue and helps you stay organized during longer sessions.
Version Variations: Java vs Bedrock Water Mechanics
Water behavior is largely consistent across Java and Bedrock editions, but there are subtle differences that affect how you remove water in practice. In most cases, sponge mechanics and block-based drainage work similarly, with Wet Sponges converting to Dry Sponges after drying in a furnace. Be mindful of variation in piston-driven water physics and the way flowing water interacts with certain blocks in different editions. If you’re building a vanilla sky-bridge or tunnel, verify the version you’re playing to apply the correct block choices and water placement rules.
Always test new methods in a controlled area before applying them to your main project. Craft Guide notes that players across editions benefit from understanding basic water physics, which minimizes trial-and-error time and helps you plan effective drainage strategies ahead of time.
Common Pitfalls and How to Avoid Them
- Don’t ignore hidden pockets: Water often hides in nooks behind walls or beneath slabs. Inspect with a light and re-check corners after drainage.
- Avoid over-reliance on sponges: While sponges are powerful, large projects can be cost-prohibitive. Alternate strategies save resources and reduce repetition.
- Don’t flood newly cleared sections: Keep temporary barriers until you’re ready to finalize the area to prevent accidental leaks.
- Don’t forget lava or cave-ins: If you work near lava or unstable ceilings, safety rails and careful scaffolding prevent accidents.
- Avoid mismatched materials: Water blocks behind decorative walls can look fine but create hidden leaks; align materials for a clean appearance.
If safety is your priority, plan a drainage sequence and keep a backup route for escape if water re-enters while you’re working. These habits reduce frustration and ensure your project stays on track.
Quick Project Walkthrough: Drying a Small Chamber
This practical walkthrough covers a small chamber of about 6x6x5 blocks. Start by sealing any obvious openings with temporary blocks. Place Wet Sponges on the water surface and rotate them as they absorb water, turning them into Dry Sponges as you go. Once the chamber reaches a dry state, replace all temporary blocks with the intended final material and seal the space with a solid wall. Finish by lighting the area to prevent mob spawning and confirming no damp pockets remain. This concise exercise demonstrates how sponge absorption and finishing touches combine to finish the dry-out efficiently.
Tools & Materials
- Wet sponges(Used to absorb water; can be dried in a furnace to yield dry sponges)
- Dry sponges(Absorbs water quickly; recharges sponge inventory after drying)
- Buckets(Useful for transiently moving water or emptying pools when a sponge isn’t available)
- Blocks for flow control(Use solid blocks like stone or dirt to block or reroute water flow)
- Lights or glowstone(Helps identify damp pockets after draining)
Steps
Estimated time: 60-120 minutes
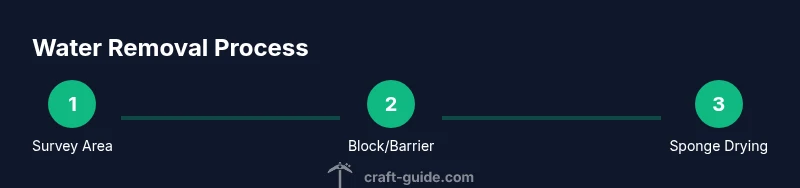
- 1
Survey the area
Identify all water sources, note where water is flowing from, and mark boundaries to prevent spillover. A clear map saves time during the drainage process.
Tip: Take screenshots or sketch a quick diagram of the drainage area before you start. - 2
Plan barriers and containment
Decide where to place barriers to stop water flow. Temporary blocks can help you test the drainage path without risking a full flood.
Tip: Place barriers on the far side from your working space to avoid accidental water leaks. - 3
Place barriers and seal openings
Set solid blocks at the water’s edge to halt flow. Ensure there are no seepage points that water can escape through.
Tip: Check ceilings and walls for hidden outlets—water can seep from above. - 4
Start sponge absorption
Place Wet Sponges on the water surface to start soaking up liquid. Move methodically to cover all active water sources.
Tip: Rinse and replace sponges as they become saturated to keep absorption efficient. - 5
Dry and reuse sponges
Transfer Wet Sponges to a furnace or drying setup to regain Dry Sponges for continued use.
Tip: Keep a stack of Dry Sponges ready to minimize downtime. - 6
Transition to block finishing
Once most water is absorbed, remove remaining liquid by replacing it with solid blocks where appropriate.
Tip: Don’t forget to seal any floor-level channels that could refill the area. - 7
Inspect for damp pockets
Light the area and scan for any hidden damp spots; reapply sponges or blocks as needed until completely dry.
Tip: A bright light helps reveal moisture you might miss in shadowed corners. - 8
Finalize and test
Replace temporary blocks with your final materials and run a test flood-check to ensure no leaks remain.
Tip: Test by quickly simulating a flood from one edge to confirm containment.
People Also Ask
What is the fastest way to remove water in a small enclosed space?
In most cases, using Wet Sponges to absorb water quickly is the fastest method for small enclosed spaces. Switch to Dry Sponges as soon as absorption slows, and consider drying Wet Sponges in a furnace to extend your supply.
The quickest approach for small spaces is to use Wet Sponges first, then dry them for reuse.
Can I remove water without sponges?
Yes. You can block water flow with solid blocks and remove source blocks, letting water drain away gradually. This method is slower but works if sponges aren’t available.
You can drain water by blocking its flow and removing sources, even without sponges.
Is water removal the same in Java and Bedrock?
For the most part, sponge-based drainage and block-led strategies apply to both editions. Minor physics differences may affect timing, so adapt your approach slightly based on edition.
The general approach works in both editions, with small tweaks for edition-specific water behavior.
Where can I find sponges in Minecraft?
Sponges are primarily found in Ocean Monuments as Wet Sponges. Dry Sponges are obtained by drying Wet Sponges in a furnace or similar drying setup.
Sponges come from Ocean Monuments, and you dry them to reuse.
What should I do after I remove water?
Fill the area with your desired final blocks, light the space to prevent mobs, and test for any damp pockets that could reintroduce moisture.
After draining, replace with blocks, light the area, and check for moisture pockets.
Are there safety tips for draining near lava or cliffs?
Work with a buddy, avoid leaning over open drops, and use non-slip blocks to prevent accidental falls. Keep a clear escape route.
Drain with a buddy and keep safe by using solid blocks near hazards.
Watch Video
The Essentials
- Plan drainage to prevent backflow
- Use sponges for rapid absorption in small areas
- Seal edges with blocks to prevent re-flooding
- Combine methods for large spaces to save time
- Finish with solid blocks and proper lighting