How to Minecraft Multiplayer: A Practical Guide
Learn to play Minecraft multiplayer with friends online: choose LAN, Realms, or self-hosted servers, set up access, invite players, troubleshoot for smooth sessions, and apply best practices for latency, moderation, and data backups.

You will learn how to play Minecraft multiplayer by choosing the right setup (LAN, Realms, or a self-hosted server), installing necessary software, and inviting friends. This quick guide covers network basics, basic server configuration, safety and moderation tips, and common troubleshooting to keep sessions stable and fun for players of all skill levels.
What is Minecraft multiplayer?
If you're wondering how to minecraft multiplayer, this section explains the basics of connecting with friends across devices. Minecraft multiplayer lets players explore, build, and survive together, whether on a local network, a hosted server, or a dedicated world you run yourself. In this Craft Guide article, we cover the main options, how they differ, and what you need to get started. The Craft Guide team emphasizes that starting with a clear target helps players pick the right path and avoid overcomplicating early sessions. Multiplayer sessions scale with the host's network quality and the number of concurrent players, so planning ahead matters for a smooth experience.
Core networking concepts
To play together reliably, you’ll need a basic grasp of latency, bandwidth, and server tick rate. Latency (ping) measures how quickly your data travels to the server and back, while bandwidth determines how much data can flow at once. A higher tick rate on a server means more responsive gameplay. Craft Guide analysis shows latency as the biggest factor in smooth play; optimizing for lower ping and a stable connection reduces lag. This section also explains permissions, whitelists, and how client version compatibility affects who can join your world. Understanding these fundamentals helps you troubleshoot faster when players report delays or disconnects.
Choosing between LAN, Realms, and self-hosted servers
LAN is great for quick, local co-op with friends on the same network. Realms offer a managed, hosted option with easy invites and automatic backups. Self-hosted servers give you full control over plugins, mods, and access rules but require more setup and ongoing maintenance. Craft Guide recommends starting with Realms for simple, reliable multiplayer and moving to self-hosted setups as you grow. When you plan to play across distances, a hosted option with proper port forwarding (or a VPN) becomes essential.
Setting up a LAN world for local play
LAN play requires only two things: a compatible Minecraft version and a local network. Start a world in single-player and open it to LAN, then have your friends on the same network join from their devices. This approach is ideal for quick sessions with a few friends who physically share the same space. The Craft Guide team highlights that LAN is the fastest way to get everyone into a game without external hosting, but it’s limited to local connections and simultaneous players.
Realms setup: quick and easy hosting
Realms provides a hosted server you rent from Mojang, with automatic backups and simple invite controls. It’s perfect for players who want an set-and-forget experience and reliable online play with friends who aren’t on the same LAN. Realms has lower maintenance than self-hosted servers and supports cross-platform play. Craft Guide analysis shows Realms to be a solid choice for beginners who want an uncomplicated multiplayer experience with decent uptime and safety controls.
Self-hosted server basics: Docker, VM, or dedicated host
A self-hosted server gives you ultimate control: choose your OS, host type, and any plugins or mods you want. Docker containers or virtual machines can simplify deployment, while a dedicated machine offers raw performance for larger groups. Expect more setup steps, including Java configuration, port forwarding, and firewall rules. The Craft Guide team stresses planning for hardware specs, network bandwidth, and regular backups to keep your world safe during heavy use.
Basic administration: permissions, whitelists, and backups
Administration starts with clear access rules. Use whitelists or operator permissions to control who can modify the world or run commands. Create separate roles for friends and guests, and regularly back up your worlds to recover from mistakes or corruption. The Craft Guide analysis emphasizes having a documented admin process so everyone knows how to request access, report issues, and participate in moderation.
Safety, moderation, and fair play
Multiplayer means more players in your world, so set expectations and rules early. Enable simple reporting, enforce chat guidelines, and maintain a calm server environment. For younger players, consider adding age-appropriate chat filters and time limits. Craft Guide's recommendations focus on proactive moderation and transparent rules to protect players and preserve a welcoming community.
Troubleshooting common issues
If players can’t connect, verify the server is online, the port is open, and the firewall allows traffic. Mismatched game versions are a frequent culprit; ensure everyone uses the same Minecraft edition and snapshot if required. Latency problems can be mitigated by choosing a closer host, enabling resource optimization, and reducing view distance for performance. The Craft Guide team notes that keeping a small, tested group helps isolate issues before inviting more players.
Tools & Materials
- Minecraft game (Java or Bedrock)(Ensure all players use the same edition and version.)
- Stable internet connection(Wired Ethernet is preferred for host machines.)
- Host device (PC, server, or Raspberry Pi)(Depends on hosting method.)
- Account for host and players(Microsoft/Xbox Live account or Minecraft account.)
- Router access for port-forwarding (optional)(Needed for self-hosted servers exposed to the internet.)
- Backup storage(External drive or cloud backup for worlds.)
Steps
Estimated time: 2-4 hours
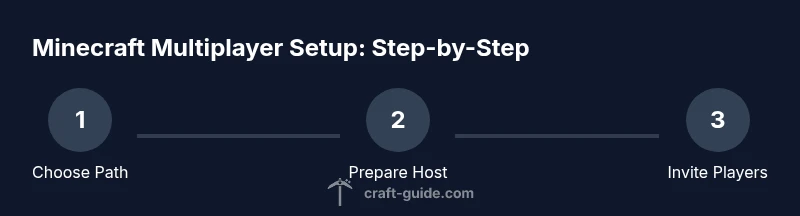
- 1
Decide multiplayer path
Choose LAN for local play, Realms for quick hosted access, or a self-hosted server for full control. Consider your players' locations, budget, and technical comfort. This decision guides every subsequent setup.
Tip: Start simple with Realms to reduce setup friction. - 2
Prepare the host
If hosting at home, ensure your router and modem support the needed speeds and that you have a reliable power source. Dedicate a machine to hosting if possible to prevent performance bottlenecks.
Tip: Use a wired connection and close bandwidth-heavy apps on the host. - 3
Install server software
For self-hosted setups, download the official server jar for Java Edition or configure Bedrock server as needed. Follow official instructions to run the server, then confirm it starts without errors.
Tip: Keep the software updated and use a startup script to simplify restarts. - 4
Configure networking
Open the necessary ports on your router or decide to use a hosting provider with built-in port management. Create a stable IP or dynamic DNS so friends can connect consistently.
Tip: Document port numbers and test with a friend before announcing access. - 5
Create test world & invite
Launch a short, test world and invite a small group to validate performance and access. Confirm that players can join from different locations and that commands work as expected.
Tip: Use a whitelist or invite-only mode during testing. - 6
Set up admin controls
Establish permissions, operators, and moderation rules. Document who can kick or ban, and how to report abuse. This keeps the server fair and fun.
Tip: Limit operator privileges to trusted players. - 7
Establish backups & security
Schedule automatic world backups and store them offsite if possible. Enable basic crash protection and verify you can restore a backup when needed.
Tip: Test restores regularly to ensure data integrity. - 8
Monitor & adjust performance
Observe CPU, memory, and network usage during peak play. Tweak view distance and plugins to balance visuals with performance.
Tip: Plan scalable upgrades if you expect growth.
People Also Ask
What is the easiest way to start playing multiplayer?
For beginners, Realms offers a straightforward way to play with friends online without managing a server. LAN is fastest for local groups, while self-hosted is best for full control. This guide helps you choose among these options.
Realms is the easiest starting point for online play; LAN is fastest for nearby players, and self-hosted gives you full control when you're ready.
Can I play with players on different Minecraft editions?
Players must use the same edition and version to connect. If some players are on Java and others on Bedrock, you’ll need to coordinate a common option or use cross-play-compatible servers where supported.
Make sure everyone uses the same edition; cross-play is limited to compatible setups.
What’s the difference between Realms and self-hosted servers?
Realms is a managed, hosted option with simple invites and backups, great for beginners. Self-hosted servers give you full control over mods, plugins, and settings but require more setup and ongoing maintenance.
Realms is easy and hosted; self-hosted is powerful but more work.
Do I need to forward ports for public play?
Yes, for self-hosted servers exposed to the internet you’ll typically need to forward ports. Realms and many hosting services handle this automatically.
Port forwarding is usually needed for self-hosted servers; Realms handles it for you.
How can I back up my multiplayer world?
Regular backups protect your progress. Use automatic backups provided by Realms or host, and keep offline copies in case of corruption or crashes.
Back up your world regularly, especially before big sessions.
What safety measures help multiplayer sessions?
Set chat rules, enable reporting, and designate moderators. Keep session logs and establish clear consequences for violations to maintain a friendly environment.
Use clear rules and moderators to keep play safe and fun.
Watch Video
The Essentials
- Decide early between LAN, Realms, or self-hosted.
- Secure access and back up worlds from day one.
- Test with a small group to iron out issues.
- Document steps for easy replication.
- Monitor performance and adjust as needed.