How to Make Minecraft Server: A Step-by-Step Guide
Learn how to make a Minecraft server with a clear, beginner-friendly approach. This guide covers planning, software choices, setup, security, backups, and ongoing maintenance for vanilla, plugin-based, and modded servers.

This guide walks you through how to make a Minecraft server from planning to maintenance, covering hardware choices, software options (vanilla, Spigot, Paper, or Forge), and essential setup steps. It emphasizes safe networking and reliable backups. According to Craft Guide, starting with a small, home-based server is ideal for beginners and flexible enough to scale as your community grows.
Planning your Minecraft server: goals, type, and audience
Before you dive into the technical setup, clarify what you want to achieve with your Minecraft server. Are you hosting a small group of friends for casual play, or do you want a public server with a broader community? Decide if you will run a vanilla server (no mods), a plugin-based server (Spigot or Paper), or a modded setup (Forge). Your choice determines what software you’ll use, how you’ll manage updates, and how you’ll enforce rules. Planning also helps you estimate hardware needs and network requirements. Craft Guide recommends writing a short mission statement for your server, listing the number of expected players, preferred game modes, and moderation policies to keep things fun and safe for everyone.
Hardware, hosting options, and network basics
Your choice of hardware and hosting dramatically affects your server’s performance and reliability. A home PC can host a small, private server for a handful of players, but a hosted VPS or dedicated server is better for uptime and public access. Consider CPU cores, available RAM, and disk speed as primary factors. Network-wise, you’ll need a stable internet connection with reasonable upload bandwidth and a router that supports port forwarding. For security, place the server behind a firewall and limit exposure to only the Minecraft ports you use. Craft Guide analysis shows that even modest, well-configured home servers can deliver a smooth experience for small groups when tuned correctly.
Choosing server software: vanilla vs modded vs plugin-based
Vanilla Minecraft is straightforward and stable, ideal for pure survival or creative play. If you want plugins for economy systems, roles, or admin tools, go with Spigot or Paper (both are compatible with most Bukkit plugins). For heavy modding with new items, blocks, and gameplay mechanics, a Forge-based server is the path. Each option has trade-offs in performance, compatibility, and update cadence. Your decision should align with player expectations, update frequency, and your willingness to manage compatibility between mods or plugins.
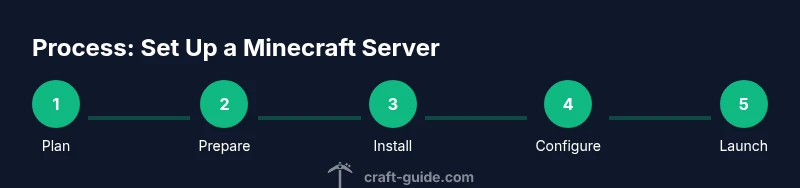
Step-by-step setup overview: what you’ll configure
This article splits the process into a practical sequence: prepare the environment, install Java, download the server jar, run the first boot, adjust server.properties, set up port forwarding and firewall rules, add plugins or mods if desired, create admin accounts, and establish a backup/maintenance routine. You’ll also learn how to test connectivity from a local and external network, verify player access, and outline rules and world settings for a smooth launch. Each section lowers the barrier to entry while keeping you in control of performance and security.
Step 1–2: Install Java and set environment
Java is the runtime that powers Minecraft servers. Start by installing a compatible JDK (Java Development Kit) version that matches your server choice. Set the JAVA_HOME path if required and ensure the java command is accessible from your command line or terminal. This step ensures your server can start and run software reliably. Pro tip: keep Java updated to benefit from performance and security improvements, and use the official sources for downloads to avoid tampered files.
Step 3–4: Download server software and first run
Download the official server jar for your chosen software (vanilla, Spigot, Paper, or Forge). Place the file in a dedicated folder, run it to generate initial files, and immediately agree to the EULA by editing eula.txt to eula=true. The first launch creates the world and configuration files you’ll customize later. Make a habit of keeping a clean project directory to simplify backups and updates.
Step 5–6: Configure server.properties, EULA, and world options
Open server.properties to tune game mode, difficulty, maximum players, view distance, and resource packs. Adjust world options like seed, generator type, and spawn rules to shape your player experience. Always review the EULA and ensure it’s set to true before starting the server. Fine-tuning these settings early helps prevent post-launch tweaks that disrupt players.
Step 7–8: Port forwarding, firewall, and testing connectivity
If you’re hosting at home, forward the Minecraft port on your router to the server’s local IP. Configure firewall rules to allow traffic on that port while blocking unnecessary exposure. Test connectivity by joining the server from a local machine and then from an external network to verify accessibility and latency. If issues arise, check white/blacklists, server logs, and ensure you’re using the correct IP and port.
Step 9–10: Backups, security, and community management
Establish a regular backup schedule for world data, plugins, and configs. Consider automatic backups to a separate drive or cloud storage. Implement basic security practices: strong admin credentials, minimal world-edit permissions, and a clear moderation policy. Finally, prepare a basic set of server rules and a short onboarding guide so new players understand how to play, report issues, and stay respectful.
Tools & Materials
- Computer or dedicated host(For testing locally or running 24/7 on a hosted plan)
- Java runtime (JDK)(Install the version compatible with your server software from official sources)
- Server software jar (Vanilla, Spigot/Paper, or Forge)(Download from the official project site or trusted repositories)
- Network router with port forwarding(Configure a static local IP for the server machine)
- Stable internet connection(Sufficient upload bandwidth and low jitter for smooth multiplayer)
- Backup storage(External drive or cloud storage for world/world data backups)
- SSH or remote management tool(Useful for headless servers and remote administration)
- Text editor(For editing server.properties and configs)
Steps
Estimated time: 1-2 hours for initial setup; ongoing maintenance weekly
- 1
Prepare the environment
Verify hardware suitability and plan your server's scope. Decide on vanilla, plugin-based, or modded play and estimate player capacity. This groundwork guides software choice and network needs.
Tip: Document your goals and expected player count to guide configuration decisions. - 2
Download server jar
Fetch the official server jar from the chosen project and place it in its own folder. Keep the file name simple for easy scripting and updates. Run the jar to generate initial configuration files.
Tip: Always download from the official source to avoid tampered files. - 3
First run and EULA
Launch the server once to generate files, then open eula.txt and set eula=true. This confirms you accept the Minecraft EULA and readiness to proceed.
Tip: If you’re testing locally, use a private world to prevent accidental public exposure. - 4
Configure server.properties
Edit server.properties to set game mode, difficulty, spawn rules, view distance, and more. Save changes and restart to apply.
Tip: Keep a backup of the default properties before editing. - 5
Add plugins or mods (optional)
If you’re going plugin-based or modded, install the appropriate loader and drop plugins/mods into the correct folders. Ensure compatibility with your server version.
Tip: Test in a small world first to avoid breaking the main world. - 6
Set up port forwarding
Forward the Minecraft port on your router to the server’s internal IP so players outside your network can join. Verify firewall rules permit traffic on that port.
Tip: Use a static IP for the server machine to keep port mappings stable. - 7
Create admin accounts and permissions
Add trusted admins with appropriate permissions. Establish a simple moderation system to enforce rules and protect the world from griefing.
Tip: Limit admin access to verified accounts and rotate credentials periodically. - 8
Backups and monitoring
Set up regular world backups and monitor server performance with logs and resource usage checks. Prepare a rollback plan in case of corruption or crashes.
Tip: Automate backups to minimize manual workload. - 9
Launch and iterate
Invite players, collect feedback, and iterate on settings, plugin choices, and rules. Maintain a changelog to track tweaks and improvements.
Tip: Communicate rules clearly and respond quickly to issues to preserve the community.
People Also Ask
Do I need a dedicated server or can I run it on my PC for a small group?
You can run a small, private server on a PC for testing and learning. For a public server or larger groups, a dedicated host or VPS offers better uptime and performance.
Yes, you can start on your PC, but for public or larger groups, consider a dedicated host for reliability.
What’s the difference between vanilla, Spigot, Paper, and Forge?
Vanilla runs the base game. Spigot and Paper add plugins for admin tools and gameplay tweaks; Forge is for mods that alter gameplay. Each option affects compatibility and performance.
Vanilla is the base game, while Spigot and Paper support plugins, and Forge enables mods. Choose based on features you want.
Can I run mods or plugins safely on a home server?
Yes, with caution. Ensure compatibility with your server version, test in a separate world, and isolate unstable mods or plugins to minimize disruption to players.
Yes, but test carefully and keep a clean rollback plan in case of issues.
How do I port forward safely for a Minecraft server?
Forward the Minecraft port on your router to the server, and restrict firewall access to trusted sources. Use a strong admin password and monitor traffic for anomalies.
Forward the port to your server and keep firewall rules strict; monitor for unusual activity.
How often should I back up the world data?
Back up your world and configs regularly, especially before updates or major changes. Store backups in a separate location to protect against drive failures.
Back up regularly, especially before updates, and keep backups in a separate location.
Is hosting a Minecraft server at home safe and legal?
Home hosting can be safe if you follow network security best practices and comply with local laws and your internet provider’s terms of service. Consider a hosted solution for higher uptime if needed.
It can be safe with proper security and terms of service, but hosting publicly may be better with a hosted plan.
Watch Video
The Essentials
- Plan server goals before starting
- Choose vanilla, plugin-based, or modded based on players
- Secure ports, backups, and admin access
- Document settings and onboarding rules