Download Minecraft Server Software: A Practical Guide
Learn how to download and set up the official Minecraft server software, configure settings, and host your own Minecraft world safely. This guide covers Java Edition, installation, memory suggestions, and basic networking.

You will download the official Minecraft server software and set up a basic server. This guide covers choosing the correct edition, obtaining the jar from the official site, and running your first startup with a safe EULA. You’ll need a computer, a stable internet connection, Java installed, and a dedicated server folder to host your world.
Understanding the goal of downloading Minecraft server software
Before you begin, it’s important to distinguish between the server software itself and client software. The official Minecraft server software is designed to host a world that you and others can join. For most players, this means using the Java Edition server jar from the official site, then configuring a set of basic options so your world runs smoothly. Craft Guide emphasizes starting with a clear goal: a reliable local or public server with stable performance and clear rules for players. This reduces frustration and helps you scale later if your world grows.
Choosing the right server variant and edition
Minecraft offers several server options, with Java Edition being the most widely used for custom worlds and plugins. Bedrock Edition servers exist as well, but they use different protocols and tooling. When you download the official Java server software, you’ll get a jar file that you run with Java. If you plan to run plugins or mods, you’ll need additional software such as Paper or Forge, which changes the setup steps. For beginners, start with the vanilla Java server to learn the basics before expanding to these alternatives.
Prerequisites you should verify before downloading
Check that your computer meets basic requirements: a recent OS, sufficient RAM, and a stable internet connection. You’ll also need Java 17 or later for modern Minecraft servers, so verify your system has Java installed. If you’re unsure, use a simple command to check your version. Craft Guide recommends starting on a desktop or dedicated server hardware rather than a personal laptop that you’ll use for daily tasks. This helps prevent performance dips during gameplay.
Where to download the official server jar
Always download from the official Minecraft website to avoid tampered files. The jar is a small file used to boot the server, and it will generate essential folders and files on first run. After download, place the jar in a new, dedicated folder to keep server data organized and separate from personal files. Avoid third-party mirrors; they may be outdated or unsafe. This initial step is foundational and ensures you can trust the server binary you’re running.
First run: generating files and accepting the EULA
Run the server jar once to generate the initial configuration files. During this first launch, Minecraft creates a set of files including server.properties and logs. You must open and edit eula.txt to set eula=true before the server will start accepting connections. This EULA step is mandatory and is designed to confirm you acknowledge Minecraft’s licensing terms. Craft Guide reiterates that compliance from the start prevents later headaches when players join.
Configuring memory and startup scripts
A key performance factor for any Minecraft server is how much memory you allocate. Start with a modest allocation and adjust based on how many players you plan to host. Create a startup script (batch file on Windows, shell script on macOS/Linux) that launches the jar with the chosen memory parameters. Common practice is to set both the initial and maximum memory (-Xms and -Xmx) to stable values that reflect your hardware. This keeps the server responsive under load.
Editing server.properties and common settings
The server.properties file controls many aspects of gameplay and server behavior. Adjust values such as max-players, difficulty, game mode, and allow-cheats based on your community needs. Start with simple defaults: a reasonable player limit, a standard difficulty, and a single world seed to begin. You can experiment with more advanced settings later, but make incremental changes and test after each adjustment to understand its impact on performance.
Local testing and validating connectivity
Run your server locally to verify it boots correctly and accepts connections from the same machine. Use localhost (127.0.0.1) in the Minecraft client to connect. This step confirms basic networking is functioning before you expose the server to the wider internet. If you encounter issues, recheck the directory structure, the EULA, and the startup script. Craft Guide notes that methodical testing helps isolate problems quickly.
Networking basics: port forwarding for public access
If you want friends outside your local network to join, you’ll need to set up port forwarding on your router and use your public IP address or a dynamic DNS name. Minecraft typically uses port 25565, but confirm this is the port your server listens on. Router setup varies by device, so consult your model’s manual. Remember to keep security in mind: only open what you need and monitor for unusual activity.
Securing, backing up, and maintaining your server
Security starts with a clean setup, regular backups, and updates to server software. Schedule periodic backups of your world data and configuration files. Enable automated backups if possible, and store copies offsite or on a separate drive. Regularly review access logs and ensure that players have appropriate permissions. Craft Guide emphasizes a maintenance mindset: small, consistent upkeep beats reactive scrambling during peak play times.
Optional enhancements: plugins, mods, and alternative server software
Once you’re comfortable with vanilla Minecraft, you can explore plugins or mods to customize gameplay. Plugins (via Paper) and mods (via Forge) extend functionality but require careful version matching and compatibility checks. If you go down this path, create a separate test world to avoid disrupting your main server. Always backup before installing new plugins or mods, and test thoroughly before opening the server to the public.
Tools & Materials
- Computer or dedicated server hardware(A mid-range PC is fine for small groups; for 24/7 hosting, consider headless or dedicated hardware.)
- Stable internet connection(Prefer a reliable upload rate; 5 Mbps or higher is better for multiple players.)
- Java Runtime Environment (JRE) or JDK(Install the latest supported version for your OS.)
- Official Minecraft server jar(Download from the official Minecraft website.)
- Text editor or terminal access(For editing server.properties and startup scripts.)
- Sufficient disk space(World data grows; plan for several backups and world sizes.)
- Router with port forwarding access(Needed for public access; see your router’s instructions.)
- Backup storage(Optional but recommended for daily/world backups.)
Steps
Estimated time: 60-120 minutes
- 1
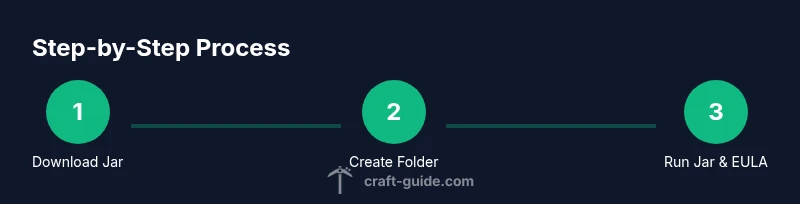
Download the official server jar
Navigate to the official Minecraft website and download the Java Edition server jar. Save it to a dedicated folder on your computer or server. Verify you are using the latest release compatible with your intended players. Keeping the file organized in one folder simplifies future updates.
Tip: Create a short, descriptive folder name like minecraft_server_1.19; this keeps versioning clear. - 2
Create a dedicated server folder
Create a new folder specifically for the server data, world files, and logs. Move the downloaded jar into this folder to keep all server-related files in one place. This separation reduces accidental deletions of personal files and makes backups straightforward.
Tip: Avoid placing the server folder in your user directory to reduce permission conflicts. - 3
First run to generate files
Run the server jar once to generate the initial files and folders (logs, server.properties, etc.). Do not edit anything yet; let the system finish its first startup. If you encounter errors, stop the process and recheck Java installation.
Tip: Running once creates a baseline you’ll modify later; this step is not about playing yet. - 4
Accept the EULA
Open eula.txt and change eula=false to eula=true. This step confirms you agree to the Minecraft terms before the server will run continuously. Re-run the server to proceed with actual gameplay-ready files.
Tip: If you skip this, the server will exit immediately after startup. - 5
Set up memory and startup script
Create a startup script that launches the server jar with allocated memory. Use a conservative -Xms and -Xmx value suitable for your hardware. This ensures the server has enough headroom without exhausting system RAM.
Tip: Example: allocate a modest amount first and adjust after testing under load. - 6
Configure server.properties
Edit server.properties to adjust game rules, world settings, and player permissions. Start with basic values like max-players, difficulty, and online-mode. Save changes and restart the server to apply them.
Tip: Document changes in a note file to track configurations later. - 7
Test local connections
Connect to the server from the same machine using localhost or 127.0.0.1. This confirms the server is listening and responding. Check the logs for startup messages indicating successful binding to the port.
Tip: If you can’t connect locally, there’s a basic connectivity issue you should fix first. - 8
Open port forwarding (if needed)
If you want players outside your local network, configure port forwarding on your router for port 25565 (default). Use a static IP or dynamic DNS to keep the address stable. Test from an external network to verify access.
Tip: Only forward what you need; disable it when you don’t require public access. - 9
Back up and maintain the server
Set up a backup routine for world data and configuration files. Store backups securely and test restores periodically. Plan a maintenance window to apply updates or changes with minimal disruption to players.
Tip: Automated backups minimize risk of data loss during crashes or updates.
People Also Ask
Where can I legally download the official Minecraft server software?
Always download the official server jar from the Minecraft website to ensure authenticity and safety. Avoid third-party mirrors that might host tampered files. This keeps your world secure from malware and corrupted data.
Get the official server jar from Minecraft’s website to stay safe from tampered files. Avoid mirrors.
Do I need Java installed to run the server?
Yes. The Java Edition server requires a compatible Java Runtime Environment or JDK. Make sure Java is installed and accessible from your system PATH before launching the server jar.
You’ll need a Java runtime or Java development kit installed to run the server.
What is the EULA and why is it required?
The End User License Agreement (EULA) is a legal requirement from Mojang that you agree to before running a server. Editing eula.txt to eula=true confirms your acceptance.
You must accept Mojang’s EULA by setting eula=true in the eula.txt file before starting the server.
Can I run a Minecraft server on a Raspberry Pi or low-power device?
Yes, but performance depends on your world size and number of players. A Pi can host smaller communities with careful resource management and proper software choices (e.g., lighter server variants).
It’s possible on a Raspberry Pi for small groups, but performance will be limited.
What’s the difference between vanilla and plugin-enabled servers?
Vanilla servers run the original Minecraft experience. Plugin-enabled servers (like Paper) add features via plugins, but require compatibility checks and version alignment with the Minecraft server version.
Vanilla is the standard game; plugins add features but need careful version matching.
How often should I back up my world?
Back up your world regularly, especially before major changes or updates. Daily backups are recommended for active servers with many players.
Back up daily if your server is active, and before big updates.
Watch Video
The Essentials
- Download the official server jar from the official site.
- Create a dedicated server folder and generate baseline files by running the jar.
- Accept the EULA and configure memory, then tweak server.properties for your playgroup.
- Test locally before exposing the server to the internet and plan for backups.