What Do You Use Minecraft Brush For? A Practical Guide
Learn what a Minecraft brush is used for, how to set it up with WorldEdit, and practical step-by-step techniques to sculpt terrain and add detail to builds for builders of all levels.

In this guide you will learn what a Minecraft brush is used for, how to set it up with WorldEdit or a similar mod, and a practical, step-by-step workflow to sculpt terrain and details safely. By the end you’ll know when and why to reach for a brush and how to apply edits without overhauling your entire build.
what do you use minecraft brush for
According to Craft Guide, a Minecraft brush is a modded tool that speeds up terrain editing and decorative detailing. In vanilla Minecraft you shape blocks with your own two hands or with commands. A brush consolidates those actions into a single action that can paint, stamp, sculpt, or smooth large chunks of terrain. It’s especially useful when you want to create natural-looking hills, riverbeds, cliffs, or plateaus without placing hundreds or thousands of individual blocks.
With a brush, you select a target region, choose a shape (such as a sphere, cylinder, or irregular stamp), pick a size, and apply the brush to apply the chosen effect to that region. Depending on the mod, you can blend new blocks with existing terrain, protect certain areas with masks, and undo mistakes. Craft Guide analysis shows this approach shines when you need repeatable, scalable edits across big builds. Keep in mind that brushes are powerful and can drastically alter terrain, so practice on a copy of your world before editing your main save.
Common brush shapes and effects
Brushes come with a toolkit of shapes and effects. Common options include spheres for rounded halos around features, cylinders for columns and arches, and stamps for repeating patterns like cobblestone walls or shorelines. Some brushes allow you to blend or mix materials, giving you smooth transitions between biomes or layered textures. Masks and selection regions help you protect existing builds while edits occur nearby. For beginners, starting with a simple sphere or cylinder on a flat area is a great way to learn how size, slope, and edge softness affect the final look. As you gain confidence, you can experiment with irregular stamps to simulate natural rock outcrops, sandbanks, or tree canopies, always testing on a safe copy first.
Getting the right setup
To use a Minecraft brush effectively, you’ll typically need a brush-capable mod or plugin (for example, WorldEdit or Voxel Sniper) and a compatible launcher or server environment. Install the tool according to the mod’s documentation, then assign a brush wand or tool to your hotbar. Understand the basic workflow: select or define a region, choose a shape, pick a size, and apply. It’s also important to learn how to limit edits with masks, layers, or permissions, especially on multiplayer servers. Before you edit, back up your world and set up a test plot where you can practice without risking your main project.
Step-by-step workflows for terrain and builds
Practice a repeatable workflow: 1) prepare a dedicated editing area or copy of the world; 2) pick a brush shape aligned with your goal (for example, a small sphere to carve a crater or a cylinder to create a pillar); 3) apply the brush in passes, starting with broad changes and then refining details; 4) use masks or selection boundaries to limit changes and keep edges clean; 5) undo or revert if you are not satisfied and iterate until you reach the desired result. This approach helps you maintain control and avoid unintended world-wide edits.
Tips for efficient editing and backups
Always back up before large edits, and keep a changelog of brush operations so you can retrace steps. Start with small brush sizes to learn the feel of different shapes and coarse textures before scaling up. Use a test world to experiment with masking, layering, and blending so you understand how edits interact with existing terrain. If you’re working on a server, coordinate with teammates and set appropriate permissions to prevent accidental changes. Finally, document your workflow so you can replicate it on future projects.
Creative project ideas using a brush
Use a brush to sculpt dramatic terrain as a backdrop for builds, such as cliff faces, river valleys, or plateau formations. Create repeating coastal patterns by stamping shoreline shapes along a coast, then blend with water to form natural inlets. Build modular terrain features like hills and caves that can be reused across multiple worlds. Apply masks to carve features into existing landscapes, then overlay textures to simulate erosion, weathering, or layered sediment.
Performance, permissions, and safety considerations
Brush edits can be powerful but impact performance and world integrity if used carelessly. On multiplayer servers, ensure you have the right permissions, consider performing edits during off-peak times, and test on a clone of the world first. Always maintain backups and encourage teammates to review edits before applying them to the main world. The aim is to improve builds without introducing instability or data loss.
Tools & Materials
- Minecraft client (vanilla or modded)(Ensure version compatibility with brush mod/plugin)
- Brush-capable plugin or mod (e.g., WorldEdit, Voxel Sniper)(Install according to the mod's documentation)
- Brush wand or tool(Assigned via mod settings)
- World backup strategy(Backup or duplicate world before big edits)
- Optional brush packs or shape packs(For expanded shapes and textures)
Steps
Estimated time: 25-45 minutes
- 1
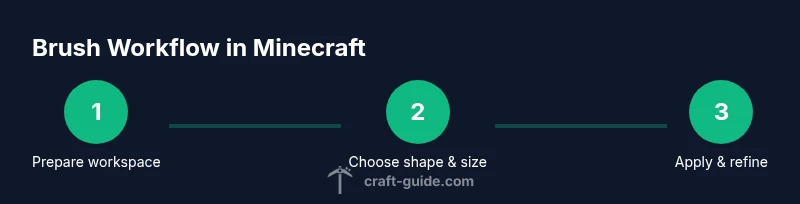
Prepare the workspace
Set up a safe editing area or duplicate world to practice. Ensure you have a reliable backup and a baseline copy of the terrain you will modify.
Tip: Create a dedicated copy for brush practice to avoid affecting your main project. - 2
Choose shape and size
Select a brush shape that matches your goal (e.g., sphere for round features, cylinder for columns). Pick a size that lets you control edits without overwhelming detail.
Tip: Start small on a flat plane to learn how the shape affects edges and blends. - 3
Apply the brush to the terrain
Position the brush over the target area and apply the shape. Apply in layers if needed to build up terrain gradually; review edges after each pass.
Tip: Use an undo command if available to revert a poor pass. - 4
Refine with masking and undo
Mask areas you want to protect, then refine the edit by adjusting shape or size. Use undo/history to back out mistakes.
Tip: Masking helps you keep existing builds intact while editing nearby areas. - 5
Save and iterate
Save your work, run visual checks from multiple angles, and iterate on the design. Document changes for future projects.
Tip: Record the exact brush settings used for repeatable results.
People Also Ask
Do you need WorldEdit to use a brush in Minecraft?
Most brush features come from a brush-capable mod or plugin like WorldEdit. Vanilla Minecraft does not include a brush tool, so you’ll need a mod or server plugin to access brushes.
Yes—most brush features require WorldEdit or a similar mod.
Can I undo mistakes when using a brush?
Yes. Most brush tools provide an undo or history feature. Use it to revert an edit if you aren’t happy with the result.
Yes, you can undo brush actions if your mod supports it.
Is using a brush safe for multiplayer servers?
Proceed with care. Ensure proper permissions, test edits on a copy, and coordinate with teammates to prevent unintended changes or performance issues.
On servers, make sure you have permission and test edits on a copy first.
What shapes are typically available with brushes?
Common options include spheres, cylinders, stamps, and smooth blends. Different mods offer additional shapes for more complex edits.
Shapes like sphere, cylinder, and stamps are typical.
How should a beginner set brush sizes?
Start with small sizes to learn the controls and gradually increase as you gain confidence. Larger brushes are powerful but riskier for newcomers.
Begin with small brushes and grow as you learn.
Can brushes be used for redstone or automation projects?
Brushes focus on terrain and decorative edits. For redstone or automation, use brushes to shape terrain around machines, but keep logic blocks and wiring separate from mass edits.
Brushes help with terrain around builds, but avoid heavy redstone edits in the same pass.
Watch Video
The Essentials
- Learn the core brush shapes and when to use them
- Always back up your world before edits
- Use masks to protect existing terrain
- Apply edits in passes for better control
- Document your workflow for future projects