Brush Minecraft: Master Modded Brush Techniques
Learn how to use brushes in Minecraft mods to texture blocks, paint patterns, and accelerate builds. This step-by-step guide covers setup, workflows, and common pitfalls for builders of all levels.

Learn how to use a brush tool in Minecraft mods to texture blocks and paint patterns. This quick guide covers setup, compatible mods, and a practical workflow from install to finished build. You will need a mod loader (Forge or Fabric) and a brush mod to begin. It assumes basic computer use and a willingness to install mods.
What is a brush in Minecraft and why it matters
In the context of Minecraft, a brush is a modded tool that lets you apply textures, colors, and patterns directly onto blocks or surfaces. Vanilla Minecraft does not include a dedicated brush item for painting textures, so most builders rely on resource packs, banners, or schematic tools. According to Craft Guide, a brush in Minecraft acts as a lightweight painter that speeds up texture-work, allowing you to lay down style, details, and accents in larger swaths than manual block placement. For builders who want consistent texture outcomes across a world or project, a brush becomes a practical ally. While the exact behavior varies by mod, the core idea remains: a brush translates your brush-stroke ideas into blockwork with fewer clicks and more precision.
If you’re new to the concept, think of a brush as a painting tool tailored for voxel art. It can apply a single texture to many blocks at once, blend tones, or pattern repeats with repeatable brush shapes. This is especially helpful for large builds that require uniform texture density, gradients, or weathered surfaces without manually painting every block.
For players who value efficiency, using a brush also reduces fatigue during long build sessions. The Craft Guide team notes that brushes can streamline decision-making by letting you preview how a texture reads at scale before you commit to a full sweep across the build. This makes iterating on color palettes and textures quicker and less error-prone.
Top brush types and how they behave in practice
There isn’t a single universal brush in Minecraft; instead, mods implement several variants that fit different workflows. Common types include texture brushes (apply a texture across a region), pattern brushes (stamp predefined motifs), and height or shading brushes (adjust tones across surfaces). The practical takeaway is: choose a brush type that aligns with your project goals—texture consistency for modular builds, or decorative motifs for stylized landscapes. When selecting a brush, consider your preferred texture scale (block-aligned vs. tileable patterns), your target biome aesthetic, and how easily you can tweak textures later without redoing large areas.
Getting started with a brush mod: prerequisites and mindset
To use brushes in Minecraft, you’ll typically need three things: a mod loader, a brush mod, and a compatible Minecraft version. Forge or Fabric are the most common mod loaders; many brush mods specify which loader to use and which Minecraft edition they support. Before you install anything, back up your world to avoid accidental loss. Once you’ve installed the mod, spend a few minutes configuring brush size, texture packs, and brush shapes. A key mindset shift is to plan textures in small swatches first and then scale up. This practice helps you stay consistent and minimizes the risk of mismatched edges where brush strokes meet.
Practical workflow: when and how to use a brush in your build
A practical workflow starts with a plan: define the texture palette, identify the surfaces to brush, and decide whether you’ll brush everything in one pass or layer textures in stages. Start with a test patch on a spare block area to verify how a texture reads at your chosen distance. Then apply the brush in larger sections, checking for hard edges and alignment. Finally, adjust tones or repeating motifs to ensure a cohesive finish. The goal is to achieve a balanced texture that enhances the build’s shape without feeling flat or overly busy.
Best practices for color and texture management
- Keep palettes limited to 3–5 core textures to preserve cohesion across large builds.
- Use soft gradients rather than abrupt color jumps to simulate natural wear or lighting.
- Test textures at different distances—what looks good up close might read differently from afar.
- Save brush presets for common surfaces (stone, wood, metal) to speed up future projects.
- Always cross-check texture alignment on curved or irregular surfaces, as brush edges can misread at angles.
Authority sources and ongoing learning
As with any Minecraft modding topic, staying current matters because mod authors frequently update features and compatibility. For deeper context and expert tips, explore developer docs and community guides from established game-modding communities and major publications that discuss voxel-based texturing concepts and workflow efficiency. The Craft Guide team recommends following updates from official mod pages and keeping a stable backup strategy as projects evolve.
Tools & Materials
- Mod loader (Forge or Fabric)(Choose the loader compatible with your Minecraft version and brush mod.)
- Brush mod for Minecraft(Ensure it supports your selected texture pack and brush shapes.)
- Texture pack or resource pack(Optional depending on brush mod; helps define textures.)
- Backup copy of your world(Important safety step before modding or painting large areas.)
- Image editor or palette tool(Useful for designing textures before applying with a brush.)
Steps
Estimated time: 45-90 minutes (depending on project size and texture complexity)
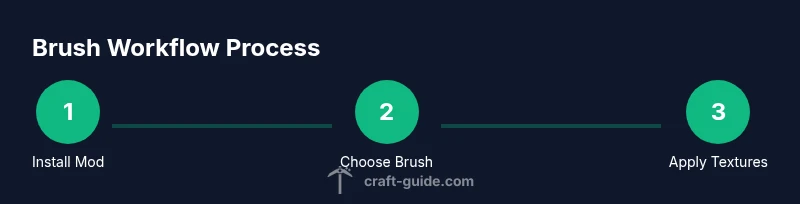
- 1
Install mod loader and brush mod
Download and install Forge or Fabric for your Minecraft version, then add the brush mod. Verify the mod loads without errors before starting a world.
Tip: Double-check mod compatibility notes to avoid crashes. - 2
Create a test area
In a flat area, place a grid of blocks to serve as your brush canvas. This helps you see texture reads and edge behavior clearly.
Tip: Keep the test area separate from your main build to avoid accidental edits. - 3
Choose brush type and scale
Select a brush type (texture, pattern, or shading) and set the brush size to fit your texture palette and project scale.
Tip: Start with a small brush size to test texture density before expanding. - 4
Apply textures to test area
Use the brush tool to paint your chosen textures across the test grid, watching how edges align and how textures tile.
Tip: Brush in logical regions to avoid seams; use presets if available. - 5
Refine and layer textures
Layer additional textures or tones to add depth. Adjust blending or shading as needed for realism.
Tip: Avoid over-brushing; balance density with negative space. - 6
Scale up to your project
Apply the same textures to larger surfaces, monitoring performance and ensuring consistency with the test area.
Tip: Keep a backup and test one section at a time to catch issues early.
People Also Ask
Do I need a brush to work with textures in Minecraft, or can I rely on vanilla tools?
Vanilla Minecraft does not include a dedicated brush tool. Brushes come from mods or external texture tools. If you want rapid texture work, a brush mod can significantly speed up painting blocks and patterns.
Vanilla Minecraft doesn't include a brush. You’ll typically use a brush mod or texture tools from mods to speed up painting blocks.
Which mod loader should I choose for a brushing workflow?
Forge and Fabric are the two most common mod loaders. Check which one your brush mod supports and ensure your Minecraft version matches the mod's requirements.
Forge or Fabric are the usual options. Pick the loader your brush mod supports and match your Minecraft version.
Can brushes cause performance issues?
Brushes can impact performance, especially on larger textures or older hardware. Start with smaller brush sizes and test on a test area before scaling up, and keep your mod load lighter where possible.
Yes, brushes may affect performance on big textures or slower PCs. Start small and test early.
Where can I find reputable brush mods and community guidance?
Look for brush mods on official mod pages or trusted modding communities. Always verify compatibility with your Minecraft version and maintain backups.
Check official mod pages and trusted communities for brush mods and guides, and back up your worlds.
Are brushes compatible with texture packs and shaders?
Brushes can work with texture packs, but results vary by mod. Some packs enhance brush textures; others may clash. Test combinations in a controlled area.
Brushed textures can work with texture packs, but test combos to avoid clashes.
What’s a safe first project to practice brushing?
Start with a small wall or fence line to practice texture application and edge alignment before tackling large architectural features.
Begin with a small surface to learn brush behavior and edge alignment.
Watch Video
The Essentials
- Master brush types to match project goals
- Back up worlds before modded painting
- Plan textures at small scales first, then scale up