What You Need for Minecraft Shaders: A Practical Guide
Learn exactly what you need to run Minecraft shaders, including hardware, software, and step-by-step installation tips. Get practical guidance on compatibility, performance, and safe setup for Java Edition.

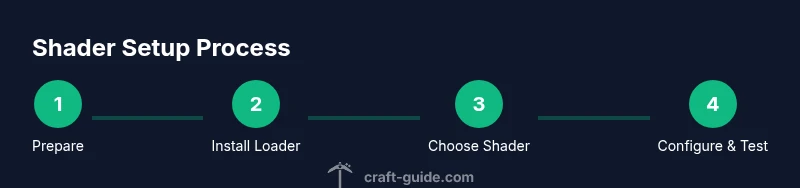
You can run Minecraft shaders by installing a shader-capable loader (OptiFine), selecting shader packs, and tuning settings. You’ll need a compatible PC, the Java Edition, and a shader pack that matches your Minecraft version. This article walks you through exact hardware/software requirements, install steps, and optimization tips. Whether you're on PC or laptop, performance will vary.
what do you need for minecraft shaders
If you’re asking what do you need for minecraft shaders, you’re in the right place. A practical shader setup begins with three pillars: compatible software, a stable Minecraft version, and a loader that can interpret shader code in real time. According to Craft Guide, most players succeed by establishing a stable foundation before chasing cinematic visuals. This means confirming you can run vanilla Minecraft smoothly with optimized graphics, then layering on shader effects gradually. In this section we’ll map out the core prerequisites and lay out a simple plan you can follow, even if you’re new to shaders. First, decide if your goal is a dramatic, realistic look or a lighter, cartoon-like vibe; different shader packs favor different aesthetic directions. Next, ensure your environment meets the requirements for shader loading: a compatible game version, a reliable launcher, and a loader that can apply shader code at runtime. With those basics covered, you’ll be ready to explore shader packs, test performance, and fine-tune visuals without sacrificing stability.
Hardware considerations for shaders
Hardware considerations for shaders begin with the GPU and memory: you need a modern discrete graphics processor with capable memory to render the lighting and water effects shaders simulate. In practice, most shader users notice the biggest gains when the GPU has enough VRAM to hold textures, a couple of shader passes, and post-process effects. A faster CPU helps with world loading and shader calculations, while ample system RAM reduces stuttering when loading large packs. For laptops, consider board-level optimizations such as power profiles and integrated graphics limitations. Based on Craft Guide analysis, players who allocate generous headroom to their graphics memory see smoother frame rates and fewer stutters when enabling high-quality shader packs. It’s also worth ensuring your monitor resolution and refresh rate align with the shader’s output quality; high-fidelity lighting can push GPUs toward the limit if you run resource-heavy texture packs.
Software prerequisites and loader choices
Software prerequisites and loader choices for Minecraft shaders revolve around two main ideas: toolchain compatibility and version alignment. On Java Edition, OptiFine remains the most widely used loader because it integrates shader support directly into the game, provides performance options, and exposes shader-specific settings you can tweak. Some players use Fabric or Forge with alternative shader loaders, particularly when combining shaders with other mods. When selecting a loader, verify that it matches your Minecraft version and the shader packs you plan to use. You’ll also want to confirm that the shader pack itself supports the chosen version and does not require incompatible texture or lighting APIs. In practice, start with the official, stable combination: a recent Minecraft version plus the latest OptiFine build. If you’re curious about exploring more modular setups, remember that compatibility varies and you may need to switch to a different loader or revert to vanilla graphics if you encounter instability.
Shader packs explained
Shader packs vary widely in style and complexity. Some are designed to mimic cinematic lighting with realistic shadows and water caustics, while others lean toward stylized, vibrant hues and soft bloom. When choosing a shader pack, consider your machine’s capability, the type of scenes you enjoy (forests, oceans, caves), and how the pack interacts with your textures. A very popular choice among beginners is a pack that emphasizes balanced lighting and smooth performance; advanced users may opt for packs that push global illumination, volumetric fog, and enhanced reflections. Always check the shader pack’s version compatibility and read reviews or tutorials from other players with similar hardware. Craft Guide recommends starting with a lightweight pack to understand the controls and then progressively adopting more ambitious options as you confirm stability.
Installation overview and folder structure
Understanding where files go and how they’re loaded makes shader setup less error-prone. In vanilla Minecraft with OptiFine, the important folder is shaderpacks, where you drop the shader pack ZIP file. The game reads the pack automatically when you launch and select it in the options. If you use Fabric or Forge, you may need to install a separate shader loader plugin and keep a separate shaderpacks folder inside the game directory. Resource packs can be used alongside shaders to enhance textures, but they’re optional. Back up your current game profile before inserting new packs, especially if you’re switching between different shader packs or when testing beta builds. If a pack fails to load or causes a crash, try a lighter version or verify that you’re using the correct Minecraft version. In short, organize your folders, keep a clean test path, and document the exact versions you’ve tested.
Performance tuning and settings that matter
Shader performance depends on how you configure the game and shader options. Start by reducing settings related to lighting quality, shadow resolution, and post processing to gain more headroom for shader effects. Some packs allow you to adjust render distance, shadow distance, and bloom intensity; tuning these can dramatically affect frame rates. In-game options such as 'smooth lighting' and 'clouds' choices often influence perceived realism and performance. Keep textures at a reasonable resolution and avoid simultaneously enabling multiple heavy effects like reflection, refraction, and depth of field. If you notice stuttering, lower the shader’s global illumination radius and disable optional effects that you don’t personally care about. Finally, ensure your graphics drivers are up to date and that your OS power profile matches your gaming needs. The goal is a stable, smooth experience rather than maximum eye candy.
Modded vs vanilla shader setups
Mods and shaders can work together, but the compatibility surface is thin. When you mix shader packs with large mods (such as texture improvements or lighting overhauls), you may encounter crashes or visual glitches. To minimize risk, test shader packs in a clean Minecraft profile before adding mods, and use reputable mod loaders that clearly support shaders. If you frequently switch between modded and vanilla play, consider keeping separate profile configurations saved, and document which shader pack and mod combination works best for your hardware. Craft Guide suggests starting with a pure shader setup and only layering mods after you confirm stable operation with shaders in place.
Troubleshooting common shader issues
Shader setup can produce a handful of familiar problems. The most common is the shader pack not appearing in the menu, usually caused by a version mismatch or a missing loader. A black screen at startup can indicate a graphics driver issue or insufficient VRAM. Flickering lighting or odd water effects often reflect conflicting texture packs or an incompatible pack. If you encounter crashes, revert to a known-good combination (vanilla + OptiFine + a lightweight shader) and reintroduce components one by one. Always check the logs; they typically point to a specific mod, pack, or feature causing trouble. If all else fails, reset to default graphics settings and re-check the pack’s documentation. Craft Guide's recommended approach is to keep a minimal, working baseline and iterate with one change at a time.
Shaders in different editions and cross-play
Minecraft has multiple editions, and shader support is uneven across them. Java Edition generally offers the broadest shader compatibility, and most major shader packs target this variant. Bedrock Edition has its own shader options built into the engine, with different performance characteristics and limitations. If you play across platforms, be mindful of version differences and toolchains; a shader pack that runs on PC may not be available for console or mobile builds. Always verify that the pack’s documentation states whether it supports your edition, and choose a configuration that aligns with your hardware and play style.
Creative uses and aesthetics
Beyond pretty lighting, shaders unlock creative possibilities for builds. They can help highlight architectural features, simulate realistic daylight cycles, and produce cinematic scenes for screenshot sessions. If you’re building large-scale projects, test shader packs on representative areas (plains, caves, water) to judge consistency across biomes. For builders who love underwater illumination or foggy dawns, shaders can provide the atmosphere you aim for without requiring resource-intensive texture edits. Craft Guide encourages experimenters to pair shaders with texture packs and resource packs that complement the shader’s color grading, producing cohesive visuals across your world.
Tools & Materials
- Minecraft Java Edition (latest version)(Ensure the launcher is up to date and can run the chosen MC version.)
- OptiFine (or equivalent shader loader)(Widely used for Java Edition shader support and performance options.)
- Shader packs (compatible with your Minecraft version)(Zip files placed in shaderpacks folder.)
- A modern GPU with dedicated VRAM(Important for handling shader effects and textures.)
- Sufficient system RAM(Needed to run the game, loader, and shaders smoothly.)
- Optional texture/resource packs(Can enhance visuals when used with shaders.)
Steps
Estimated time: 30-60 minutes
- 1
Prepare your Minecraft version and back up data
Verify your intended Minecraft version and back up your worlds and config files. This reduces the risk of loss if a shader setup crashes or creates conflicts with existing mods. Keep a clean profile for testing shader packs.
Tip: Always create a separate backup copy before changing graphics software. - 2
Install a shader loader (OptiFine)
Download OptiFine from the official source and install it for your Java Edition. This step adds shader support and performance options integrated into the launcher.
Tip: Avoid third-party installers; stick to official sources to prevent malware. - 3
Download and select a shader pack
Choose a shader pack that matches your Minecraft version and hardware capability. Download the pack and confirm it is a ZIP file compatible with your loader.
Tip: Start with a lightweight pack to gauge performance before moving to heavier options. - 4
Place the shader pack in the proper folder
Drop the shader pack ZIP into the shaderpacks folder within your Minecraft directory. If you use Fabric/Forge, ensure you follow the loader’s specific folder rules.
Tip: Do not rename the ZIP; renaming can break loading. - 5
Launch and choose the shader in-game
Start Minecraft and open the Options or Video Settings to select the shader pack you installed. Confirm that the shader is active and observe any in-game changes.
Tip: If the pack doesn’t appear, double-check version compatibility and loader type. - 6
Tune shader settings for your system
Access the shader options to adjust lighting, shadows, bloom, and post-processing according to your hardware. Reducing some effects can greatly improve performance.
Tip: Balance visual quality with smooth frame rates for the best experience. - 7
Test in multiple scenes and save configurations
Test the shader in different biomes and lighting conditions to ensure stable visuals. Save configurations for quick switching between settings.
Tip: Document which pack and settings work best on your setup. - 8
Maintain backups and monitor performance
Regularly back up worlds after shader changes and monitor performance when updating software. If issues appear after an update, revert to a known-good configuration.
Tip: Keep an easy rollback path in case of updates.
People Also Ask
Do shaders work with Bedrock Edition?
Shaders are primarily designed for Minecraft Java Edition; Bedrock has its own shader options and compatibility is limited.
Shaders mainly work on Java Edition, with limited Bedrock support.
Is OptiFine required to use shaders?
OptiFine is the most common loader for Java Edition shaders, though some setups use alternative loaders. It’s not strictly required for all shader packs.
Most setups use OptiFine, but there are other options depending on your setup.
Will shaders reduce performance?
Yes, shaders add visual complexity and can reduce frame rates; adjust settings to find a balance between visuals and performance.
Shaders can slow things down, especially on weaker systems.
How do I know which shader pack matches my version?
Check the shader pack’s documentation for supported Minecraft versions and required loaders.
Always pick a pack that explicitly supports your Minecraft version.
What should I back up before installing shaders?
Back up your worlds and important config files to prevent data loss if something goes wrong.
Back up your saves first.
Watch Video
The Essentials
- Match shader packs to your Minecraft version
- Use a lightweight pack to test before heavy options
- Keep backups before changes and after successful setups
- Tune in-game settings to balance visuals and performance