How to Install Minecraft Shaders: A Complete Guide
Learn how to install Minecraft shaders with our step-by-step guide. Prerequisites, safe installations, and troubleshooting tips for better visuals on supported systems.

To learn how to install minecraft shaders, you’ll update Minecraft Java Edition, install a compatible mod loader (such as OptiFine), grab a shader pack, and enable it in-game. This quick answer outlines the key steps and safety checks to help you get visuals quickly without breaking your world. You’ll need a capable PC, a stable internet connection, and trusted shader sources.
What shaders do for Minecraft
Shaders dramatically transform lighting, shadows, water, and atmospheric effects in Minecraft, producing a more cinematic or painterly look. They rely on shader packs that modify how the game renders pixels, combining with a compatible mod loader like OptiFine. For many players, shaders improve depth, contrast, and color vibrancy, making biomes feel new. However, shader performance depends on hardware, game version, and the shader pack's complexity. According to Craft Guide, starting with a modest shader pack and tuning settings is the best way to learn what your PC can handle. If you’re playing on older GPUs or laptops, expect lower frame rates and potentially longer load times, but you can still achieve a satisfying upgrade by choosing lighter packs and reducing resolution or shadow quality. By understanding what shaders do and what they don’t, you’ll avoid wasted time chasing unrealistic visuals. This section will walk you through the rationale behind shader choices and how to gauge the impact before you install.
Prerequisites and compatibility
Before you install, verify you’re on Minecraft Java Edition, ideally the latest stable release for your platform. Shaders require a mod-compatible environment; most players use OptiFine as the bridge between the vanilla game and shader packs. Ensure your Java runtime is up to date and that you have sufficient RAM allocated to Minecraft (for example, 4–8 GB depending on system). A clean, freshly started profile reduces risk from conflicting mods. Also check your GPU drivers and ensure you have a recent driver version for your graphics card. Craft Guide analysis shows that shader performance varies widely by hardware and shader pack, so plan to test gradually. If you’re on a laptop or integrated graphics, prepare for shorter sessions or lighter packs. Finally, back up your world and your Minecraft installation so you can revert if something goes wrong.
Understanding shader packs and mod loaders
Shader packs come in various styles (realistic, cartoon, pure lighting). Popular packs include lightweight options for lower-end machines and more feature-rich packs for powerful GPUs. To run shaders safely, install OptiFine or another compatible mod loader, then place the shader pack file in the designated shaderpacks folder within the Minecraft directory. Not all shader packs require the same version of OptiFine, so read the pack’s compatibility notes carefully. If you see a black screen or flickering, it often means the pack requires a higher shader model or a different resource pack. Keep a simple baseline shader active at first, then gradually add more demanding packs as you confirm stability. Remember that shader packs alter visuals but don’t change core gameplay; you can always revert by disabling the shader in the Options menu. The goal is to achieve a balance between aesthetics and performance that matches your monitor’s resolution and refresh rate.
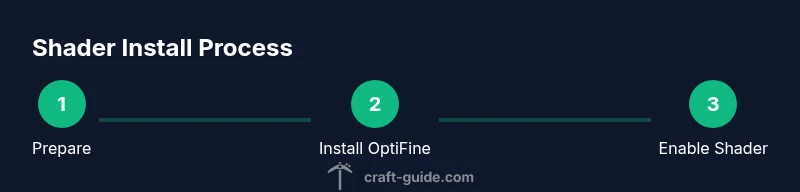
Step-by-step overview
Below is a high-level plan you can follow to install shaders safely. This isn’t the full install, but it sets the structure for the detailed steps that follow. 1) Prepare your system and backups. 2) Install OptiFine and verify it loads. 3) Download a shader pack from a trusted source. 4) Place the shader pack into the shaderpacks folder. 5) Open Minecraft and select the shader under the 'Shaders' option. 6) Adjust settings to balance visuals and performance. 7) Test in different biomes and lighting conditions. 8) If issues arise, revert to a baseline and re-test with a lighter pack. 9) Keep your installation updated and back up frequently.
Installing OptiFine and shader packs
The core workflow is: install a compatible mod loader (OptiFine) for the Java edition, then add a shader pack. Start by downloading the latest OptiFine build that matches your Minecraft version from the official source. Run the installer to add OptiFine to your Minecraft instance. Next, download a shader pack from a trusted source and save it to your shaderpacks folder inside your Minecraft directory. Launch Minecraft with the OptiFine profile, then navigate to Options > Shaders and select your pack. If you don’t see the shader, verify the pack’s compatibility notes and ensure you’re using a compatible OptiFine version. Remember to keep a clean, well-organized Minecraft folder to avoid conflicts between shader packs and resource packs.
Troubleshooting common issues
If the game crashes on startup, re-check your Java version and OptiFine compatibility. A black screen or flickering usually indicates a GPU or shader model mismatch; try a lighter shader or lower resolution. Missing textures or color glitches can be resolved by switching to a different resource pack or reloading the shader after changing settings. Performance drops often result from high-resolution packs; reducing render distance, shadows, and post-processing effects can stabilize fps. Always revert to a baseline installation if something goes wrong, and keep backups of your saves and modded profiles. When in doubt, consult shader pack documentation and the OptiFine release notes for known issues.
Performance tuning and safe settings
For most systems, the balance point is achieved by lowering shadow quality, turning off ambient occlusion on higher packs, and using a modest texture pack. Increase RAM only if you have headroom, and ensure VSync is enabled to cap frame rates. Consider using a fixed render distance and a moderate level of anti-aliasing. If you’re using a laptop, enable power-saving modes when needed and avoid maxing all settings simultaneously. Test across different biomes—dense forests and open oceans—to confirm stable performance, especially at dusk and night when lighting effects are most demanding.
Safety, backups, and maintenance
Always back up your Minecraft folders and save data before experimenting with shaders. Keep a separate profile for shader testing to avoid corrupting your main world. Update shader packs and OptiFine only from official or trusted sources. Document settings you use so you can reproduce a stable setup later. Periodically review installed packs for compatibility with new Minecraft updates; when in doubt, roll back to the previous stable version and re-test.
Tools & Materials
- Minecraft Java Edition(Ensure you’re on the latest stable release for your platform.)
- OptiFine mod(Download from the official source; match your Minecraft version.)
- Shader packs(Choose reputable shader packs (e.g., lightweight to high-end) from official sources.)
- Java Runtime Environment(Keep up to date; some OSes require a specific JRE version for compatibility.)
- Resource/Texture packs (optional)(Enhance color and FX; not required for visuals but recommended.)
- Backups(Backup worlds and installation folders before changes.)
Steps
Estimated time: 60-120 minutes
- 1
Prepare your system and backups
Create a dedicated shader testing profile, back up your saves and game files, and note your current settings. This ensures you can revert quickly if something goes wrong.
Tip: Label your backup clearly with date and shader version. - 2
Update Minecraft and Java
Update Minecraft Java Edition to the latest stable release. Ensure Java is up to date and matches the OptiFine version you plan to use.
Tip: Use a clean install directory for testing shaders. - 3
Download and install OptiFine
Visit the official OptiFine site, download the version that matches your Minecraft, and run the installer. Choose the profile where you want shaders active.
Tip: Always verify the source; avoid installers from untrusted sites. - 4
Download a shader pack
Choose a shader pack from a trusted source. Save the file to a known location to avoid misplacing files.
Tip: Start with a lightweight pack to gauge performance. - 5
Place shader pack in shaderpacks folder
Navigate to your Minecraft directory and place the shader pack into the shaderpacks folder. If the folder doesn’t exist, create it under the root Minecraft directory.
Tip: Keep shader packs organized with a dedicated folder. - 6
Launch Minecraft with OptiFine
Open the Minecraft launcher and select the OptiFine profile. Ensure the game boots properly before enabling shaders.
Tip: If the game freezes, close and re-launch; verify version compatibility. - 7
Enable shaders and select the pack
In-game, go to Options > Shaders and choose your downloaded pack. Confirm changes and return to a world test.
Tip: Make a small test in a single biome to observe lighting changes. - 8
Adjust shader settings for performance
Tweak resolution, shadow quality, and post-processing to balance aesthetics and FPS. Use a steady frame rate as your goal.
Tip: Incrementally adjust; test after each change to identify bottlenecks. - 9
Test across different scenes
Run through daylight, dusk, night, and biomes with complex lighting to ensure stability and consistency.
Tip: Pay attention to glow, water reflections, and shadow sharpness. - 10
Document and maintain
Record your settings, shader version, and pack name for future updates. Keep backups after every major change.
Tip: Create a quick reference sheet to simplify future updates.
People Also Ask
What are shaders in Minecraft and why should I use them?
Shaders are graphical modifications that alter lighting, shadows, and water effects to create more realistic or stylized visuals. They enhance immersion but can impact performance, so choose packs that fit your hardware and adjust settings as needed.
Shaders change lighting and textures to improve visuals, but they can affect performance; pick compatible packs and tune settings for your hardware.
Do shaders work on Minecraft Bedrock or only Java?
Shaders that require mod loaders like OptiFine are designed for Minecraft Java Edition. Bedrock shaders exist but typically use different systems and RTX features; ensure you’re following Java-specific instructions.
Shaders typically work with Java Edition using mod loaders; Bedrock uses different methods.
Can shaders cause performance issues?
Yes. Shader packs can increase GPU load and memory usage. If your FPS drops, lower shader quality, reduce resolution, or switch to a lighter pack. Always test incrementally.
Shaders can slow things down; lower quality or lighter packs can help, test step by step.
What’s the safest way to install shaders?
Install OptiFine from the official source, download shader packs from reputable sites, and back up your saves before applying changes. Use a dedicated testing profile to avoid affecting your main world.
Use official sources, back up first, and test in a separate profile.
How do I revert if shaders break my game?
Disable the shader in the Shaders menu or delete the shader pack from the shaderpacks folder. If issues persist, restore from a backup or revert to a baseline profile.
Turn off the shader or remove the pack; restore from backup if needed.
Which shader packs are good for beginners?
Look for lightweight packs designed for modest hardware. They typically offer clear visual improvements without heavy performance costs.
Start with lightweight packs to learn the basics without overloading your system.
Do I need to update shader packs after Minecraft updates?
Yes. New Minecraft versions can break compatibility with older shader packs or OptiFine builds. Check compatibility notes before updating.
Shader compatibility can change after updates; check notes first.
Is this guide applicable to laptop setups?
Laptops often have variable performance. Use lighter packs and reduce settings to prevent thermal throttling and frame drops.
Laptops can run shaders, but start light and monitor temps.
Watch Video
The Essentials
- Prepare hardware and backups before trying shaders.
- Start with a lightweight pack to test stability.
- Balance visuals with performance using targeted settings.
- Craft Guide's verdict: shaders are worth it on compatible systems when done carefully.