How to Use Minecraft Shaders: A Practical Guide
Learn how to use minecraft shaders to enhance lighting, shadows, and water. Step-by-step setup, performance tips, and troubleshooting to achieve cinematic visuals without sacrificing performance.

Goal: Learn how to use minecraft shaders to dramatically improve lighting, water, and atmosphere. You will identify shader packs, install the proper mod loader (OptiFine or Iris), configure settings for your PC, and test performance using in-game benchmarks. This guide also covers common compatibility issues, troubleshooting, and optimization tips for smooth gameplay.
What are shaders in Minecraft and why use them
Shaders are programs that run alongside the game to change how light, shadows, water, and post-processing effects are rendered. They don’t add new blocks or items, but they dramatically improve atmosphere and realism by altering ambiance, bloom, depth of field, and global illumination. If you're curious how to use minecraft shaders, this guide walks you through the setup, practical tweaks, and expected performance trade-offs. According to Craft Guide, shaders unlock cinematic lighting and richer reflections, transforming both survival and creative builds. They work best when paired with resource packs that don't slow your GPU down. In short, shaders are a visual upgrade that stays flexible enough for players with modest hardware.
This section sets the stage for practical use: you’ll learn the core concept of shading, common terminology (GI, AO, bloom, SSAO), and what you should expect in terms of performance and aesthetics. You’ll also see how shaders integrate with standard Minecraft gameplay—from lighting at sunset to water reflections during rain—and why many players consider shaders a must-try feature for builds and screenshots.
Prerequisites: hardware, software, and safety
Before diving in, ensure you have a compatible setup and copies of your worlds. Shaders rely on real-time lighting calculations, which are GPU-intensive, so a reasonably modern PC with adequate RAM is recommended. You should also have the Java edition of Minecraft installed, since most shader workflows hinge on loaders like OptiFine or Iris. Keep your graphics drivers up to date and back up your saved worlds and game files; shader changes can occasionally cause compatibility hiccups. If anything goes wrong, you can revert to the vanilla game and retry with a lighter configuration. Craft Guide notes that starting with a modest shader pack reduces risk while you learn the workflow.
In this prerequisite block, you’ll confirm your environment, understand the purpose of the loader, and set safety nets (backups, snapshots). This ensures you have a stable base before you install shaders and shields you from accidental data loss during experimentation.
Choosing a shader pack
Shader packs come in a variety of styles, from photorealistic to painterly. Popular options include SEUS, Sildur’s, and Continuum, each offering distinct lighting models and performance footprints. When selecting a pack, consider your target resolution, dream level of bloom, and whether you want dynamic water and sun rays. Some packs require more powerful GPUs to maintain smooth frame rates. Also verify compatibility with your chosen loader (OptiFine or Iris) and your Minecraft version. Trial and error with a lightweight pack first is a smart approach according to Craft Guide analysis. This section helps you compare visual goals against hardware realities so you pick a shader that matches your play style.
Pro tip: start with a low-resolution shader pack if you’re unsure about performance, then scale up as you refine your settings and confirm stability.
Installing a shader loader and shader pack
To enable shaders, you generally install a loader like OptiFine (for classic setups) or Iris (for a lightweight alternative) and then place the shader pack file into the shaderpacks folder. Step-by-step, this typically means downloading the loader, running the installer, and selecting it in your Minecraft launcher. Next, download a shader pack and move the file into the shaderpacks folder. Launch Minecraft, go to Video Settings > Shaders, and pick the pack you installed. If you don’t see the new pack, ensure the folder path is correct and that the pack is compatible with your game version. This block builds a solid foundation for a successful shader workflow, including folder structure, version checks, and common pitfalls to avoid.
Important: always validate the shader pack’s compatibility with your Minecraft version and loader, since mismatches are a leading cause of startup issues.
How to enable and customize shaders in-game
After selecting a shader pack, you’ll access a new set of quality settings. Most packs expose options for bloom, shadows, light geometry, motion blur, and ambient occlusion. Start with a baseline like medium shadows, low to medium bloom, and reduced ambient occlusion to test performance. If things run smoothly, gradually increase settings until you’re satisfied with visual fidelity. Remember to save your settings as a preset for quick reuse. For players with multiple monitors or higher resolutions, consider adjusting render distance and anti-aliasing to maintain stability. This section translates each visual feature into practical on-screen outcomes so you can tailor shaders to your exact preferences.
Tip: create a short test scene (sunset over a lake) to consistently evaluate how each setting affects mood and performance.
Performance optimization tips
Shader-powered visuals bloom at the cost of frame rates. To strike a balance, try these tactics: reduce render distance, switch to a lower resolution shader, enable adaptive rendering, and ensure your Java memory allocation is sufficient without starving the system. Monitor GPU and CPU temperatures while testing changes. Use in-game benchmarks and simple test worlds to measure improvements. You can also close background applications and optimize your OS power settings for gaming. Craft Guide recommends starting with a lightweight shader and progressively enabling features. The aim is to retain cinematic lighting while keeping FPS comfortable for your play style.
Advanced users can experiment with multi-monitor setups by dedicating one screen to a high-fidelity preview and another for standard gameplay, reducing strain on a single GPU.
Troubleshooting common shader issues
When shaders misbehave, start with a clean slate: recheck compatibility, reinstall the loader, and confirm the shader pack version matches your Minecraft build. Common issues include white screens, black textures, flickering lighting, or crashes on startup. Disable all resource packs, then reintroduce them one at a time. If you still have problems, consult the shader pack’s readme for recommended versions and look for memory-related errors in the log. Keeping backups makes it easier to recover from failed attempts. If you can’t resolve a specific issue, revert to vanilla and reapply gradually, testing one change at a time.
Practical tip: maintain a small set of backups for your different shader configurations so you can compare performance outcomes without losing progress in your worlds.
Advanced tips for builders and creators
For builders, shaders can dramatically enhance mood and atmosphere for renders and creative projects. Try pairing shaders with a minimal resource pack to maintain performance while preserving glow and shadows. Use consistent lighting across builds to avoid jarring contrasts, and consider exporting screenshots with a custom time of day to showcase depth. If you stream or record, test encoding settings and ensure your shader settings don’t cause stutters during motion. This section encourages you to push shader usage into production-quality visuals while safeguarding your workflow and performance.
Pro approach: create a dedicated shader profile for screenshots or videos to ensure reproducibility across lighting conditions.
Quick comparison: popular shader packs at a glance
-
SEUS: Realistic lighting and reflections; requires more GPU headroom but delivers cinematic vibes.
-
Sildur’s: Flexible performance options; suitable for mid-range rigs with multiple presets.
-
Continuum: High-end, cinematic look; best on strong GPUs and fast storage for texture reads.
-
Complementary: Subtle, performance-friendly variant ideal for builders and explorers.
-
Weave: Gentle, color-accurate lighting and minimal bloom for steady FPS. For best results, start with light presets and scale up as hardware allows.
Tools & Materials
- Minecraft Java Edition(Installed and up to date)
- OptiFine or Iris(Loader compatible with your Minecraft version)
- Shader pack file (e.g., SEUS, Sildur's)(Download from a reputable source)
- Graphics drivers updated(Ensure OpenGL support)
- Backup storage(Back up worlds and game profiles)
- Optional: Lightweight resource pack(Helps prevent visual clashes)
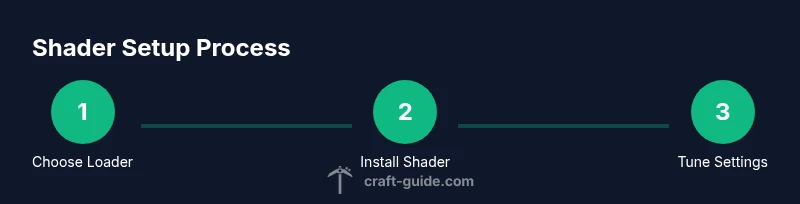
Steps
Estimated time: 45-60 minutes
- 1
Back up your worlds and profile
Create a safe restore point by copying your Minecraft folders and your game profiles to a separate drive or cloud storage. This protects your worlds and settings when experimenting with shader files and loaders. Why: Shader changes can occasionally cause incompatibilities. A backup lets you revert quickly without losing progress.
Tip: Label a dedicated backup folder like 'Shaders_Main_Backup'. - 2
Install a shader loader (OptiFine or Iris)
Download the loader installer, run it, and select the correct Minecraft version. This creates a functional environment for shader packs to run. Verify the launcher shows the loader as active before moving on.
Tip: Choose OptiFine if you want broad compatibility; Iris for a leaner footprint. - 3
Download and place a shader pack
Get a shader pack from a trusted source and move the .zip file into the shaderpacks folder created by the loader. Do not unzip the pack; Minecraft reads the file directly.
Tip: If you encounter a mismatch, check the pack version against your Minecraft build. - 4
Launch Minecraft and select the shader pack
Open the launcher, start a profile with the loader, and navigate to Video Settings > Shaders. Select the newly added pack to apply visuals. Why: This activates the shaders in-game and enables the per-pack options.
Tip: If you see a blank screen, verify the shaderpack path and ensure the pack is compatible with your version. - 5
Tune settings for your system
Open the shader’s settings panel and adjust bloom, shadows, ambient occlusion, and anti-aliasing to balance visuals with FPS. Save a preset once you reach a desirable balance.
Tip: Start with moderate settings and slowly increase; capturing a quick FPS log helps compare options. - 6
Test across scenarios
Play in at least two different environments (daylight, sunset, night) and in a test world to gauge consistency. Note any crashes or texture gaps and recheck compatibility.
Tip: Record a short clip to review lighting quality and performance over time.
People Also Ask
Do shaders work in Minecraft Bedrock vs Java?
Shaders are primarily for Minecraft Java Edition. Bedrock handles visuals differently and may rely on different add-ons. Check compatibility before switching platforms.
Shaders work mainly on Minecraft Java Edition; Bedrock uses different methods. Check compatibility before switching.
Why am I seeing lag after installing shaders?
Lag is usually caused by GPU limitations or high render distance. Lower render distance, reduce shadows, and choose a lighter shader pack to improve performance.
Lag is usually due to hardware limits or settings. Try lowering render distance and shadows.
Do I need OptiFine to run shaders?
Most shaders require a compatible loader such as OptiFine or Iris. Check the shader pack's requirements and install the recommended loader.
Most shaders require a loader like OptiFine or Iris. See the shader's instructions.
How do I update shaders safely?
Download the latest shader pack version, replace the old file, and restart Minecraft. Back up before updating.
Update by replacing old files and restarting; back up first.
Are shader packs safe to download?
Download from reputable sources and verify checksums when possible. Avoid random files from untrusted sites.
Only download from trusted sources and verify integrity.
Can shaders be used with mods or resource packs?
Yes, but some mods and resource packs may conflict. Use a clean setup to test compatibility before adding other mods.
Shaders can pair with mods and packs, but test for conflicts first.
Watch Video
The Essentials
- Back up your world before installing shaders.
- Start with lightweight shader packs to learn the workflow.
- Test performance with different settings to balance visuals and FPS.
- Gradually enable features rather than maxing everything out.