Minecraft with Shaders: A Practical How-To Guide
Learn how to install, configure, and optimize shaders in Minecraft to achieve cinematic lighting, realistic water, and vibrant colors. Step-by-step setup, compatibility tips, performance tweaks, and troubleshooting for both Java and Bedrock editions.

You will learn how to install and optimize shader packs in Minecraft to dramatically improve lighting, shadows, and water effects. This guide covers compatibility, hardware considerations, and a safe, step-by-step setup to ensure smooth performance. By the end, you’ll be able to enjoy cinematic visuals with confidence.
What shaders do in Minecraft and why you might want them
Shaders alter how light, shadows, water, and atmosphere look in Minecraft. They don’t change core game mechanics, but they transform mood, depth, and realism. With shaders, daytime skies glow with volumetric light, shadows become soft or crisp depending on the pack, and water reflects like a still lake or ripples with motion. According to Craft Guide, shaders can elevate the sense of immersion without requiring a complete overhaul of your world. When you say you want to play Minecraft with shaders, you’re opting for a cinematic, painterly experience that can be tailored to performance constraints. This section outlines why people choose shaders, common expectations, and what the upgrade means for different play styles, from builders seeking mood to explorers chasing realism.
- Benefits include enhanced lighting, ambient occlusion, realistic water, and color grading that can make biomes feel distinct.
- Trade-offs involve potential FPS changes, memory usage, and version compatibility.
- Start with a modest shader pack to learn your system’s tolerance before moving to heavier packs.
Choosing a shader pack: performance vs. visuals
Selecting a shader pack is a balance between visuals and performance. Lighter packs render faster and use less VRAM, while heavier packs offer richer shadows, bloom, and motion blur. When evaluating shader packs, consider visual goals (fantasy vs. realism), your monitor’s resolution, and your hardware. Craft Guide analyses show that newer GPUs tend to handle higher-quality shaders with stable frame rates, while older systems benefit from mid-tier packs or lower shader presets. In Minecraft with shaders, you’ll often find packs that emphasize color grading, water realism, or atmospheric fog. If you’re new, start with a popular mid-range pack and gradually increase quality as you test stability. Pro tip: keep multiple shader presets saved so you can switch quickly between casual play and creative builds.
- Look for shader packs that explicitly list supported Minecraft versions.
- Check user reviews and patch notes for compatibility with your edition (Java vs Bedrock).
- Remember: shader performance is heavily tied to your world’s texture packs and biome variety.
Running shaders: requirements and settings
To run shaders smoothly, you need a capable GPU, sufficient RAM, and updated graphics drivers. Java Edition shaders typically rely on OpenGL, while Bedrock Edition may use different graphics paths. Before you begin, ensure your Minecraft version is compatible with your chosen shader pack and that you have the necessary bootstrapping mod or launcher, such as OptiFine for Java Edition. In many setups, enabling shaders is a matter of selecting the shader pack in the Options menu after the pack is installed. If you experience stuttering, consider lowering shader quality or turning off certain features (like bloom or advanced shadows) to reclaim FPS. Properly configured, shaders can run at 60 FPS or higher on modern hardware with medium-to-high settings.
- Update graphics drivers and allocate adequate RAM to Minecraft.
- Use V-Sync and limit frame rates if you notice tearing or stutter.
- Start with the default in-game brightness and adjust post-processing effects gradually.
Install and setup basics for Java Edition
Java Edition requires a compatible launcher and a shader-capable mod loader. The typical path is to install OptiFine or a similar mod, then download a shader pack and place it in the correct shaders folder. After launching Minecraft, you’ll find shader options under Video Settings. Keep in mind version compatibility: shader packs designed for 1.20 may not work on 1.19 without updates. Always back up your worlds before making significant changes, and test shaders in a controlled environment (a flat world or a small test area) to gauge performance.
- Verify your Minecraft version matches the shader pack requirements.
- Install the loader (e.g., OptiFine) from official sources.
- Place the shader pack in the correct directory and enable it in-game.
Install and setup basics for Bedrock Edition
Bedrock Edition supports shaders via the built-in Minecraft: Bedrock Edition shader system and compatible shader packs. The process differs from Java and can involve enabling experimental features or installing through the game’s marketplace or third-party packs. For Bedrock, ensure you’re on a compatible build and that shader packs are designed for Bedrock. Always review pack instructions for any edition-specific steps, and beware of performance differences between Windows 10/11, consoles, and mobile devices. A cautious approach: test on a small world and adjust settings to maintain stable performance.
- Confirm you’re using a Bedrock-compatible shader pack.
- Enable the shader option in the game settings.
- Begin with low-resolution shader packs and scale up as hardware permits.
Performance considerations and troubleshooting
Shader packs can dramatically impact performance. If you notice significant FPS drops, try lowering shadow resolution, disabling bloom, or reducing texture sizes. Memory usage is a common factor; allocate more RAM through your launcher if needed, but avoid over-allocating, which can destabilize the game. If shaders crash, verify the pack version matches your game build, re-download the pack, or switch to a lighter preset. Regularly updating graphics drivers and shader packs helps prevent compatibility issues. When in doubt, revert to the vanilla look to confirm whether the issue is shader-related or tied to another mod or resource pack.
- Check compatibility logs and release notes for shader packs.
- Test with a clean Minecraft profile to isolate issues.
- Always back up worlds before applying new shaders.
Realistic visuals and artistic considerations: color grading, lighting, and water
Shaders expose a broader palette and refined lighting. Color grading can dramatically alter mood, so experiment with warm vs. cool tones to match your biome. Water shaders range from crystal-clear lakes to reflective, glass-like surfaces; the right pack can make rivers feel alive. However, subtlety often yields better results than extreme effects. A common workflow is to enable a mid-range shader, then add optional texture packs or resource packs to enhance textures without overwhelming the visuals. Play with weather and lighting conditions to understand how shaders react at dawn, noon, and dusk.
- Balance saturation and contrast to preserve visibility in dark caves.
- Pair shaders with texture packs designed for compatibility to avoid mosaic artifacts.
- Remember that personal taste matters as much as technical capability.
Common mistakes and safe practices for shader setups
New shader users often misjudge hardware requirements or neglect backups. Always back up worlds, keep copies of your shader packs, and document the exact game version and shader settings you used. Avoid overmodding; combining too many mods or resource packs can cause instability. Start with one shader pack and a modest preset, then gradually add more customization once you’re confident in performance. Keeping a separate testing world is a smart precaution for exploring settings without risking your main builds.
- Do not run shader packs on unstable driver versions.
- Keep a rollback plan if performance degrades after updates.
- Document your configuration for easy replication in future projects.
Tools & Materials
- Minecraft (Java or Bedrock edition)(Ensure version compatibility with chosen shader packs)
- Shader-capable mod/launcher (e.g., OptiFine or equivalent)(For Java Edition shader support)
- Shader packs (.zip or directory)(Choose packs compatible with your Minecraft version)
- Updated graphics drivers(Crucial for best shader performance)
- Adequate RAM allocation for Minecraft(Balance with system resources)
- Backup storage (external or cloud)(Safeguard your worlds)
- Texture/Resource packs (optional)(Enhance visuals to complement shaders)
- Testing world (optional but recommended)(Safe space to try settings)
Steps
Estimated time: 60-180 minutes
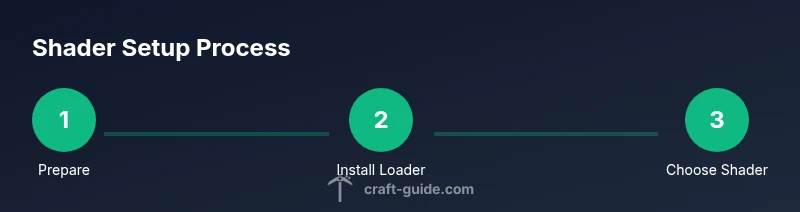
- 1
Prepare your game version and backups
Verify your Minecraft version aligns with the shader pack requirements. Create a backup of your worlds and essential saves to safeguard against data loss. If you’re using Java Edition, decide whether you’ll rely on OptiFine or another loader as your shader gateway.
Tip: Back up your worlds to a separate drive or cloud storage before modding. - 2
Install a shader-enabled loader (OptiFine or equivalent)
Download OptiFine from the official source and install it to enable shader support. Launch the game once to ensure the profile is detected, then close the game before proceeding. For Bedrock, ensure you’re on a version that supports shader packs or use marketplace options.
Tip: Always download from official sources to avoid bundled malware. - 3
Choose and download a shader pack
Select a shader pack that matches your Minecraft version and performance goals. Preview screenshots and read user feedback to gauge visual quality and stability. Save the pack to a convenient location for quick access during installation.
Tip: Start with a mid-range pack to learn your system’s limits. - 4
Install the shader pack into the correct folder
Place the shader pack file into the shaders folder created by your loader, or follow the pack’s specific installation steps. Ensure the file name is simple to avoid confusion. Keep a second copy in case you need to revert.
Tip: Organize shader packs by version to prevent misapplication. - 5
Enable and select the shader in-game
Launch Minecraft and go to Video Settings > Shaders. Choose the pack you installed and apply. If options are limited, verify the pack is compatible with your game version and loader.
Tip: If the pack isn’t visible, recheck the folder path and launcher profile. - 6
Tune settings for performance and visuals
Adjust shadow resolution, water reflection, and atmosphere effects to suit your hardware. Test in different biomes and lighting conditions to ensure consistent frames. Consider lowering resolution textures if you experience stuttering.
Tip: Iterate in small steps; small changes add up to a noticeable difference. - 7
Test, refine, and enjoy
Play in a controlled area to confirm stability, then explore a larger world. Save your favorite configurations as presets for easy sharing or reuse in future builds. Keep backups handy in case updates require reconfiguration.
Tip: Document settings to reproduce your preferred look later.
People Also Ask
Do shaders work on Bedrock Edition?
Yes, Bedrock supports shader packs, but the process differs from Java. Use Bedrock-compatible packs and follow edition-specific instructions to enable them. Performance varies by device.
Bedrock can use shaders, but follow edition-specific steps to enable them; performance depends on your device.
What hardware do I need for smooth shader performance?
A modern GPU, adequate RAM, and up-to-date drivers help shader performance. Start with mid-range packs and adjust settings to balance visuals and frame rates.
A decent GPU, enough RAM, and updated drivers help shader performance; start with mid-range packs.
Is OptiFine required to use shaders on Java Edition?
OptiFine is the most common way to enable shaders in Java Edition, but some loaders or packs include built-in shader support. Always verify compatibility with your chosen version.
OptiFine is usually needed for Java Edition shaders, but check your loader’s requirements.
How do I uninstall shaders if performance drops?
In Minecraft, go to Video Settings > Shaders and select 'Off' or delete the shader pack from its folder. Restart the game to ensure changes take effect.
Turn shaders off in settings or remove the pack folder, then restart Minecraft.
Will shaders affect world stability or save files?
Shaders primarily affect visuals and performance, not core world data. However, instability can occur if the pack is incompatible with your game version or mods. Always back up saves.
Shaders don’t change your world data, but incompatibilities can cause instability; back up saves.
What’s the best way to test shader quality?
Test in a small, representative area with several biomes. Compare visuals across different lighting conditions and adjust settings to achieve balance between look and performance.
Test in a small area across biomes to gauge visuals and performance.
Watch Video
The Essentials
- Back up worlds before modding.
- Shaders dramatically affect visuals and performance.
- Start with mid-range packs to learn hardware limits.
- Tune settings gradually for stability and beauty.