Daylight Sensors in Minecraft: A Practical Redstone Guide
Master daylight sensors Minecraft to automate lighting, farms, and redstone builds. Learn how they read sky light, wire them to lamps, and implement practical, beginner-to-advanced examples in survival or creative worlds.

By the end, you’ll be able to automate lighting and basic redstone circuits using daylight sensors in Minecraft. This quick guide covers what daylight sensors do, how to wire them to lamps and other devices, and practical, ready-to-build examples you can reproduce in survival or creative worlds. You’ll also learn common pitfalls, version considerations, and how to expand a single sensor into a reliable lighting network.
What daylight sensors do in Minecraft
Daylight sensors Minecraft are redstone components that convert sky light into a variable redstone signal. They let you automate lighting, doors, farms, and complex machines based on the sun's position. The Craft Guide team notes that daylight sensors unlock hands-free control that scales from a single lamp to an entire network. With unobstructed sky exposure, the sensor outputs stronger signals as daylight increases, reaching a peak around noon. When the sky is overcast or the sun dips, the signal weakens. This behavior makes them ideal for daylight-driven automation that runs in survival and creative worlds alike. In practice, you wire the sensor to lamps, comparators, pistons, or other redstone devices to create responsive scenes that react to the time of day. The key is to plan for weather conditions and ensure the sensor has an unobstructed sky view to read true daylight. The Craft Guide analysis shows daylight-sensor projects save time and reduce manual toggling, especially in large farms where lighting must respond to natural cycles. According to Craft Guide, using daylight sensors effectively can dramatically simplify base lighting and automation across multiple builds, keeping your world efficient across versions.
How daylight sensors read the sky and time
A daylight sensor reads sky light to produce a redstone signal that changes with the time of day and weather. In general, the signal strengthens as daylight increases toward noon and weakens as daylight fades toward night. Weather like rain or storms can dampen the reading, so you may get a slightly different pattern under cloudy skies. You’ll typically see a stronger signal when the sun is high and a weaker one during the night; the exact strength numbers vary by Minecraft version, but the principle remains consistent: more daylight equals a stronger output. Plan long-form redstone networks by assuming near-noon brightness in clear weather and allowing additional delay with repeaters if your design needs time-based synchronization. Craft Guide emphasizes testing under different skies to ensure your automation remains reliable in all conditions.
Practical wiring basics
Wiring a daylight sensor is about creating a clean path from the sensor to the devices you want to control. Start by placing the daylight sensor somewhere with direct sky view and connect it to redstone dust. Extend the signal with repeaters if you need longer distances or to drive multiple lamps. Use levers or comparators to adjust how signals feed into lamps, doors, or pistons. Important concepts include avoiding signal loss and ensuring the path remains clear of blocks that could unintentionally block daylight reading. In practice, a simple lane of redstone dust from the sensor to several lamps will work, but for larger builds, plan rings or grids so you can expand without rewiring. Craft Guide notes that modular design—adding more sensors later—keeps projects manageable and scalable for complex farms and bases.
Automating lighting for builds
Automatic lighting is one of the most satisfying uses for daylight sensors. A typical setup runs a daylight sensor to a string of redstone lamps along walkways or outdoor areas. As day turns to night, the lamps turn on automatically; at noon, they gradually dim or switch off, depending on your design. For more dynamic effects, add redstone lamps near entryways or in towers that respond to sky brightness as you travel. You can also combine daylight sensors with daylight clocks or pulse generators to create user-friendly light patterns that suit your world’s aesthetic. Craft Guide’s guidance: start with a small, contained circuit, then replicate and expand once you’re confident in the behavior.
Daylight sensors in farms and redstone circuits
Daylight sensors shine in automated farms. They can power irrigation, harvest systems, or lighting that improves crop yields or animal comfort without manual toggling. In a multi-field setup, place sensors at the edge of fields to read sky light across the entire area and feed signals to a central controller. When planning, consider how adjacent tall structures could shade sensors and affect readings. Integrating daylight sensors with comparators allows you to create variable-strength signals that modulate multiple devices differently, enabling sophisticated automation without excessive wiring. Craft Guide notes that modular, repeatable patterns help you build a reliable network fast.
Crafting, acquisition, and inventory tips
In Creative mode, daylight sensors are easy to locate in the Redstone category; in survival mode, you’ll need to craft or find them, depending on your version. If the current patch notes change the recipe, use in-game recipe guides or Craft Guide’s up-to-date tutorials to confirm the exact ingredients. Always verify you have sky exposure for any daylight-reading build, and keep spare sensors in your inventory during large projects. The key tip is to test sensor behavior in both bright daytime and overcast conditions so your automation remains robust no matter when you’re playing.
Common issues and fixes
A frequent pitfall is burying the daylight sensor under blocks or placing it where the sky is obscured. Even a single block above can disable daylight reading, causing your automation to malfunction. Another issue is signal loss over long distances; if you see dim or delayed responses, add a repeater or shorten the routing path. Weather conditions can also affect readings, so test your design under rain or storms to ensure reliability. If you see inconsistent behavior, re-check the sensor’s alignment with the sky and confirm there are no nearby items interfering with the redstone path.
Version-aware tips
Daylight sensor behavior remains largely the same across Minecraft editions, but there can be minor differences in UI, block IDs, or texture appearance between Java and Bedrock Editions. When porting a design, test the sensor in both versions to confirm it still outputs the expected signal levels. Keep a small, version-agnostic prototype to validate basic behavior before attempting a large cross-edition build. Craft Guide notes that a flexible, modular approach reduces version-specific issues and saves time during world updates.
Creative build ideas
Here are quick ideas to spark daylight sensor use: (1) Exterior walkway lighting that follows the sun; (2) Greenhouse lighting that activates at dusk for crop growth; (3) Automated doors that unlock as daylight wanes to protect a base; (4) Multi-room lighting with variable brightness using comparators; (5) A solar-powered clock tower that changes lamp brightness with the sun’s position. Start with simple setups and scale up to cover entire bases or farms. Craft Guide encourages experimentation and sharing your schematics with the community.
Best practices and next steps
Always document your daylight sensor networks with brief drawings or labels so you can expand later. Start with a single sensor, then add additional sensors to cover more areas. Regularly test your builds under different weather conditions and times of day to ensure consistent behavior. Finally, review the edges of your sky exposure to ensure no new structures block readings as you build. The Craft Guide team recommends iterating in small steps and validating each addition before moving on.
Tools & Materials
- Daylight Sensor(Essential component; verify version compatibility)
- Redstone Dust(Connects sensor to devices)
- Redstone Lamp or Lamp Block(Visual feedback for automated lighting)
- Construction Blocks(Build supports and mounting)
- Redstone Repeater (optional)(Extend signal distance or adjust timing)
- Comparator (optional)(Create controlled signal branching)
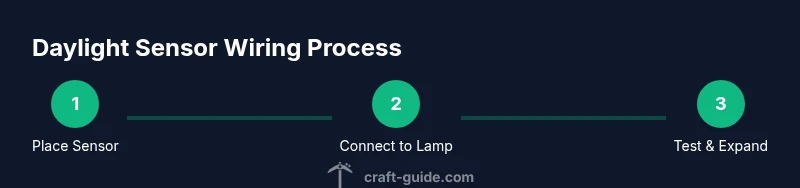
Steps
Estimated time: 20-40 minutes
- 1
Position daylight sensor with sky view
Place the daylight sensor on a high block or roof edge where it has an unobstructed view of the sky. This ensures it reads natural daylight accurately. Check for any nearby overhangs or tall blocks that could shade it at times of day.
Tip: Use a clear sightline first; you can adjust later if needed. - 2
Connect sensor to first lamp
Lay a straight path of redstone dust from the sensor to the first lamp block. Keep the route clean and avoid intersections that could short-circuit the signal. If the distance is long, insert a repeater to preserve signal strength.
Tip: Test at noon and midnight to verify full range and reliability. - 3
Scale to multiple lamps
Extend the circuit to additional lamps using the same dust path or by branching with repeaters. Use careful routing to prevent signal loss and to keep the build organized.
Tip: Label lines with simple signs or map out the path in a schematic. - 4
Add feedback and control
Optionally introduce a comparator or a second sensor to modulate brightness or to create a priority system (e.g., gates before lights or doors). This step helps you adapt the network to larger bases.
Tip: Test with a timer or manual switch to confirm stability. - 5
Test under different conditions
Check daylight readings at various times and during weather changes. Adjust distances and repeater timing if needed to ensure consistent operation.
Tip: Document observed behaviors for future adjustments. - 6
Document and expand
Create a simple diagram of your daylight sensor network and prepare expansion plans for future rooms or farms. Revisit every few updates to ensure no sensor is accidentally shaded.
Tip: Keep spare daylight sensors on hand for quick upgrades.
People Also Ask
What is a daylight sensor in Minecraft?
A daylight sensor is a redstone component that outputs a signal based on the sky's light level. It enables automatic lighting and other redstone-mowered automation tied to day/night cycles.
A daylight sensor reads sky light and sends a redstone signal that changes with the time of day.
How does a daylight sensor respond to day and night cycles?
Signal strength increases as daylight grows toward noon and decreases toward night. Overcast weather can affect reading accuracy, so test under different skies.
The sensor's output grows with daylight and falls as the sun sets, with weather influencing readings a bit.
Can I adjust daylight sensor output with levers or knobs?
You adjust behavior by combining the sensor with redstone components like repeaters, comparators, and proper routing rather than turning a knob on the sensor itself.
You control it by wiring and timing, not by a built-in dial.
Are daylight sensors different between Java and Bedrock editions?
The core behavior is similar, but some redstone interactions and UI details can differ between Java and Bedrock editions. Always test a design in both if you plan cross-version builds.
The basic idea stays the same across editions, but some details vary.
Where do I find daylight sensors in Creative mode?
In Creative mode, search for daylight sensor in the Redstone category and pull it into your hotbar. In Survival, verify the current recipe for crafting or trading as per your version.
In Creative, just search and place; in Survival, check the recipe for your patch.
What are common mistakes with daylight sensors?
Covering the sensor, burying it, or routing signals through obstructed paths can break daylight readings. Always ensure sky exposure and clean wiring to avoid glitches.
Make sure the sensor sees the sky and the wiring isn’t blocked.
Watch Video
The Essentials
- Position sensors with clear sky view for accuracy.
- Wire sensors to lamps using direct redstone paths.
- Test across times of day and weather for reliability.
- Expand gradually to keep wiring manageable.
- Document layouts to simplify future updates.