Minecraft Redstone: Practical Step-by-Step Guide for Builders
Master practical minecraft redstone with beginner-friendly, step-by-step tutorials. Learn dust wiring, power sources, and simple automations to build lamps, doors, and farms that respond to input and time.

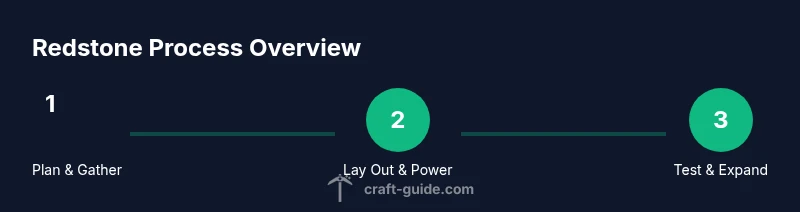
Learn how to use minecraft redstone to build practical circuits and automatic devices. You’ll cover basic power sources, wiring, and simple machines you can assemble in under an hour. By the end, you’ll understand how to plan, test, and expand redstone projects for practical in-game use.
What is minecraft redstone and why it matters
Redstone in Minecraft acts like electrical wiring. You mine redstone ore and craft dust that carries a redstone signal. A single dust line can power lamps, pistons, doors, and many other blocks, while more complex setups can automate farms, mob traps, or base defenses. For many players, mastering minecraft redstone transforms a simple base into a living system where doors open, lights respond to time of day, and farms run without manual input. According to Craft Guide, the core idea is: a power source creates a signal, wires carry it, and devices react to that signal. The logic is simple in principle, but the combinations are endless. Start small, then scale up by adding repeaters to extend signal, comparators to measure item flows, and observers to detect block changes. With practice, you’ll turn a handful of dust into a reliable automation layer that saves time and adds fun to your Minecraft experience.
Core components: power sources, wires, and signals
Power sources include redstone torch (an inverter that can create off-on signals), levers, buttons, daylight sensors. Wires are redstone dust; you lay dust to connect inputs to outputs. Signals travel along the dust and keep their strength for a short distance—the farther you go, the weaker the signal unless extended by repeaters. Repeaters also introduce timing by adding delay and can resume power after a pause. Comparators measure items in a container, giving a signal strength that can be used for resource-based automation. Observers detect block updates and emit a short pulse when the block in front changes. All together, these components form the language of minecraft redstone, letting you express logic with physical blocks rather than code. The Craft Guide team recommends thinking in terms of inputs, processing, and outputs when planning a build. Practice by building a 1-tick lamp or a slow clock and then step up to more complex devices.
Basic circuits you can build in minutes
Getting started is about small wins. Try a simple lamp switch: power a redstone lamp with a lever through a short dust line. The lamp should light when the lever is on and shut off when it’s off. Next, build a NOT gate by placing a redstone torch on the side of a block with the input powering that block; when the input is on, the lamp will turn off. A basic clock is a tiny repeating pulse—place two repeaters facing each other with dust between and tune the delay to create a steady on/off signal. These mini-projects help you understand propagation, timing, and how distance affects signal strength.
Tools & Materials
- Redstone dust(Sufficient quantity to cover planned wiring length; start with 16–32 blocks for compact tests)
- Redstone torch(Power source and inverter for NOT gates and clocks)
- Lever(Manual input to test circuits and control outputs)
- Button(Alternative input for quick toggling tests)
- Repeater(Extend signal; adjust timing and latency)
- Comparator(Measure item flow or block state in containers; optional for advanced projects)
- Piston (sticky piston)(Used for moving blocks in doors and traps; optional for basic builds)
- Solid blocks (any)**(Place to anchor redstone components and build structures)
Steps
Estimated time: 30-60 minutes
- 1
Plan your circuit
Draft a simple plan on paper or in-game tiles. Identify inputs (button/lever), the output (lamp/door), and the path of redstone dust. Decide whether you need timing (delay) or distance extension and mark where repeaters will sit. This upfront planning saves frustration later.
Tip: Sketch a rough diagram showing inputs, outputs, and any repeats to keep wiring organized. - 2
Gather materials and space
Collect the required items from your inventory and clear a workable space. A clean, flat area helps you lay dust in straight lines and line up blocks for stable builds. Prepare a small testing area where you can insert inputs (like a lever) and observe outputs (like a lamp) without interference.
Tip: Group related items nearby and keep a dedicated space for testing so you don’t disturb your main build area. - 3
Lay down a power line
Place redstone dust to run from your power source toward the intended output. Keep lines as straight as possible and avoid crossing lines unnecessarily. If the distance is long, insert a repeater to refresh the signal and prevent fading.
Tip: Run the dust on a single layer to avoid accidental powering of nearby blocks. - 4
Create a basic lamp circuit
Connect a lever (input) to a short redstone line that leads to a lamp. Flip the lever to test the lamp’s on/off behavior. If the lamp doesn’t respond, recheck dust placement and ensure the output is properly powered.
Tip: Always verify power goes from source to output without any gaps. - 5
Add a control and timing
Incorporate a repeater to extend signal distance or to introduce delay, producing a controlled on/off cycle. This is the first step toward more complex devices like clocks or doors. Observe how timing affects lamp behavior and how adjusting delay changes outputs.
Tip: Tiny changes in delay can dramatically alter behavior—tune gradually. - 6
Test, refine, and expand
Test under different inputs, move blocks to optimize space, and consider future expansions (additional outputs or more inputs). Document tweaks so you can replicate the design later. Once you’re comfortable, you can attempt a more advanced project like a piston door.
Tip: Keep a log of what works and what doesn’t for faster iteration.
People Also Ask
What is minecraft redstone used for?
Redstone is used to create circuits, automate tasks, and control devices like lamps, doors, and farms. It allows input/output logic without requiring external code.
Redstone lets you automate things in Minecraft, like lights and doors, using simple inputs and outputs.
Can redstone circuits be used in survival mode?
Yes. Many redstone builds work in survival, though you may need to gather resources and plan carefully since you can’t fly or build freely like in creative. Start with small projects in safe areas.
Yes, you can build redstone devices in survival; start small and expand as you gather materials.
What’s the difference between a repeater and a comparator?
A repeater extends a redstone signal and can introduce delay. A comparator detects items or block states and outputs a signal based on the measured value, enabling more advanced logic.
Repeater extends and delays signals; comparator measures items or block states to adjust output.
Do I need to learn every component to start?
Not at first. Begin with dust, a lever, a lamp, and a single repeater. As you build, add components like the piston, comparator, and observer to unlock more possibilities.
No—start with the basics and learn more components as you build more complex systems.
How can I troubleshoot a non-working redstone line?
Check power input, verify dust placement, ensure no blocks interrupting the circuit, and confirm appropriate distance—use a repeater if the signal seems weak or too short.
Check inputs and dust layout; add a repeater if the signal dies before reaching the output.
Watch Video
The Essentials
- Plan before wiring for clarity
- Extend signals with repeaters to cover distance
- Use basic components to master timing and logic
- Document and label your builds for easier expansion
- Test early and iterate to avoid wasted effort