What to Do When You Buy Minecraft: A Practical Guide
A comprehensive, beginner-friendly guide to what to do after purchasing Minecraft—edition choice, account security, launcher setup, world planning, and joining communities. Learn practical steps to get started quickly and safely.

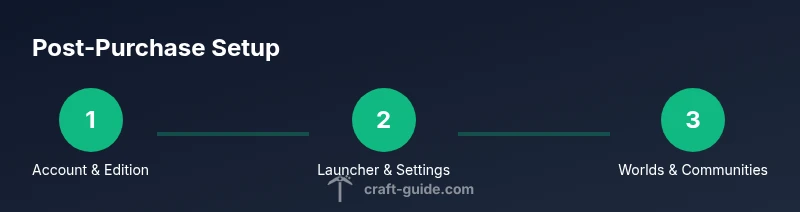
If you're wondering what to do when you buy minecraft, start by securing your account, choosing the edition that fits your devices, and installing the official launcher. Then plan your play style—single-player, survival, or multiplayer—adjust settings, back up worlds, and begin with a simple starter project. This sets you up for smooth progress and lasting enjoyment.
Understanding Editions: Java vs Bedrock
If you’re wondering what to do when you buy minecraft, the first decision is choosing the edition that fits your devices and goals. The Java Edition is PC-first, with strong modding support and a large Java community. Bedrock Edition runs on Windows 10/11, consoles, and mobile with cross-platform play. Your choice affects how you install the game, which launcher you use, and which servers you can join. In this guide, Craft Guide compares the editions so you can pick the path that matches your playstyle. Based on Craft Guide analysis, most new players start with Java for customization, then explore Bedrock if they want cross-platform play. If you want to maximize modding and tinkering, Java is usually preferable. If you value cross-device play and performance on non-PC hardware, Bedrock is a strong choice. Either way, your purchase opens access to a vast ecosystem of worlds, communities, and tutorials. As you move forward, keep in mind the core concepts—security, backups, and a plan for your first builds. According to Craft Guide, the best starting point is to decide on your primary play mode before diving into installations. This ensures a smooth setup and a faster path to fun.
Secure Your Account and Privacy
Security starts with the account you use to sign in. Make sure you’re using a Microsoft account that you control, with a strong, unique password and recovery options that you regularly review. Enable two-factor verification if available, keep your email secure, and consider a password manager to reduce reuse. Privacy basics matter too: review connected apps, grant minimal permissions, and be mindful of how you share your in-game identity with servers and communities. Craft Guide’s best-practice recommendation is to lock down the primary login before you download any assets, so you don’t have to chase issues later. A small upfront investment in security pays off with fewer headaches during big builds or server adventures.
Installing the Launcher and Signing In
Next, install the official Minecraft launcher for your edition. If you’re on Java Edition, download from the official site and choose the correct launcher. Bedrock users typically install via the Microsoft Store or Xbox app, depending on their platform. Sign in with the account you secured in the previous step, verify ownership if prompted, and update your profile preferences. Once signed in, take a moment to review language, accessibility, and notification settings. Pro tip: keep your login on a device you trust and log out from shared machines to protect your purchase.
First World Setup: World Types, Modes, and Starter Goals
With access granted, plan your first world around a few simple goals. Decide whether you want a calm creative build, a survival challenge, or a long-term exploration project. Choose a world type and difficulty that match your preferred pace, then start with a tiny starter base, a roofed shelter, or a basic farm. The starter phase is about learning the mechanics—how to gather resources, manage hunger, and explore caves—without getting overwhelmed. It helps to set a short-term goal (e.g., build a basic house in the first two in-game days) to stay motivated and focused.
Backups, Realms, and World Management
As soon as you have a stable world, set up a backup routine. Regular backups protect against corruption, crashes, and accidental data loss. For single-player worlds, use your preferred cloud storage or an external drive. If you want a seamless multiplayer option, consider Realms or Realms Plus for hosted worlds with automatic backups and easy sharing. Craft Guide recommends a simple schedule: weekly backups for ongoing worlds, with a separate export after major builds or updates. Keep multiple restore points to easily roll back if a design idea goes wrong.
Performance, Graphics, and Modding Basics
Performance tweaks help you enjoy Minecraft on a wider range of devices. Allocate memory in the launcher, adjust render distance, and set smooth lighting to balance visuals and FPS. If you’re on Java Edition and plan to mod, start with well-known, compatible mods and read the installation instructions carefully. Bedrock users should note that modding is more limited than Java, but there are add-ons and marketplace content to customize your look and feel. Remember to back up before adding any mods or resource packs, so you don’t lose progress if something goes awry.
Joining Communities: Servers, Realms, and Tutorials
A big part of Minecraft’s value comes from its communities. After you’re comfortable with your own world, explore multiplayer by joining public servers, Realms, or friend-hosted worlds. When choosing servers, look for those that align with your play style (survival, creative, PvE, or PvP) and review rules, uptime, and community standards. Tutorials—from Craft Guide and trusted community channels—can accelerate your learning curve, from redstone basics to advanced builds. Start small: join a beginner-friendly server, observe the culture, and gradually contribute with your first projects.
Safety, Privacy, and Parental Controls
If you’re playing with younger players or in shared spaces, set boundaries for chat, build access, and world permissions. Use parental controls and server moderation tools to prevent exposure to inappropriate content or griefing. Regularly review your friends list and permission settings, and remind younger players about online safety basics. Craft Guide emphasizes ongoing awareness: keep software updated, monitor updates to the game, and adjust settings as you grow more confident.
Tools & Materials
- Microsoft account for Minecraft(Use the account tied to your login; ensure email is verified.)
- Stable internet connection(Minimum dependable connection for downloads and online play.)
- Official Minecraft launcher(Download the correct launcher for your edition from the official site.)
- Backup storage(External drive or cloud storage for regular world backups.)
- Optional mods/add-ons (Java only)(Use mods cautiously; back up before installing.)
Steps
Estimated time: 1-2 hours
- 1
Create or link your Microsoft account
If you don’t already have an account, create one and link it to Minecraft. Use a strong, unique password and enable two-factor authentication if available. This step protects your purchase and saves your progress across devices.
Tip: Enable 2FA and keep recovery options up to date. - 2
Choose the edition that fits your platform
Java Edition suits PC users who want deep customization and mods; Bedrock Edition supports cross-platform play across Windows, consoles, and mobile. Pick based on your devices, preferred community, and whether cross-play matters to you.
Tip: If you plan to mod, start with Java Edition. - 3
Download and install the launcher
Install the launcher from the official source for your chosen edition. Sign in with the linked account and verify ownership if prompted. Update to the latest version before playing.
Tip: Keep your launcher up to date to avoid compatibility issues. - 4
Configure basic settings
Set your resolution, render distance, and difficulty. Enable accessibility options that suit you, such as text-to-speech or UI scale. Adjust sound levels for an optimal starting experience.
Tip: Test a quick world run to confirm performance before building. - 5
Create your first world
Choose a world name, select a seed if desired, and decide on game mode. Start with a small starter shelter to learn resource gathering and safety basics. Establish simple farming or renewable-resource systems early.
Tip: Set a short-term goal (e.g., build a basic house) to stay motivated. - 6
Set up backups and consider Realms
Configure a backup routine for your worlds and explore hosted options like Realms for easy sharing and protection. Backups prevent loss from corruption or griefing in multiplayer contexts.
Tip: Schedule weekly backups and export before big updates. - 7
Join communities and start learning
Find beginner-friendly servers or communities and explore tutorials for basics like mining, farming, or building. Observe rules and engage positively to grow quickly.
Tip: Start with a small project on a server to get feedback early. - 8
Review safety and privacy
set expectations with friends and servers regarding chat usage, sharing of coordinates, and world access. Regularly review permissions and update settings as you gain confidence.
Tip: Periodically audit your privacy and account security.
People Also Ask
Do I need internet to play Minecraft after purchase?
Online play requires internet, especially for servers and Realms. You can still play offline in single-player modes, depending on the edition, but many features like updates and cloud saves require connectivity.
Most multiplayer features need internet, but you can still play single-player offline depending on your edition.
Which edition should I buy for cross-platform play?
Bedrock Edition supports cross-play across Windows, consoles, and mobile devices. Java Edition is PC-only and focuses more on mods and Java-based servers.
Bedrock works across many devices; Java is PC-only.
Can I upgrade from Bedrock to Java later?
There isn't a direct upgrade path between editions. If you want the other edition, you would need to purchase it separately.
No direct upgrade; you’d need to buy the other edition separately.
How do I secure my Minecraft account?
Use a strong password, enable two-factor authentication if available, and verify recovery options. Regularly review connected apps and permissions.
Use a strong password, enable 2FA, and review recovery options.
Are Realms free or paid?
Realms is a paid subscription service; Realms Plus adds extra content and features beyond the base Realms.
Realms requires a paid subscription.
Can I mod Minecraft after buying?
Modding is widely supported on Java Edition with compatible mods; Bedrock has more limited modding options and focuses on add-ons from the marketplace.
Mods are common on Java; Bedrock has fewer modding options.
Watch Video
The Essentials
- Decide edition early to align with devices and goals.
- Secure your account and back up worlds from the start.
- Choose a starter project and a backup plan for smooth growth.
- Explore communities to accelerate learning and enjoyment.