Paper Minecraft Scratch: Create Scratch Art Inspired by Minecraft
Learn how to create Minecraft-inspired scratch art on paper. This educational guide blends pixel-art design with scratch-off techniques, perfect for Minecraft fans of all ages seeking a hands-on, creative project.

In this quick guide, you’ll make a paper minecraft scratch art piece that blends Minecraft-inspired pixel art with scratch-art technique. You’ll sketch a simple blocky scene on scratch-friendly paper, apply a dark scratch-off coating, and reveal bright colors beneath. This beginner-friendly project uses common materials and a calm workflow to produce a frame-ready Minecraft homage.
What is paper minecraft scratch?
paper minecraft scratch is a creative fusion of Minecraft-inspired pixel art rendered on scratch-off paper. The technique hides a colorful underlayer beneath a dark, silvery coating that you scratch away to reveal the image. This approach is ideal for Minecraft fans who want a tangible, decorative piece that mirrors blocky landscapes and iconic creatures. According to Craft Guide, this hands-on project blends art and gaming culture, making it perfect for classrooms or solo weekend projects. By combining simple shapes with a scratch surface, even beginners can achieve crisp edges and a bold reveal that celebrates your favorite builds. The process emphasizes planning, patient scratching, and careful color choices to ensure the final piece looks like a miniature Minecraft world realized on paper. This article focuses on safe tools, practical steps, and simple design concepts you can complete in a single session or as a weekend craft.
Why scratch art fits Minecraft themes
Scratch art thrives on bold contrasts and crisp edges, which mirror Minecraft’s iconic pixel art style. The dark scratch-off layer creates dramatic reveals when you scratch away the surface, and the colors you choose beneath can evoke biomes, mobs, or iconic blocks. Minecraft’s blocky aesthetics translate well to scratch art because each pixel becomes a simple square. When planning your design, think in terms of a tiny tile grid: a few hundred small squares can convey hills, trees, and structures without overwhelming detail. Scratch art also invites experimentation with gradients and color blocking, allowing you to recreate sunset skies, lava blocks, or mossy stone with controlled reveals. As you work, keep in mind that high-contrast palettes make the scratch marks easier to see from a distance, a key consideration for wall displays or classroom demonstrations. Craft Guide’s approach to this craft emphasizes accessibility and playfulness, encouraging you to iterate and enjoy the process more than chasing perfection.
Materials and safety considerations
Before you begin, gather the essentials for a smooth scratch-art journey. You’ll need scratch paper or dark-coated paper, a scratch tool with a fine tip, and a reliable underlayer (colored pencils or markers). A ruler helps with neat edges, while a pencil and eraser keep your initial sketch reversible. Work on a protective surface, and consider gloves if you’re sensitive to ink or pigments. Safety matters: avoid sharp tools for young children and supervise any use of blades or craft knives. If you’re using an adhesive or spray sealant to protect your finished art, test it on a scrap piece first to avoid smudging the scratch layer. Keeping a damp cloth handy helps clean the tool and prevents color transfer between projects. The core idea is to build a simple plan, assemble safe materials, and pace yourself to achieve clean, satisfying results.
Designing your Minecraft scene for scratch art
Start with a small, manageable scene that conveys Minecraft’s vibe without requiring intricate detailing. Consider a basic landscape: a blocky hill, a single tree, a distant creeper silhouette, and a sun or moon. Sketch your scene lightly on paper, mapping out the cube-like blocks and the color areas that will be revealed. This planning step matters because scratch art thrives on bold shapes rather than fine lines. If you’d like, print a tiny Minecraft pixel art template and trace its shapes onto your scratch paper to ensure proportion and symmetry. Choose a limited color palette that contrasts well with the scratch layer—think bright greens against a dark underlayer or warm oranges against a black surface. By narrowing the design scope, you’ll reduce confusion and speed up the scratch process. Craft Guide recommends starting with a simple composition and adding layers later if time permits.
Transfer and prep: turn your design into a scratchable surface
Once your design is finalized, transfer it to your scratch paper with clear, deliberate lines. If your scratch paper has a pre-printed grid, align your sketch to it for pixel-perfect accuracy. Lightly trace the major blocks and shapes, then erase any stray marks. After the transfer, apply your scratch-off coating carefully. If you’re using a premade scratch layer, ensure it’s evenly distributed; if you’re creating your own, consider a fine black or graphite base that scratches away cleanly to reveal color beneath. Allow the coating to dry fully before the reveal stage. Prep your color underlayer in the suggested areas, keeping colors separate to prevent bleed-through. The goal here is to create a predictable scratch path that reveals vivid colors and maintains crisp edges across all blocks.
The scratching process: revealing color safely
Begin scratching from larger shapes to avoid accidental gouges in tight corners. Use short, controlled strokes to create uniform reveals that resemble Minecraft’s blocky texture. If you encounter a stubborn area, switch to a sharper tip and apply light pressure in small increments. For a cleaner look, scratch along the grid lines rather than across them, which helps keep edges neat. Periodically pause to wipe the surface and inspect progress; this helps catch stray scratches that could damage adjacent color areas. If you want to add shading, scratch different areas with varying depths to simulate light and shadow, but keep the effect consistent with the overall pixel art style. When you’re satisfied, let the piece rest and examine it from a short distance to confirm the contrast and balance.
Troubleshooting common issues
Common issues include uneven scratch lines, color bleeding, and gummed surfaces. If lines appear jagged, re-scrape with a steadier hand and use a fresh tip. If color bleeds beyond the intended areas, apply a light border to separate zones or recoat with a thinner layer of undercolor. For sticky coatings, ensure proper drying time and store your materials in a cool, dry place. If you’re unhappy with the composition, don’t hesitate to start anew on a fresh sheet; practice runs help refine technique quickly. Remember, patience is key: slower, deliberate scratching yields sharper edges and stronger color reveals, which makes the Minecraft theme pop.
Finishing touches: framing, presenting, and preserving
To present your piece, consider a simple frame or an archival sleeve that protects the scratch surface without glare. You can mount the art on a contrasting backing to enhance the reveal and emphasize the pixel blocks. A spray sealant designed for scratch art can add durability, but test it first to ensure the coating remains scratchable. Label your artwork with a small note about the Minecraft inspiration, your materials, and the date to create a personal memento. Finally, store completed pieces flat in a portfolio or drawer to prevent warping. With proper care, your paper minecraft scratch artwork will be a charming reminder of your creativity and Minecraft enthusiasm.
Inspiration and next steps
If you’re looking for more ideas, try designing alternate Minecraft biomes, like a snow village or desert temple, using the same scratch technique. You can scale up to a larger canvas or try a mini-series of 3–4 pieces that form a small world. Experiment with different color palettes, such as night sky purples and blues or forest greens, to evoke distinct moods. For those who want a digital companion, sketch a pixel grid in a drawing app and print templates for consistent scratch layouts. The key is to stay curious, practice regularly, and let your imagination build a cohesive Minecraft-inspired collection.
Authority sources
This project blends craft techniques with a Minecraft theme. For further reading on scratch art and color theory, consider exploring reputable educational resources and museum guides to deepen your understanding and techniques. This section cites general educational perspectives for arts-and-crafts projects and does not replace hands-on practice.
Tools & Materials
- Scratch art paper (dark-coated or scratch-off paper)(8x10 inches minimum; ensure the coating scratches away cleanly)
- Metallic scratch tool or wooden stylus(Fine tip works best; avoid heavy presses)
- Colored underlayers (colored pencils/markers)(Choose colors that contrast with the scratch surface)
- Pencil and eraser(For sketching initial design and corrections)
- Ruler and scissors(For planning edges and trimming paper)
- Scratch-safe workspace and protective sheet(Protect surfaces from color and coating marks)
- Optional: stencil templates or printed Minecraft pixel art(Helpful for beginners to map blocks)
- Gloves (optional)(Keeps hands clean during inking and coating steps)
Steps
Estimated time: 60-90 minutes
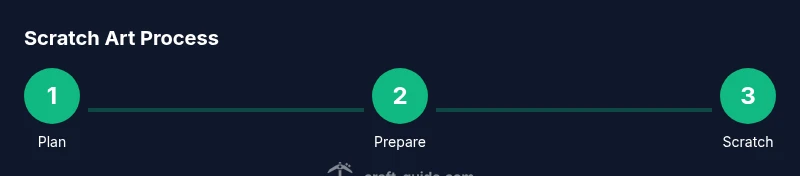
- 1
Plan your scene
Choose a simple Minecraft-inspired moment with blocky shapes. Sketch the layout lightly on paper to map out where each color will appear. Keeping the scene small helps maintain crisp edges.
Tip: Define 4-6 large blocks only to start; add more only if you have time. - 2
Prepare your workspace
Set up a clean, flat surface with a protective layer. Organize color pencils, the scratch tool, and a scrap sheet for testing. A calm environment helps you work steadily.
Tip: Test the scratch tool on a scrap area to gauge pressure before working on the final piece. - 3
Transfer design onto scratch paper
Lightly transfer your plan to the scratch-paper, ensuring lines align with your grid. Use a pencil to outline the major blocks and erase any stray marks.
Tip: Keep lines faint to preserve the paper’s dark coating and avoid smudges. - 4
Apply the color underlayer
Color the areas you plan to reveal with colored pencils or markers. Leave space between colors to prevent blending. Let colors dry if you’re using markers.
Tip: Start with the darkest colors first to avoid color transfer when scratching nearby areas. - 5
Coat the surface and set up for scratching
Apply the scratch-off coating evenly if you’re not using premade scratch paper. Allow to dry completely before scratching. Keep a clean edge to ensure crisp reveals.
Tip: A light, even coat yields the cleanest scratch lines. - 6
Scratch to reveal color
Scratch away the coating in short, controlled strokes. Follow grid lines for pixel accuracy. Pause to assess contrast and adjust with additional scratching as needed.
Tip: Scratch edges first for a defined, frame-like look. - 7
Refine edges and contrasts
Sharpen lines where blocks meet and ensure color patches are distinct. Add extra strokes where you want more depth, but avoid over-scratching.
Tip: Keep a light touch to preserve the undercolor integrity. - 8
Display and preserve
Frame the piece or slip it into a protective sleeve. Consider a UV-resistant frame to minimize color fading. Store flat to prevent curling.
Tip: Label your artwork with a date and a short note about your Minecraft theme.
People Also Ask
What is paper minecraft scratch?
Paper minecraft scratch is a scratch-art technique where a Minecraft-inspired design is etched away on scratchable paper, revealing colored layers beneath. It combines pixel-art aesthetics with a tactile reveal.
Paper minecraft scratch is scratch-art featuring a Minecraft-like pixel scene. You scratch away a dark surface to reveal color beneath.
What materials are essential?
Essential materials include scratch paper, a scratch tool, colored underlayers, a pencil, eraser, ruler, and a protective workspace. Optional items like templates help beginners.
You need scratch paper, a scratch tool, colors, and basic drawing supplies to start.
How long does it take to complete?
A complete piece typically takes about an hour, depending on design complexity and your scratched detail level.
Most scratch-art Minecraft pieces take around an hour or so.
Is this suitable for kids?
Yes, with supervision. Use age-appropriate tools, avoid sharp objects, and work at a comfortable pace.
Absolutely, with supervision and safe tools.
How can I protect finished art?
Frame the art under glass or sealing sprays designed for scratch art. Store flat to prevent warping.
Frame or seal the piece and store flat.
Watch Video
The Essentials
- Plan a simple pixel-ready scene for clean edges
- Choose high-contrast colors for dramatic reveals
- Scratch slowly and steadily to maintain uniform lines
- Protect and frame finished pieces for display
- Practice on scraps to build confidence