Starting House Minecraft: Your First Shelter
Learn how to build a durable starter house in Minecraft with a step-by-step guide. From location choice to materials and expansion, Craft Guide provides practical, beginner-friendly tips for a safe base.

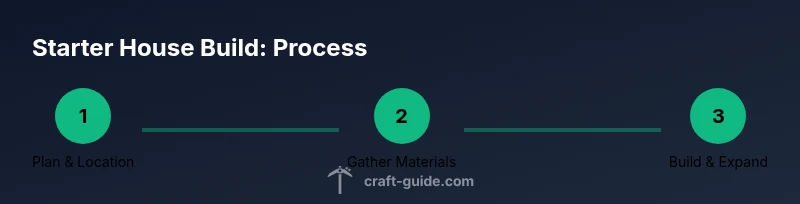
By the end of this quick guide, you’ll be able to build a sturdy starter house in Minecraft that supports early survival. It covers choosing a safe location, gathering essential materials, and a compact, expandable layout you can grow as you collect resources. This plan is designed for vanilla Minecraft on flat or gentle terrain using basic tools.
Why a reliable starter house matters
A reliable starter house isn't just a roof over your head; it's a safe hub for crafting, storage, and nighttime safety. In the early game, your shelter determines how quickly you can gather resources without losing health to zombies, spiders, or creepers. A well-built starter home reduces wandering to collect food and keeps you close to essential resources. According to Craft Guide, a modular design that lets you expand as you progress can dramatically improve your survival rate. A sturdy first base also teaches you about resource management and time budgeting, two skills that transfer to later builds.
Key principles include a compact footprint, durable materials, ample lighting, and a clear plan for expansion.
Location and terrain: choosing the best spot for your starter home
Your choice of location affects safety and accessibility. Look for flat or gently sloping ground that minimizes the need for excessive foundation work. Proximity to trees, water, and ores helps you gather supplies quickly, while being away from hostile mob spawns at night is crucial. A sheltered area behind small hills or near a village can also provide early trading opportunities and reduce vulnerability to wandering mobs. Craft Guide findings suggest prioritizing stable ground with a natural barrier on at least two sides. This reduces the amount of digging and makes farming easier nearby.
Materials and tools: what you need on day one
For a beginner-friendly starter house, prioritize common, renewable materials like oak or birch planks, logs, and cobblestone. A crafting table, chest, furnace, and bed are essential for turning resources into shelter, storage, armor stands, and a safe spawn point. You’ll also want torches for lighting, doors for security, and a few stairs for easier access between floors. Keep a stack of wooden planks and torches handy as you construct the base and interior. Craft Guide recommends keeping tools simple: pickaxe, axe, and shovel in basic form so you can quickly gather and shape your shelter. Coal or charcoal will fuel your torches during the night.
Designing a compact, expandable plan
A practical starter home uses a compact footprint that can grow without major rebuilds. A common approach is a rectangular base with a single floor to begin, plus an upper level or attic that you can add later. Plan for a 2- to 4-block-wide doorway and a small storage alcove near the entrance to keep items organized. Include simple storage: chests for blocks, items, and ores. Leave space for a crafting corner and a bed so you can sleep through nights. The underlying principle is to enable quick access to essential items while leaving room for future rooms, farms, or workshops as resources allow.
Exterior and interior layout ideas
Exterior design can boost durability and comfort. Use a stone or cobblestone foundation to resist weather and mobs, then clad with wood or brick for aesthetics. A pitched roof helps shed rain and snow, while a simple color scheme ties the house together. Inside, position the bed away from doors, place a chest near the crafting table, and ensure you have a reliable lighting plan (torches at corners, ceiling-mounted where needed). Windows improve visibility and planning; use glass panes to keep mobs out while letting light in. If you plan an extension, align walls so that upcoming rooms can be added without large rebuilds.
Common mistakes and how to avoid them
Rushing construction before you have enough lighting or storage leads to quick mob spawns and clutter. Skipping doors or placing chests far from workstations reduces efficiency. Underestimating lighting allows creepers to approach at night; always place torches on ceilings or walls and near entrances. Building on uneven terrain creates unstable floors and unaligned walls. Invest a little time leveling the ground and staking a simple grid for rooms to ensure future expansion is straightforward.
Tools & Materials
- Wooden planks(Primary building material for walls and floors)
- Wooden logs(Supports frame and aesthetic)
- Cobblestone(Foundation or durable base)
- Crafting table(For crafting and layouts)
- Furnace(Smelting and resource processing)
- Chest(Storage for tools and items)
- Bed(Set spawn point for night safety)
- Torches(Lighting to prevent mob spawns)
- Doors (wooden)(Security and access)
- Shovel(Terrain leveling and digging)
- Axe(Resource gathering and wood cutting)
- Coal or charcoal(Fuel for torches/furnace)
- Glass panes(Optional for windows)
- Stairs(Safer access to upper level)
Steps
Estimated time: 60-90 minutes
- 1
Prepare the site
Scout your area for a flat, open space. Clear debris and level the ground to reduce later work. Mark the footprint of your house with natural boundaries (e.g., a ring of dirt) to keep the build organized.
Tip: Choose a spot close to resources but not too near hostile areas. - 2
Gather essential materials
Collect wooden logs/planks, cobblestone, and basic tools. Mine coal or charcoal for lighting and fuel. Ensure you have at least a chest, crafting table, and bed before you start.
Tip: Keep a small inventory of extra planks for future expansion. - 3
Lay foundation and floor
Level the ground and place a simple foundation using cobblestone or wood. Lay a clean, flat floor inside the footprint to establish a stable base.
Tip: Use even, straight lines to simplify wall alignment later. - 4
Build walls and roof
Erect walls to enclosure, then add a basic roof that provides enough overhead clearance. Incorporate a doorway and window openings for visibility and access.
Tip: Leave space for stairs or an additional room for future expansion. - 5
Install door, windows, and lighting
Fit a door and glass panes or wood windows. Place torches at corners and near entrances to deter mobs and light hallways.
Tip: Light-inside corners to prevent dark spots where mobs could spawn. - 6
Set up interior and begin storage
Position the bed, crafting table, and a central storage area. Create a simple room layout that can be expanded with additional chests and workstations.
Tip: Keep essentials close to the entry for quick access.
People Also Ask
What is the best size for a starter house?
A compact footprint that fits essential areas (bed, crafting, storage) is ideal. Start with a single floor and a small storage alcove, then expand as resources allow.
For beginners, start small with a single floor and a dedicated storage area; expand later as you collect more materials.
Which materials are best for beginners?
Use readily available materials like wood for walls and floors and cobblestone for a durable foundation. Add basic glass or slabs for light and accessibility.
Wood and cobblestone are great for beginners; add glass panes for visibility and light.
How can I protect my starter house at night?
Ensure doors are closed or locked, light the interior, and place torches around the perimeter. Consider upgrading to a wall with a small fence for extra security.
Light the area and keep doors closed; torches around the perimeter help deter mobs.
When should I plan expansion?
As soon as you have a stable farming system and enough storage, plan an additional room or second floor. Expansion should be modular to avoid major rebuilds.
Expand when you have the basics covered and storage space is tight.
Can this apply to survival mode with limited resources?
Yes. Start with the simplest materials you can gather quickly, and upgrade only as needed. A small, efficient design reduces resource drain while you learn.
Absolutely—focus on the essentials first and upgrade as you gather more resources.
Watch Video
The Essentials
- Plan before building to save time.
- Keep the base compact and expandable.
- Light up rooms and perimeter to improve safety.
- Organize storage for quick access to tools.